
 The ZL1 Camaro is undoubtedly the most powerful Camaro that Chevrolet produces, which makes it a prime candidate for even more power. Equipped with a 6.2 liter supercharged LSA engine, the ZL1 produces 580 horsepower and 556 pound-feet at the flywheel, which in turn equates to a lot of fun behind the steering wheel.
Sure, there are plenty of possible modifications to extract more power out of the LSA, but the most important aspect of that modding process is upgrading the cooling system to keep the engine and supercharger at an optimum operating temperature. When upgrades have been made to the powertrain to increase performance, increased heat is usually a byproduct. As supercharger temperatures increase, efficiencies lower, which in turn reduces power.
To fend off the power loss by excessive heat build up in the supercharger and intake system on our ZL1 Camaro, we turned to AFCO Racing for their heat exchanger upgrade (P/N 80283PRO). With very simple and detailed instructions, we will walk you through the install process and show how beneficial upgrading from the factory heat exchanger really is.
The Starting Point
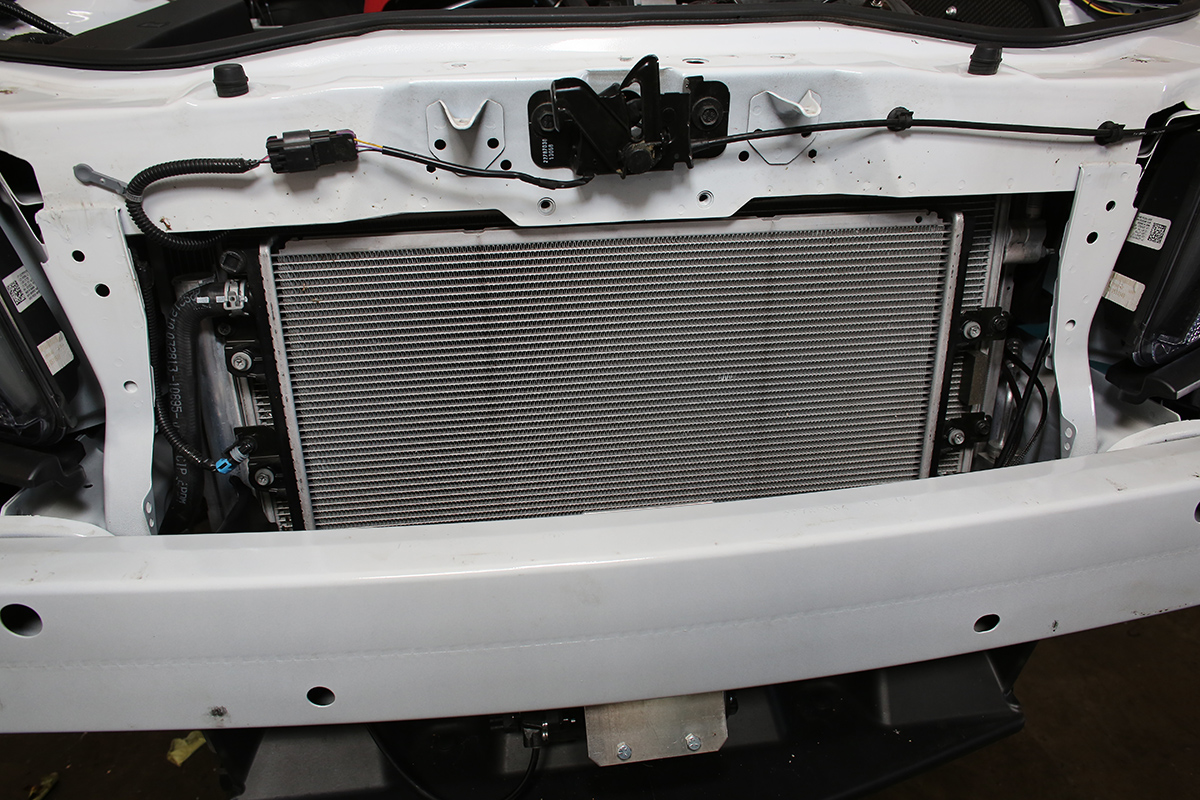
As you can see, this is the stock heat exchanger. It does an adequate job of fighting excessive heat for the factory components, but once more modifications are added to the equation, it will struggle to keep temperatures down.
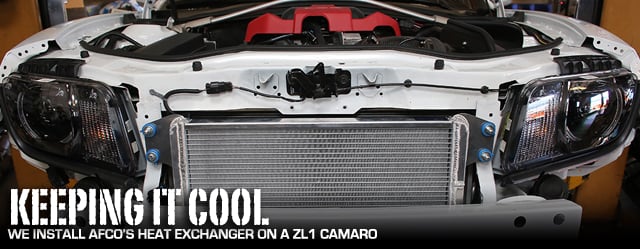
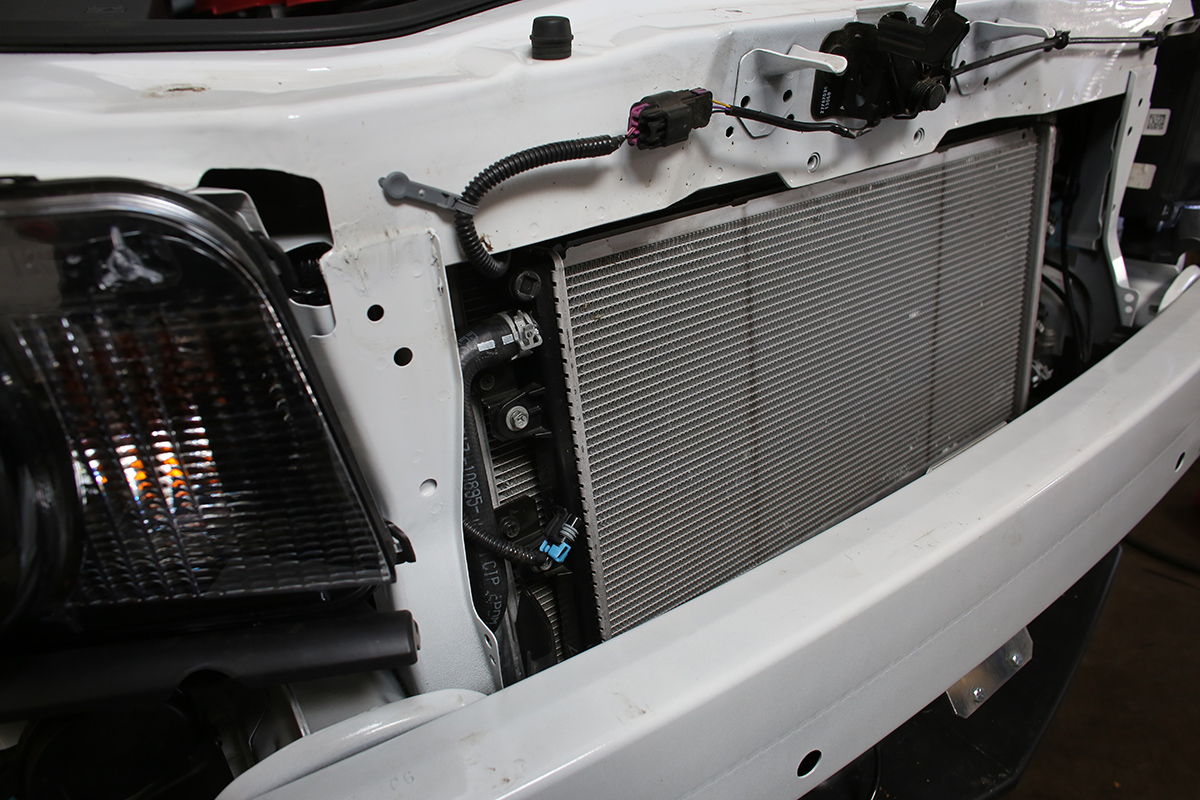
From the factory, the ZL1 utilizes a heat exchanger mounted low in the front grille, which is very similar to a small radiator. The heat exchanger is essentially a standalone system designed to assist in managing the supercharger’s temperature to provide consistent powertrain performance.
Here’s how it works: Coolant flows in a separate circuit from the main engine cooling system and circulates internally through the intercooler core beneath the supercharger, then returns back through the heat exchanger to keep the coolant at the lowest possible operating temperature. The factory supercharger cooling system is adequate in stock configuration for street driving, but if the car is prepped for track days or any other form of racing, additional supercharger cooling capacity is advisable to prevent power-robbing heat soak.
The Teardown
It’s not as scary as it sounds, but if you perform the installation at home, make sure the car is properly cooled down because the coolant will remain at a high temperature for a good while, and could potentially scald you. Having a vehicle lift is very helpful, but lifting the front of the car and securing it on jack stands will work just fine for those that don’t have access to a lift. After the car is safely secured, the negative battery cable comes off and so do the front tires. The whole nose of the car needs to be removed to access the factory heat exchanger, and removing the tires will allow you to get into the front wheel wells to remove the splash guards.


The factory heat exchanger being removed.
AFCO’s instruction manual shows the removal of the steel bumper in front of the heat exchanger for ease of installation; however, it is not mandatory and the unit can still be installed with the steel bumper on. Next, the two air deflectors attached to the radiator support are removed, but make sure that the air temperature sensor is removed from the back of the air deflector first.
To drain the heat exchanger, simply remove the 3/8-inch hex plug on the driver’s side of the heat exchanger and once it’s done draining, remove the upper and lower coolant hoses. After it is completely drained, remove the four bolts holding the heat exchanger to the condenser. Not too hard of a disassembly, right?
Comparing AFCO’s Heat Exchanger Versus The Factory ZL1 Heat Exchanger
The dual ten inch SPAL fans are most effective at lower ground speeds when we’re off of peak boost coming down from a run. – Eric Saffell, AFCO

There’s no question that AFCO’s TIG welded aluminum heat exchanger is more efficient than the factory unit in the ZL1, and that is partially due to the overall thickness and increased fluid capacity. AFCO’s unit is a dual-pass design, holds three times the volume of coolant over the stock unit, and has 350% more cooling area. This results in a much cooler air charge being fed into the supercharger thanks to both more thermal mass in the system, and greater heat-rejection capacity.
One of the biggest differences about AFCO’s unit compared to the factory unit is the addition of dedicated fans – dual electric 10-inch diameter SPAL fans to be exact. The fans allow for better cooling at lower speeds because there’s not as much air being forced through the core as it would at a higher rate of speed.

There’s no comparison between the stock heat exchanger (top) and AFCO’s cooler.
Just think of it like a radiator setup – if you’re sitting in stop-and-go traffic, there’s no air being moved through the radiator and it depends on the electric fan(s) to pull air through the core for optimal cooling. “The colder, more dense inlet charge we can develop, the more horsepower we’ll yield” stated AFCO’s Eric Saffell.
Mounting The Unit
The installation of AFCO’s heat exchanger unit is quite a simple process with very little modification. Once all four rubber grommets and spacers are in place on the heat exchanger, it will be bolted to the lower two holes on the radiator core support. From there, a mechanical punch is used to mark the spots where the bottom two holes will be drilled. With the heat exchanger removed, the two marks for the bolt holes are drilled out and the unit is ready to be mounted.
Before mounting the unit, be sure to route the upper hose on the outside of the front air dam up to where the upper heat exchanger inlet will be located. The last step before bolting the unit up is to attach the upper and lower hoses to the heat exchanger inlet and outlet.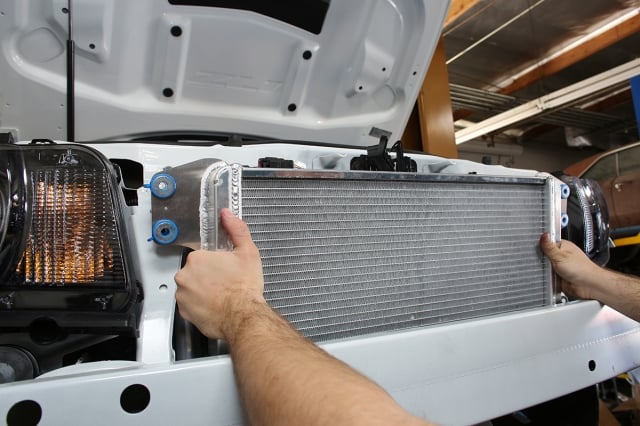


Wiring In The Fans
Working with electrical components is a touchy subject for some do-it-yourselfers, but thankfully AFCO has made wiring up the dual fans on their heat exchanger unit a breeze.”It comes with a high performance wiring harness with relays that snaps into the factory harness, so there is no need to do any modifications to the factory wiring,” explained Saffell.
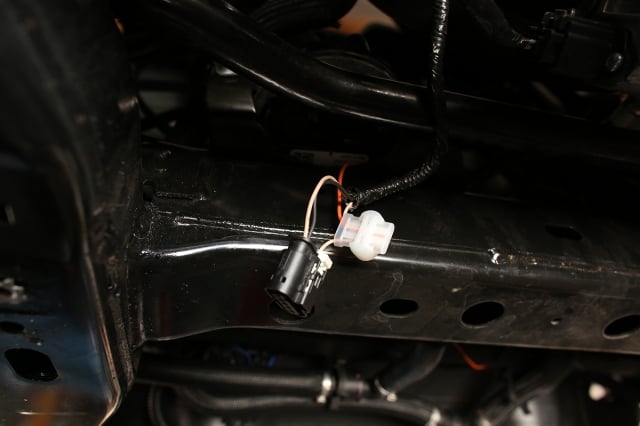
First thing to do is mount the relays in a safe spot where they’re not exposed to mass amounts of heat – one relay mounts under the headlight, while the second relay mounts under the horn. Next, the ground wires are to be attached to the passenger side radiator support with the supplied hardware, and the two red fused leads are connected to the main power supply of the fuse box.
The fans on AFCO’s unit are triggered off of the coolant pump, so the last step is to access the connector for the pump which is located on the K-member. After the white power wire is cut about two inches from the connector, insert both ends and the orange wire into the supplied 3M splice connector. If you can believe it, that’s how simple it is to wire up the fans.
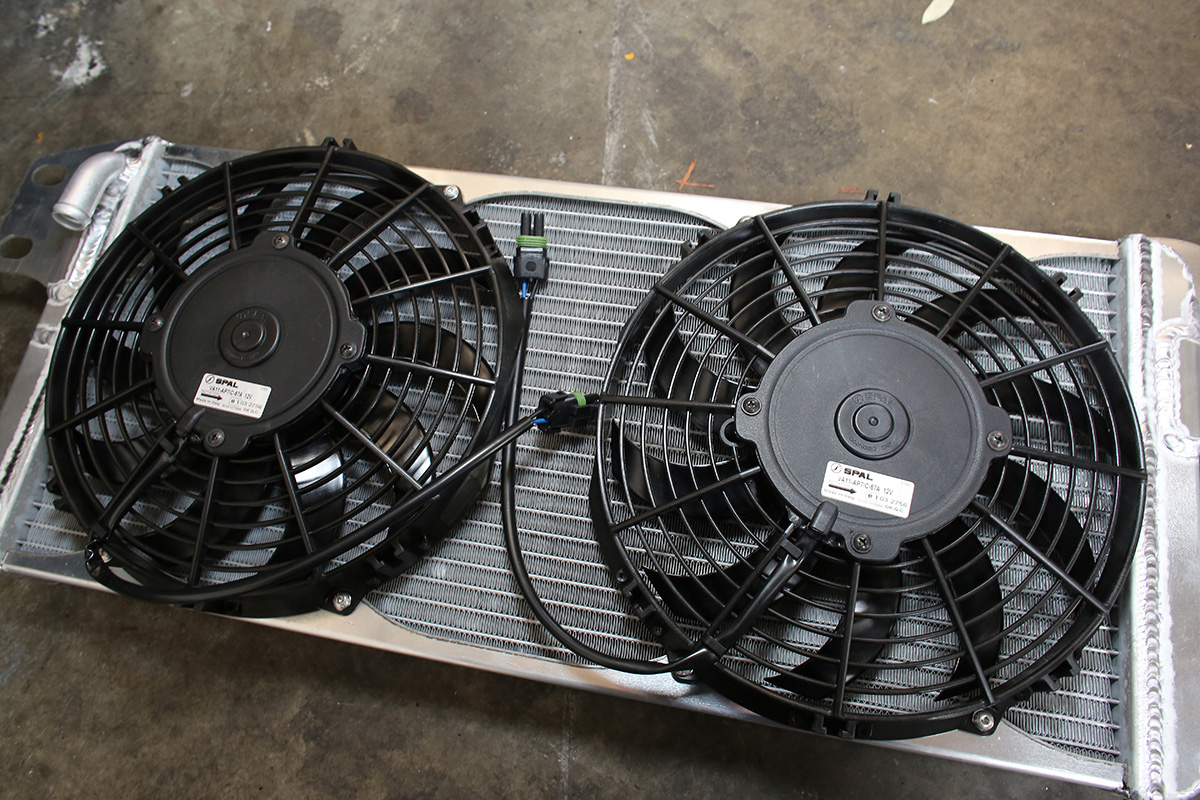
The 10-inch SPAL fans that AFCO uses on their heat exchanger unit are very beneficial. Each fan moves 795 CFM at zero static pressure with a draw of 8 amps.


Finish Options
AFCO’s heat exchanger comes in two finishes for those who like a little bit of variation. A satin black finish is available for those who simply like the look, or for those who want to keep their vehicle looking as close to OEM as possible. As you can see in the photos from this article, we opted for the polished aluminum finish.
Reassembly
Once the wiring of the fans is complete, we checked the unit for wayward hardware, loose hose connections, and leaks. Fill the system up with the recommended OEM coolant, start the car, and let it idle until warm.
You can verify if the fans are working right by holding a rag or paper towel in front of the heat exchanger – if the fans are working correctly, the rag or paper towel should be pulled toward the face of the heat exchanger.
Provided everything is working right, the front end of the Camaro can be reassembled. It’s pretty simple; install every part taken off of the car in reverse order of removal, except the plastic air deflectors – those are not going to be reinstalled onto the car. They would be good to save if the car were to be converted back to stock for any reason, though.
Wrapping It Up
 Regardless of what kind of power your ZL1 is making or what you use it for – street car or track toy – an upgraded heat exchanger will increase the efficiency of the supercharger and keep inlet air temperatures cooler. Per Ryne Cunningham, owner of Cunningham Motorsports and experienced LS tuner, intake air temperatures are reduced by 30-40% with AFCO’s heat exchanger installed.
Heat is an engine’s worst enemy and providing cooler air to the supercharger ultimately keeps the engine cooler, which in turn prolongs the life of the engine.
AFCO’s heat exchanger upgrade is a true bolt-on unit and is really simple to install, not to mention the awesome quality TIG welds, great fit, and sleek finish. Check out AFCO’s website for more information on this heat exchanger system!


