

There is no doubt that owning and driving a classic automobile is an enjoyable experience. Sure, they require a lot more maintenance than a new car does, but that’s all part of the charm. It doesn’t matter if you prefer a traditional restoration or a restomod, cruising around town in your classic really generates not only a feeling of nostalgia, but also a feeling of pride and joy in the fact that you can handle something that was built — possibly, before you were born. But, that feeling can quickly diminish if your classic happens to leave you stranded on the side of the road.
To get the old dash cluster out, you first need to remove the two nuts under the steering column, so the column can be lowered to give you some room for working. After that is done, remove the four screws holding the cluster in place.
If you are the type of enthusiast that enjoys modifying your classic ride, there are four basic areas that you will typically consider upgrading for better performance and/or aesthetics: engine, suspension, paint, and interior. Interior upgrades usually include aftermarket seats, a new shifter — definitely a sound system, and possibly, a set of aftermarket gauges.
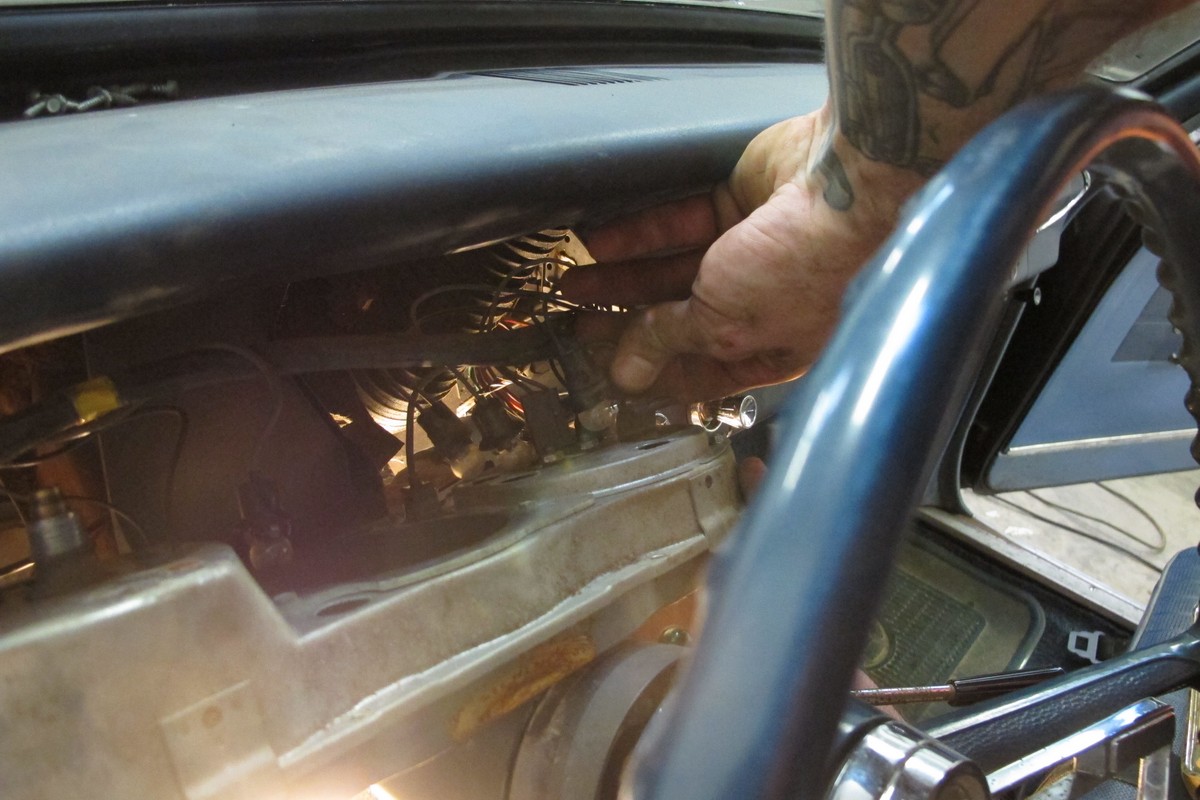
Before the cluster can be removed, the speedometer cable, the gauge lights, and other wires like the fuel gauge and “idiot” lights need to be disconnected.
Upgrading the gauges is a good idea, because proper engine monitoring can often eliminate those aforementioned, impromptu roadside delays. With a simple glance at the amperes, fuel, or water temperature gauges, you can quickly learn when something isn’t right before the issue becomes catastrophic. If your car was built in the ‘60s, that means it’s anywhere from 46 to 55 years old, but that’s not a problem. The classics we love were built to run forever, and even if they weren’t, the aftermarket has a supply of parts that can make sure they are rebuildable many times over. Such is the case with gauges. As much as we hate to admit it, things do wear out, and either need to be fixed or replaced. The gauges in your classic ride are no exception.
With our wire harness, it really is a no brainer to wire the dash using just simple hand tools and a volt meter. Anyone can hook up a dash in just a few hours. – Greg Wambold, Classic Dash

If you were working on cars back in the ‘70s and even into the ‘80s, you definitely remember how limited your choices were when it came to aftermarket gauges. Back then, the myriad of choices available got you either a black or chrome bezel, with either full-sweep or 270-degree sweep gauges. There was not much of a myriad, huh? Other than that, you got what the manufacturer made. Now however, it seems like the sky is the limit in gauge design. If you want your gauges backlit in green, it can be done. Do you want black, silver, or white faced gauges — take your pick. Heck, your speedometer doesn’t even need a cable to operate it anymore.
If you decide to use the radio delete gauge pod, some cutting and drilling of the dash is required.
Updating the gauges in your classic car not only eliminates the aged, and possibly worn out and non-functioning gauges, it increases the driver’s ability to accurately monitor the engine. What’s more, new gauges can typically improve visual aesthetics as well. If installed correctly, the new gauges will improve the look of your car’s interior, and not change the original feel of the dash. If the car has been upgraded with a modern engine, new and modern gauges really need to be part of the equation.
We encountered just such an aged, engine-monitoring condition with a ’64 Nova owned by T.J. Wright. With the gauges that were present – speedometer, fuel level, and, well, that’s it, there was no way to fully monitor what was going on with the engine.
The wiring kit comes in two halves. One half connects to the car, and the other half connects to the gauges. Connections are easy, as every wire is marked so you know where to connect it.
T.J. had planned to add gauges for monitoring oil pressure, voltage, water temperature, and a tachometer, but mounting gauges under the dash, and on the steering column just wasn’t going to give him the clean look he was hoping to achieve. Not only that, but the dash bezel was completely faded, the gauges that were present — well, they looked like gauges, but their functionality left a lot to be desired, and let’s not even mention the aesthetics. It was definitely time to do something.
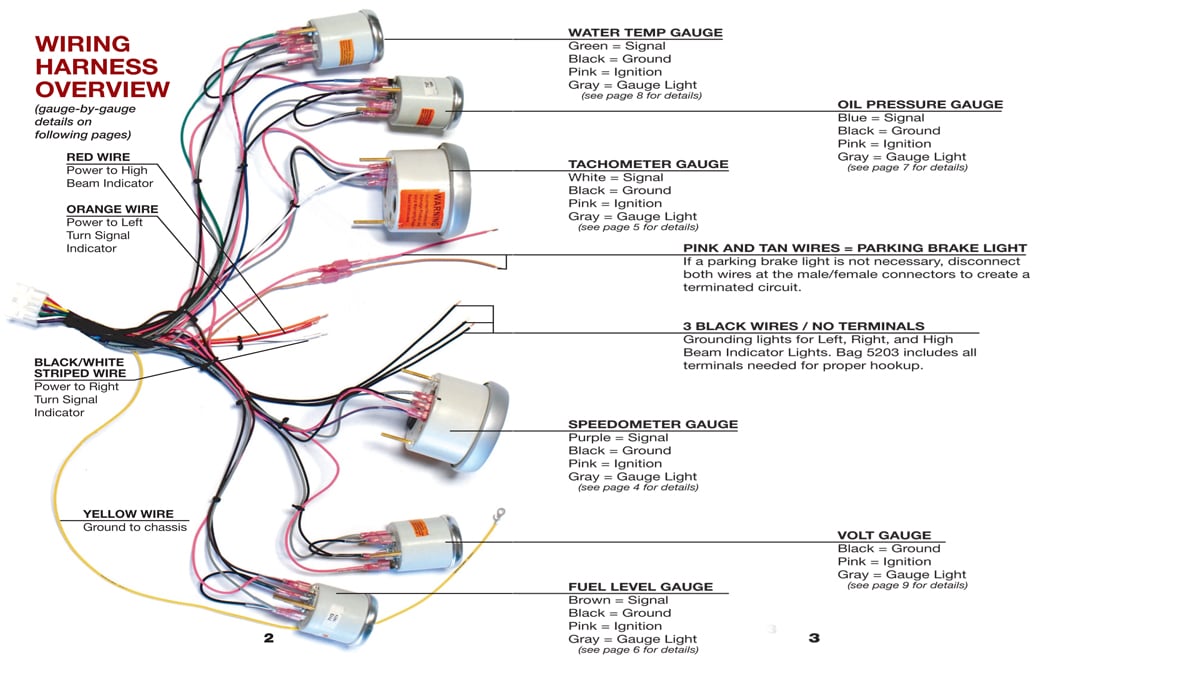
Following the wiring diagram makes the wiring connections simple.
The Chosen Upgrade
One of T.J’s ideas consisted of getting a factory original radio-delete plate and adding the much-needed gauges that were not present. While searching for the plate, we came across Classic Dash, and learned that they have a great way to upgrade the gauges in the Nova, and really improve the interior appearance as well.
Once we had the gauges installed in the radio-delete bezel, the wiring was connected.
What we found was their 1962 through 1965 Nova / Chevy II complete two-piece six-gauge panel (PN 140-62-00001). Molded in a UV-resistant, ABS material, the Classic Dash instrument panel is offered in a matte black, brushed aluminum, or carbon fiber finish. The kit will replace the stock gauge panel, which allows the car owner to install a speedometer, tachometer, and fuel gauge.
We fed the wiring harness through the former radio opening, and attached the bezel to the dash.
Not only that, but the kit also comes with a bezel that acts as a radio-delete plate, and lets you install other engine-monitoring gauges. The radio-delete panel is designed to house the extra gauges where the radio used to be, and does required some cutting and drilling so it can be mounted. The kit not only comes in a variety of bezel finishes, but you can choose from many Auto Meter gauges to fill the openings.
Although it used to be thought that only mechanical gauges could be accurate, the American Muscle gauges we chose are electric. Improvements in gauges has made electronic gauges just as accurate and reliable as the best mechanical instruments, and they’re easier to install — especially when working on a dash with limited space.
Going Global
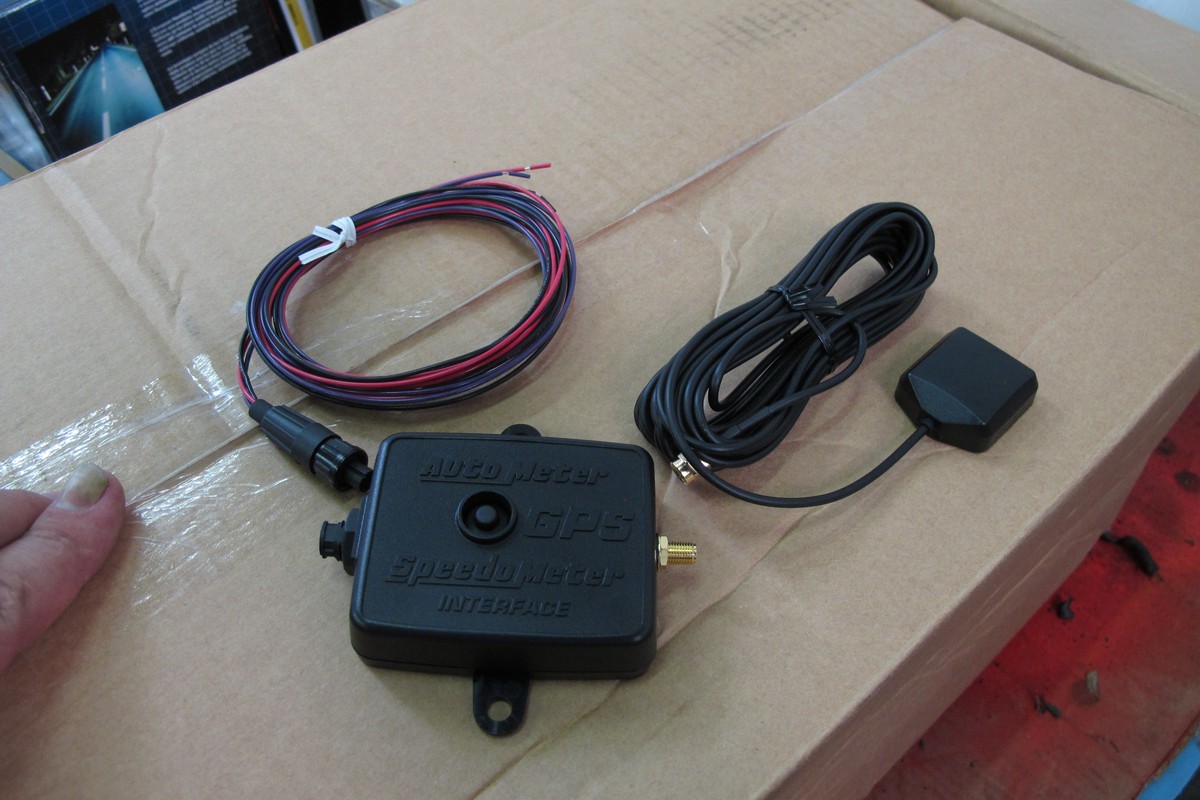
If you are so inclined, Auto Meter has a universal GPS speedometer interface module as well. This plug-and-play system is designed to work with their electric speedometer. The unit is sealed, so it can be mounted almost anywhere, and utilizes a paintable GPS antenna.
GPS speedometers are very accurate, and that helps with avoiding traffic tickets. Auto Meter told us, “There are even several court cases on record, where GPS data has been used to overturn speeding tickets, because the GPS logs showed the defendant traveling below the speed limit when they were ticketed.
The gauge kit does come with a mechanical-to-electronic signal transducer, which means that the original speedometer cable can be retained if so desired. The kit also contains 3/8 and 1/2-inch NPT adapter fittings, and the speedometer covers zero to 120 mph, oil pressure range is zero through 100 psi, and the water temperature range from 100 to 250 degrees. Finally, the voltmeter registers from eight to 18 volts.
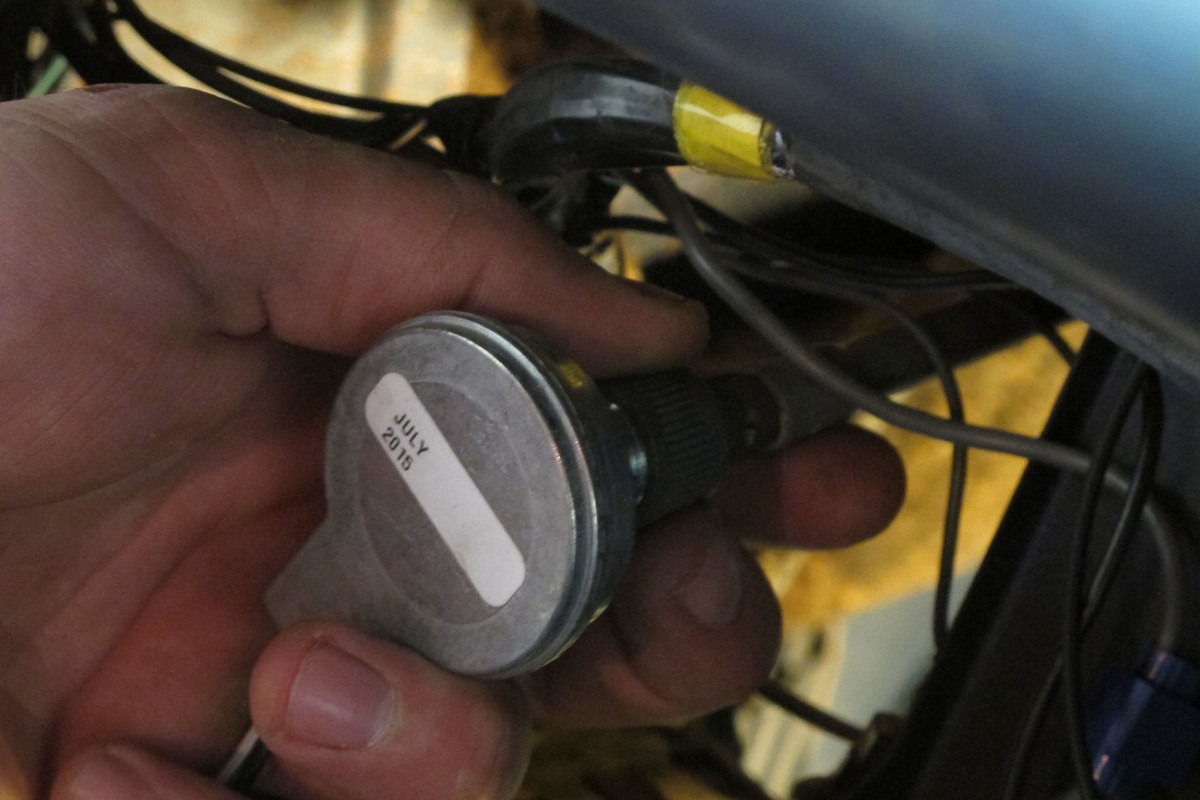
The Auto Meter gauges come with a speedometer sensor that will connect to your existing speedometer cable, and then connect to the Auto Meter electronic Speedometer.
Getting The Job Done
Like we said, the kit is designed so that the home DIY guy can complete the install and have stellar results. We met T.J. at Old Glory Automotive in Largo, Florida, so we could begin a job that we learned would take an entire day. We chose to do the install at Old Glory, since they specialize in rebuilding classic cars. The thought being, if we ran into any issues, we could handle it right there and then. Fortunately, the install was easy, and we only needed simple hand tools. We started by lowering the steering column to make some room to work, and the removed the four screws holding the bezel to the dash. Even with the retaining screws removed, you can’t just yank the bezel out of the dash, as there are wires and the speedometer cable that need to be disconnected.
If there is one part of the installation that many home mechanics might have some trepidation’s about completing, it is connecting the Auto Meter gauges to the factory wiring. Classic Dash eliminates that concern by supplying a dash-to-car wiring harness that makes this kit easy to install. The wiring harness sent with the kit is very complete, color coded, and includes a very thorough and simple-to-understand instruction manual.

When installing the cluster, you’ll need to finish making the needed wiring connections before attaching the cluster to the dash.
The first page of the instruction manual is an overview of the wiring harness. This in itself will be enough guidance to help with the install, but following that are gauge-by-gauge instructions on the following pages that provide clear and concise information for mounting each gauge. We started by installing the car portion of the wire harness first, and as we said, each wire is marked for where it connects, be it a sending unit, speed sensor, or ignition.
Finally, the moment we’ve been waiting for, attach the bezel with the screws and clips provided in the kit.
With the car side of the wiring handled, it was time to install the gauges into the bezels, and wire them.The dash/gauge wire harness comes with pre-terminated ends, and the labeled wires make it a true plug-and-play system. When you order your kit/gauges, make sure that you order the correct fuel level gauge. Auto Meter fuel level gauges are available in zero to 90 ohm (GM mid-’60s to mid-’90s), zero to 30 ohm (early GM like our Nova), 73 to 10 ohm (pre-’90s Ford and Chrysler), 16 to 158 ohm (later-model Fords), and 240 to 33 ohm (which fits aftermarket senders such as the Auto Meter 3262).
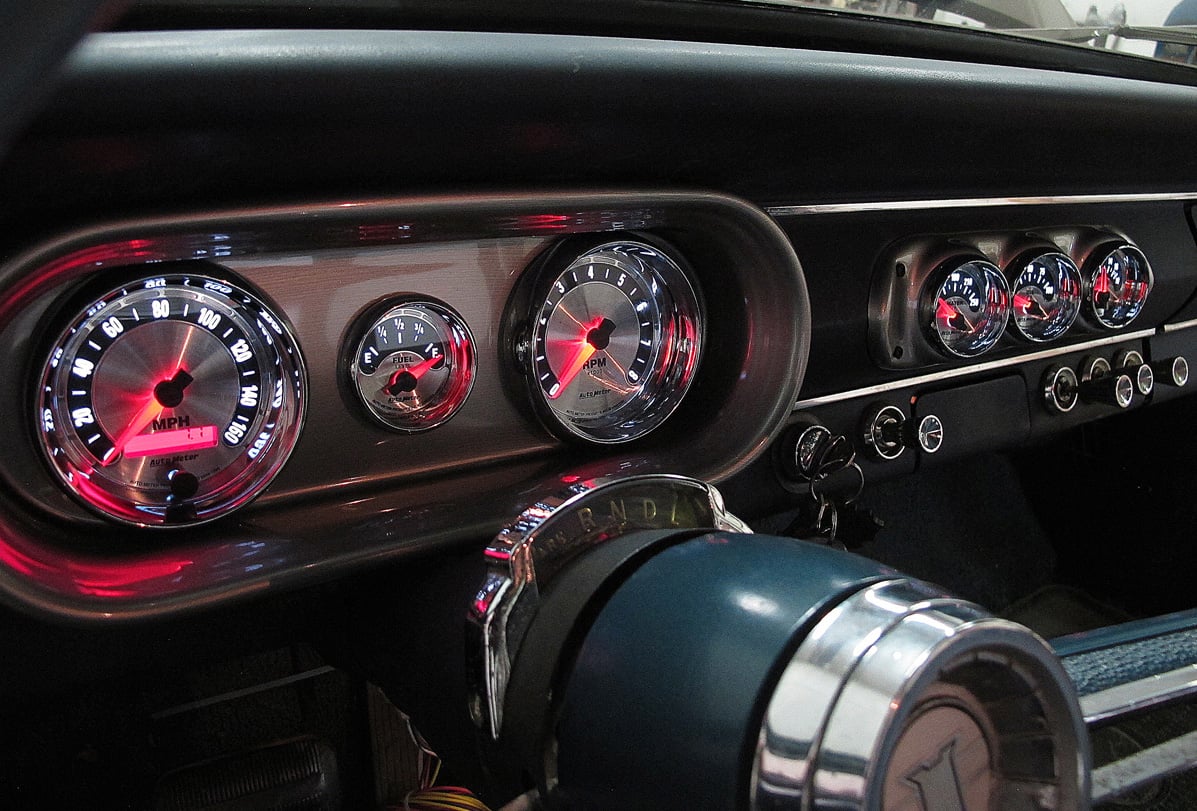
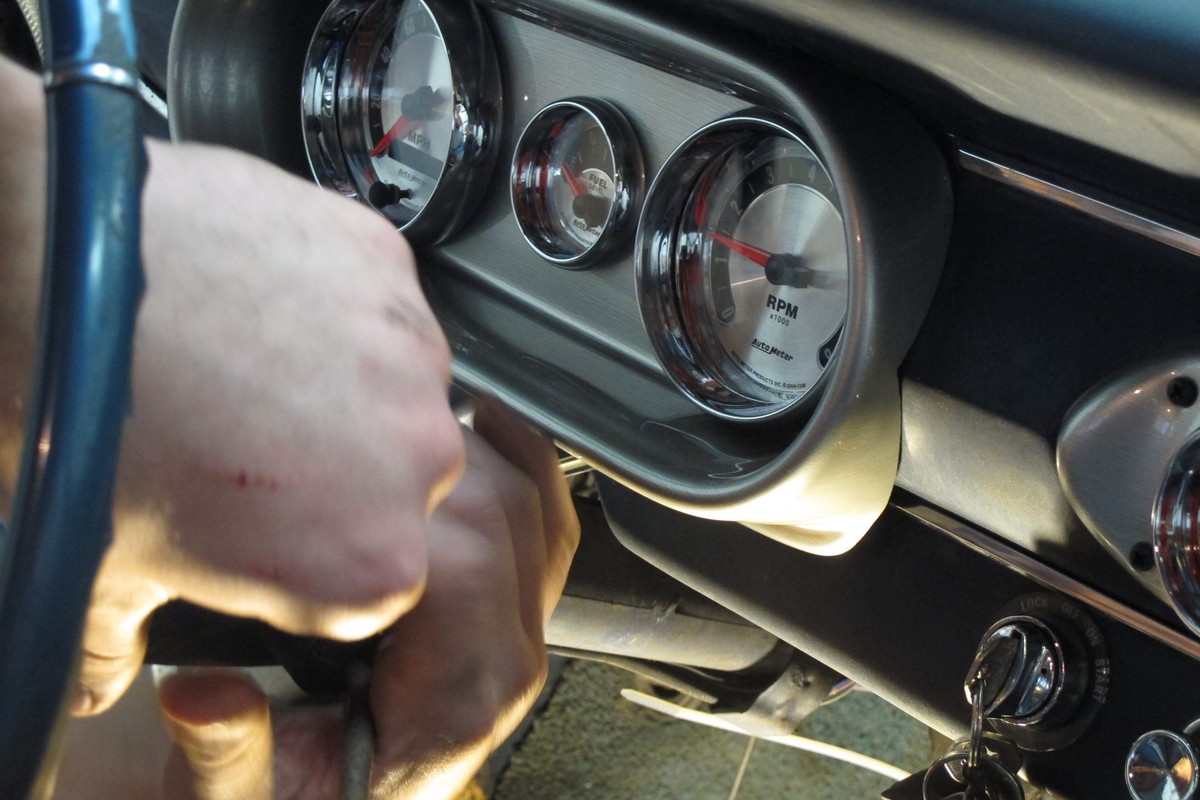
There is no arguing how much-improved the Nova’s interior is with the new Classic Dash upgrade.
With the final connections made, the only thing left to do was to install the main gauge cluster, hit the switch, and check the operation of the gauges. The new dash clusters and gauges not only improve the look of our interior, they also help eliminate any unexpected roadside stops, by giving T.J. accurate and vital engine operating information.
If you are interested in other technical articles involving Classic Dash gauge clusters, check out:


