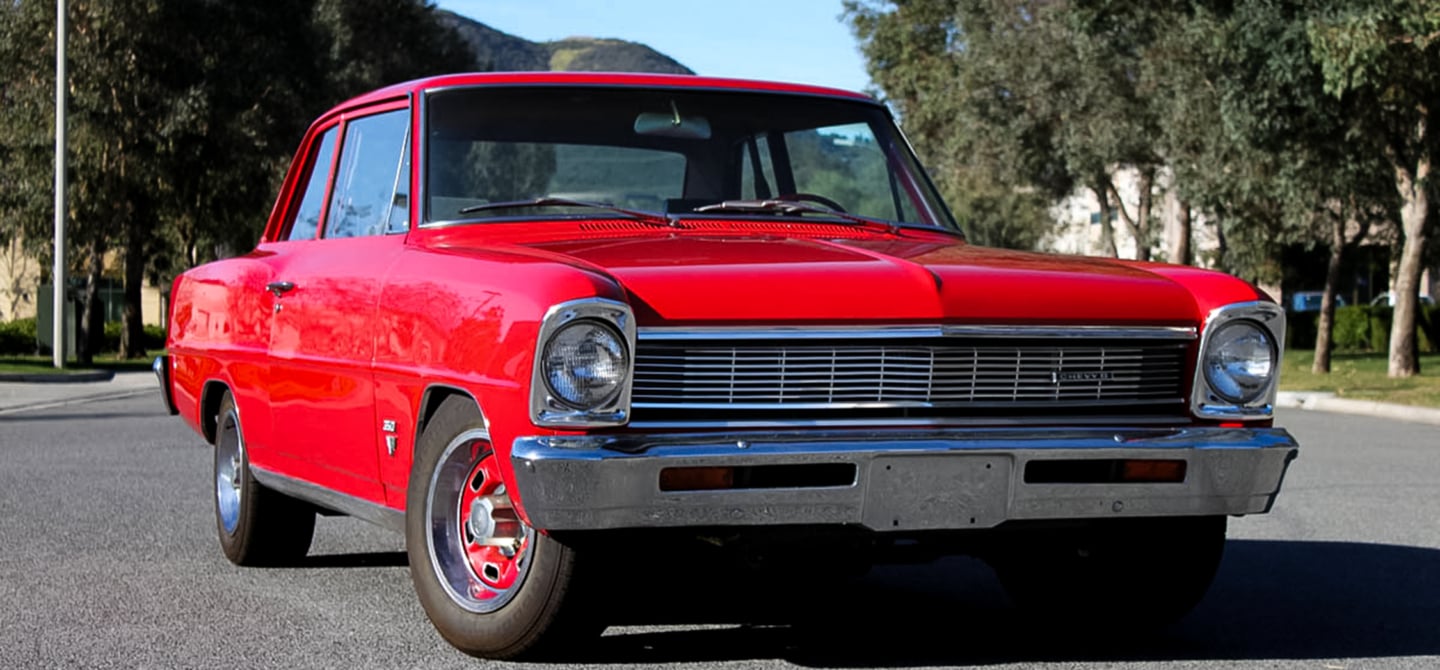
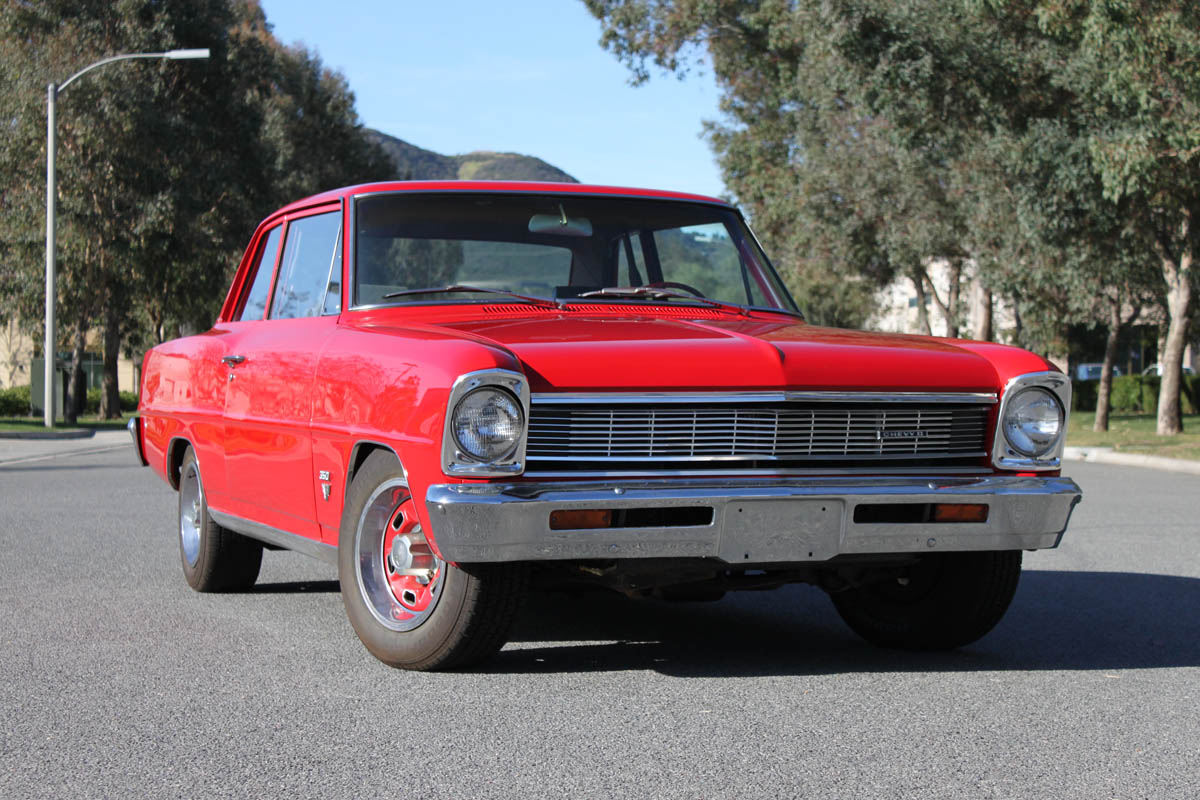
 One of the coolest things about musclecars is seeing a pony car with a lot of power by way of a massive V8. Our Project MaxStreet is a 1966 Chevy II with 555 cubic-inches of Edelbrock/Musi big-block power. But MaxStreet isn’t just another small car/big engine monstrosity, it’s been treated to the kind of attention that would make any musclecar stand out in just about any crowd.

Project MaxStreet
Tech Articles
MaxStreet was bought with serious intentions, and those intentions were street and strip: quick off the line and fast in the corners. After a few pictures were taken, we got it into the shop and the teardown commenced.
The details are below:
Mini Tubs and Wheel Fitment
Flaming River Steering System Install
Edelbrock RPM XT Cylinder Heads
Fuel System Installation Part 1
The first plan was to get the drivetrain out of the car and gut the interior, then yank out the suspension to make room for all the new parts that we planned on installing. We started out with Detroit Speed mini-tubs and tested the wheel fitment of the Billet Specialties 17 x 11-inch Street Lite wheels. We needed to make sure that the 315/35R17 Mickey Thompson Drag Radials were going to fit in the rear.
From there, it was on, and the drivetrain was being put together, literally, to make this car a roller. That meant a lot more work was ahead of us, and we knew that horsepower was going to be the primary goal, with a drivetrain to support it.
The entire car is purpose built to get the most from the big-block and to put that power down to the pavement and make it stick. As you might have guessed, the project name gives a not-so-subtle hint at our intentions with this car; and while most people would love to have a car like this at the dragstrip, we decided to give it the maximum street presence as well, hence MaxStreet.
We began this project a couple years ago, but then other projects took precedence and MaxStreet sat for a little while. But now we’re back at it and MaxStreet is getting some well deserved attention by the shop dawgs Sean G. and Dean J., and while we make our move to our new location here in Murrieta, California, MaxStreet is back on the priority list.
Below, you’ll find our build diary, from the latest adventure back to our very first task with Project MaxStreet. As with any build, it takes time and it takes patience, and we have a long “to do” list with plenty of documentation along the way. If you want to start from the beginning, start from the bottom and as we continue the project we’ll add to this build thread just below this paragraph. You can also follow along, in order, in the sidebar to the right.
Project Build Diary:
October 2021: Final Assembly Time…But Wait, There’s More
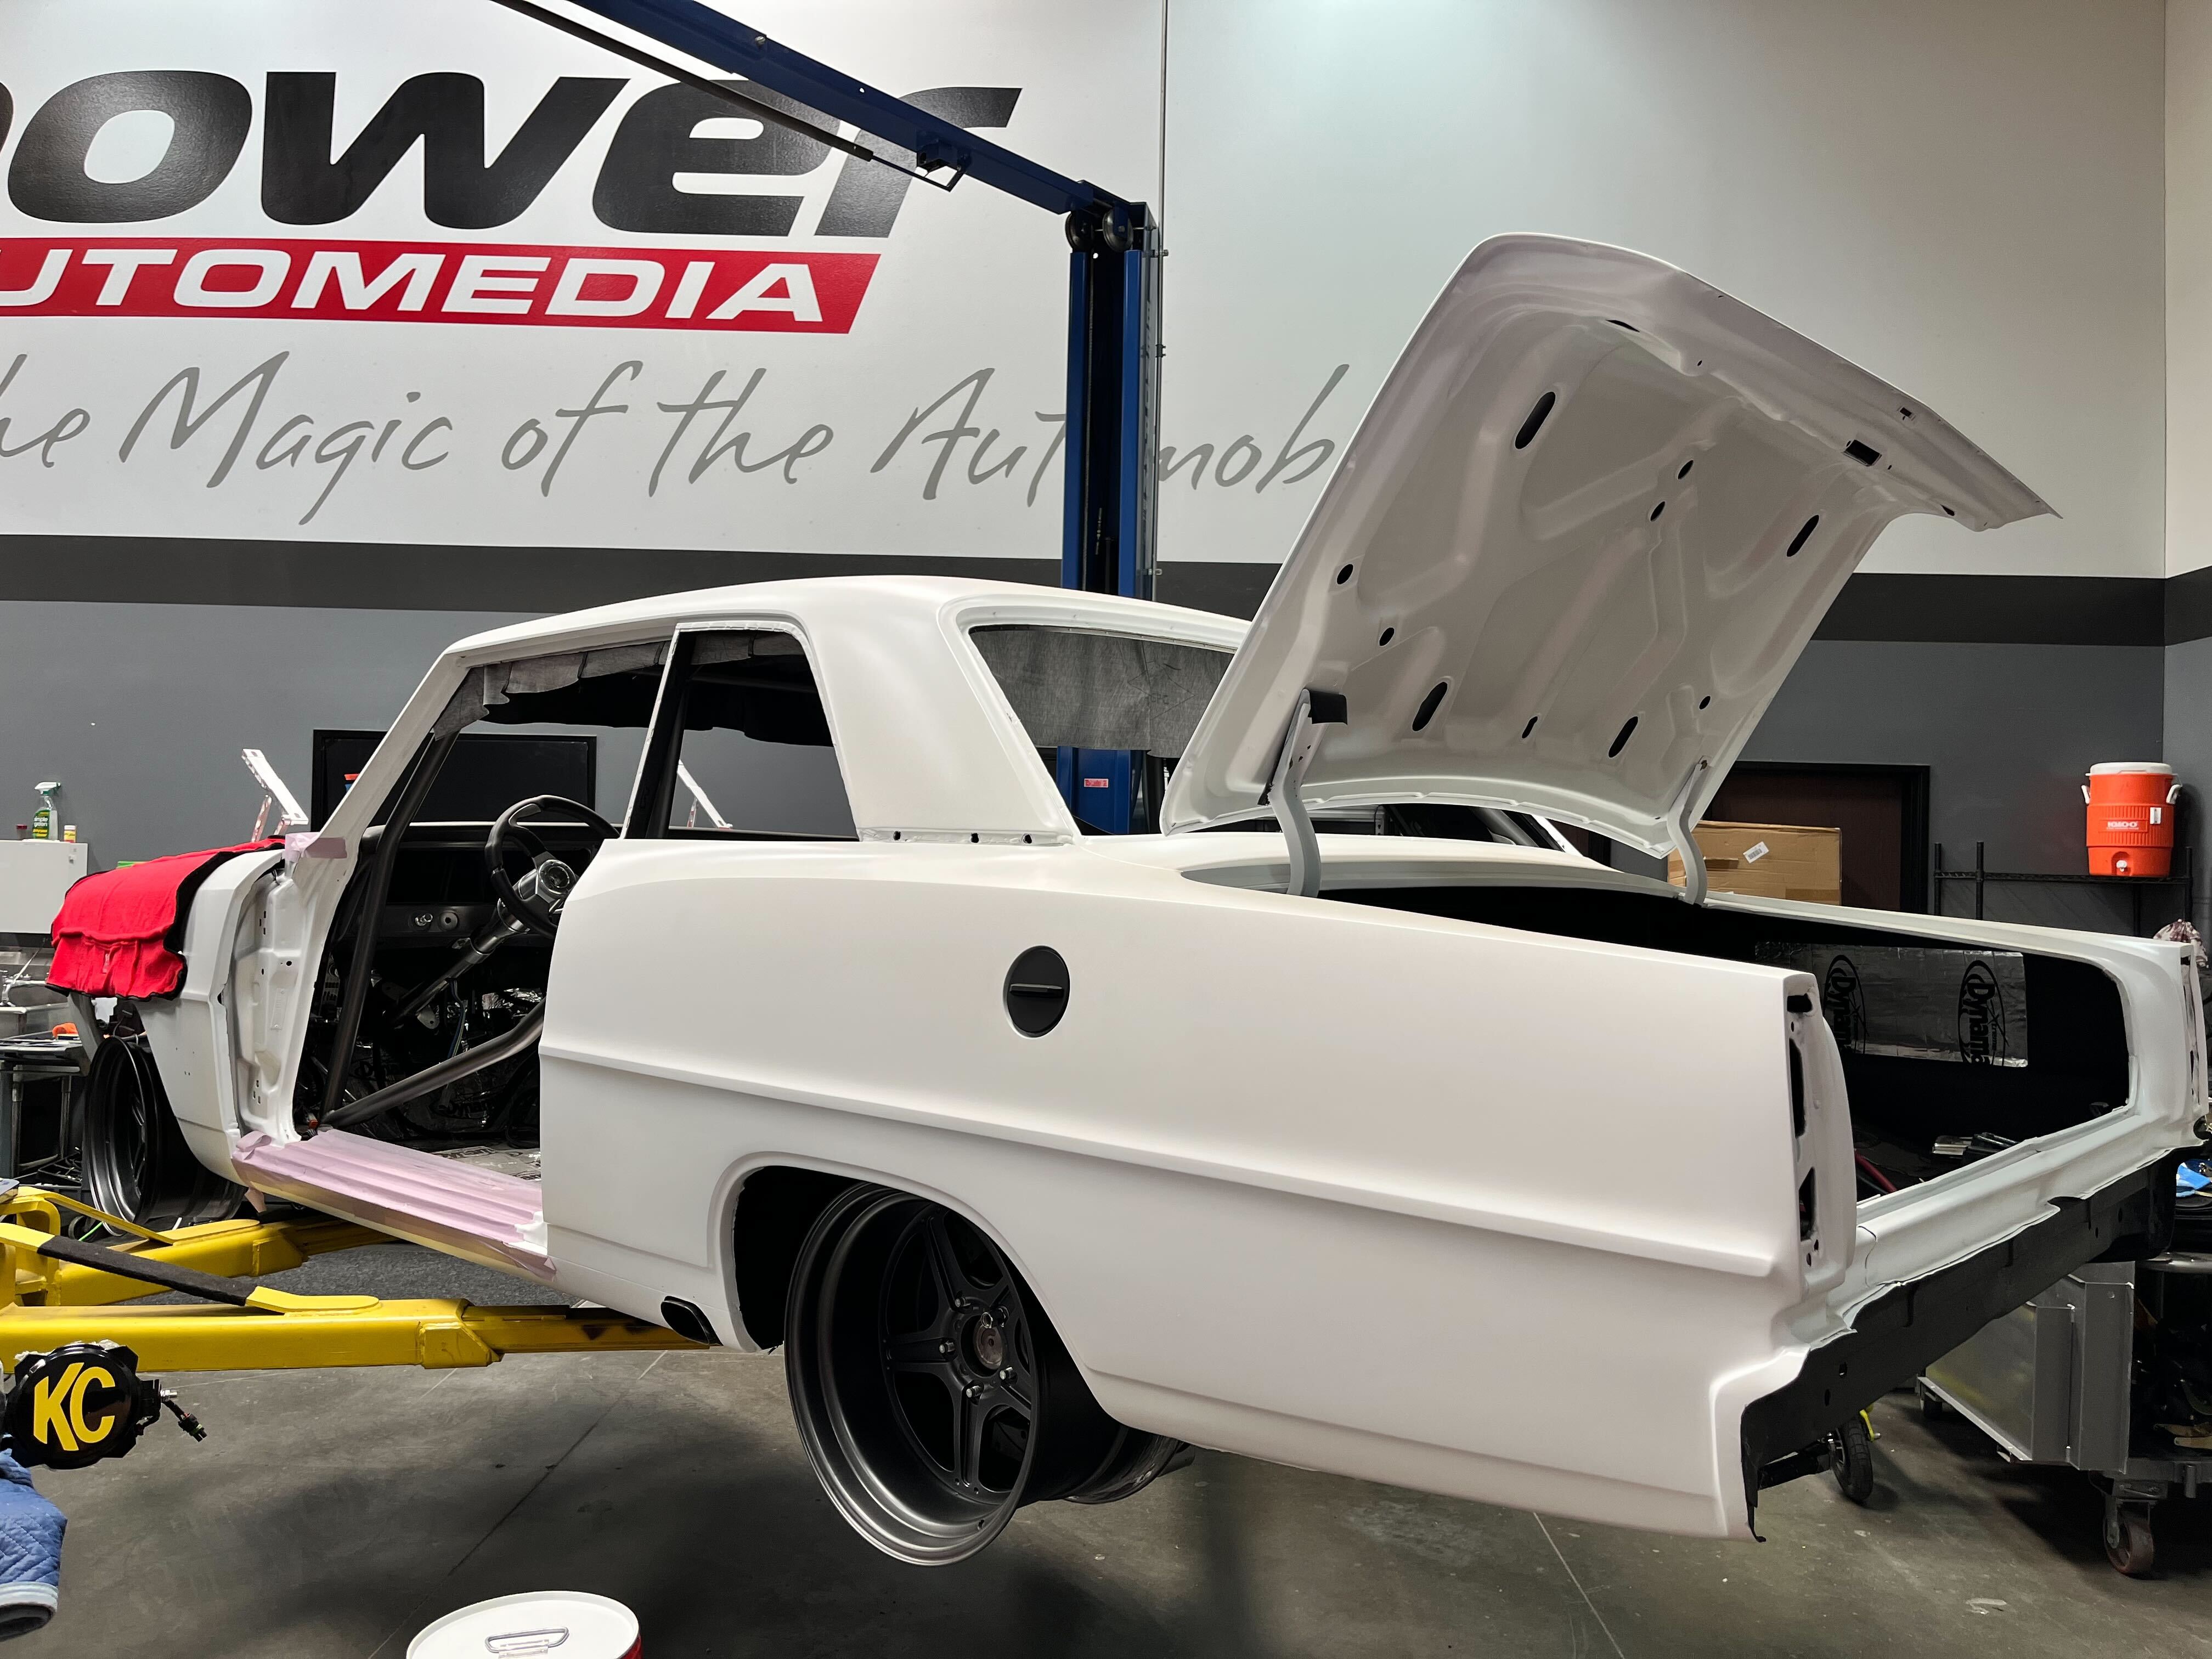
Have you ever had a project that for whatever reason gets mothballed? Well then, you know the plight of MaxStreet, our longest running project car. Over the last few months all that has changed, though, and things have escalated quickly. Allow me to get you up to speed… After its Axalta paint job, the ’66 Nova has sat in storage only to emerge with a new lease on life. The idea was take the outdated engine combo and bring it to present day.
Step 1: ditch the cog drive and older blower, for a new F-series supercharger and serpentine drive from ProCharger.
Step 2: overhaul the fuel system to run E85 rather than pump gas and water-meth injection. This meant a larger fuel pump, larger fuel lines, and a new EFI system from Holley.
Step 3: re-assemble the rest of the car and install a fresh interior from TMI.
Step 4: go through the rest of the car and replace any stock or outdated parts.
All of this sounded so simple at the outset, but let me tell you it’s been a thrash. And here we are, the car is coming together and we are almost to the finish line. And just in time, too, because we have a surprise for you. Stay tuned to our social media channels for more updates as we get closer to debuting MaxStreet and all the content associated with these installations.
October 2017 – April 2018:
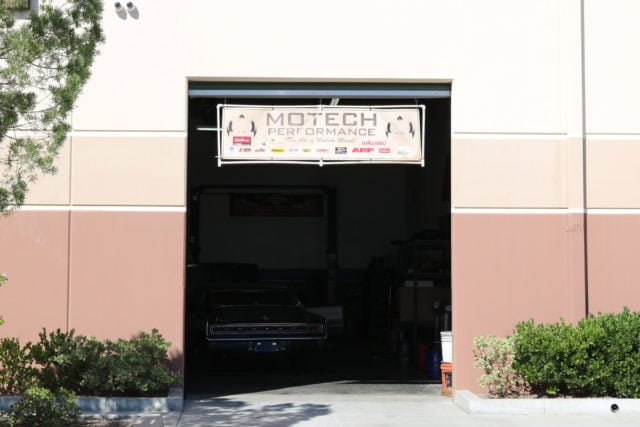
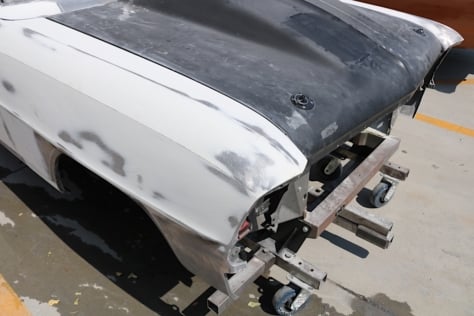
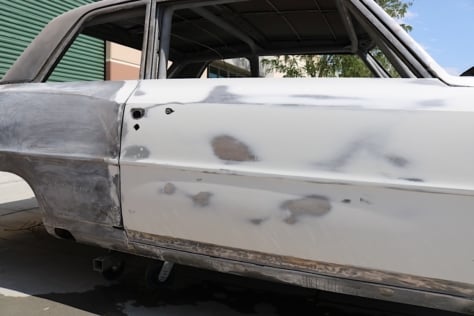
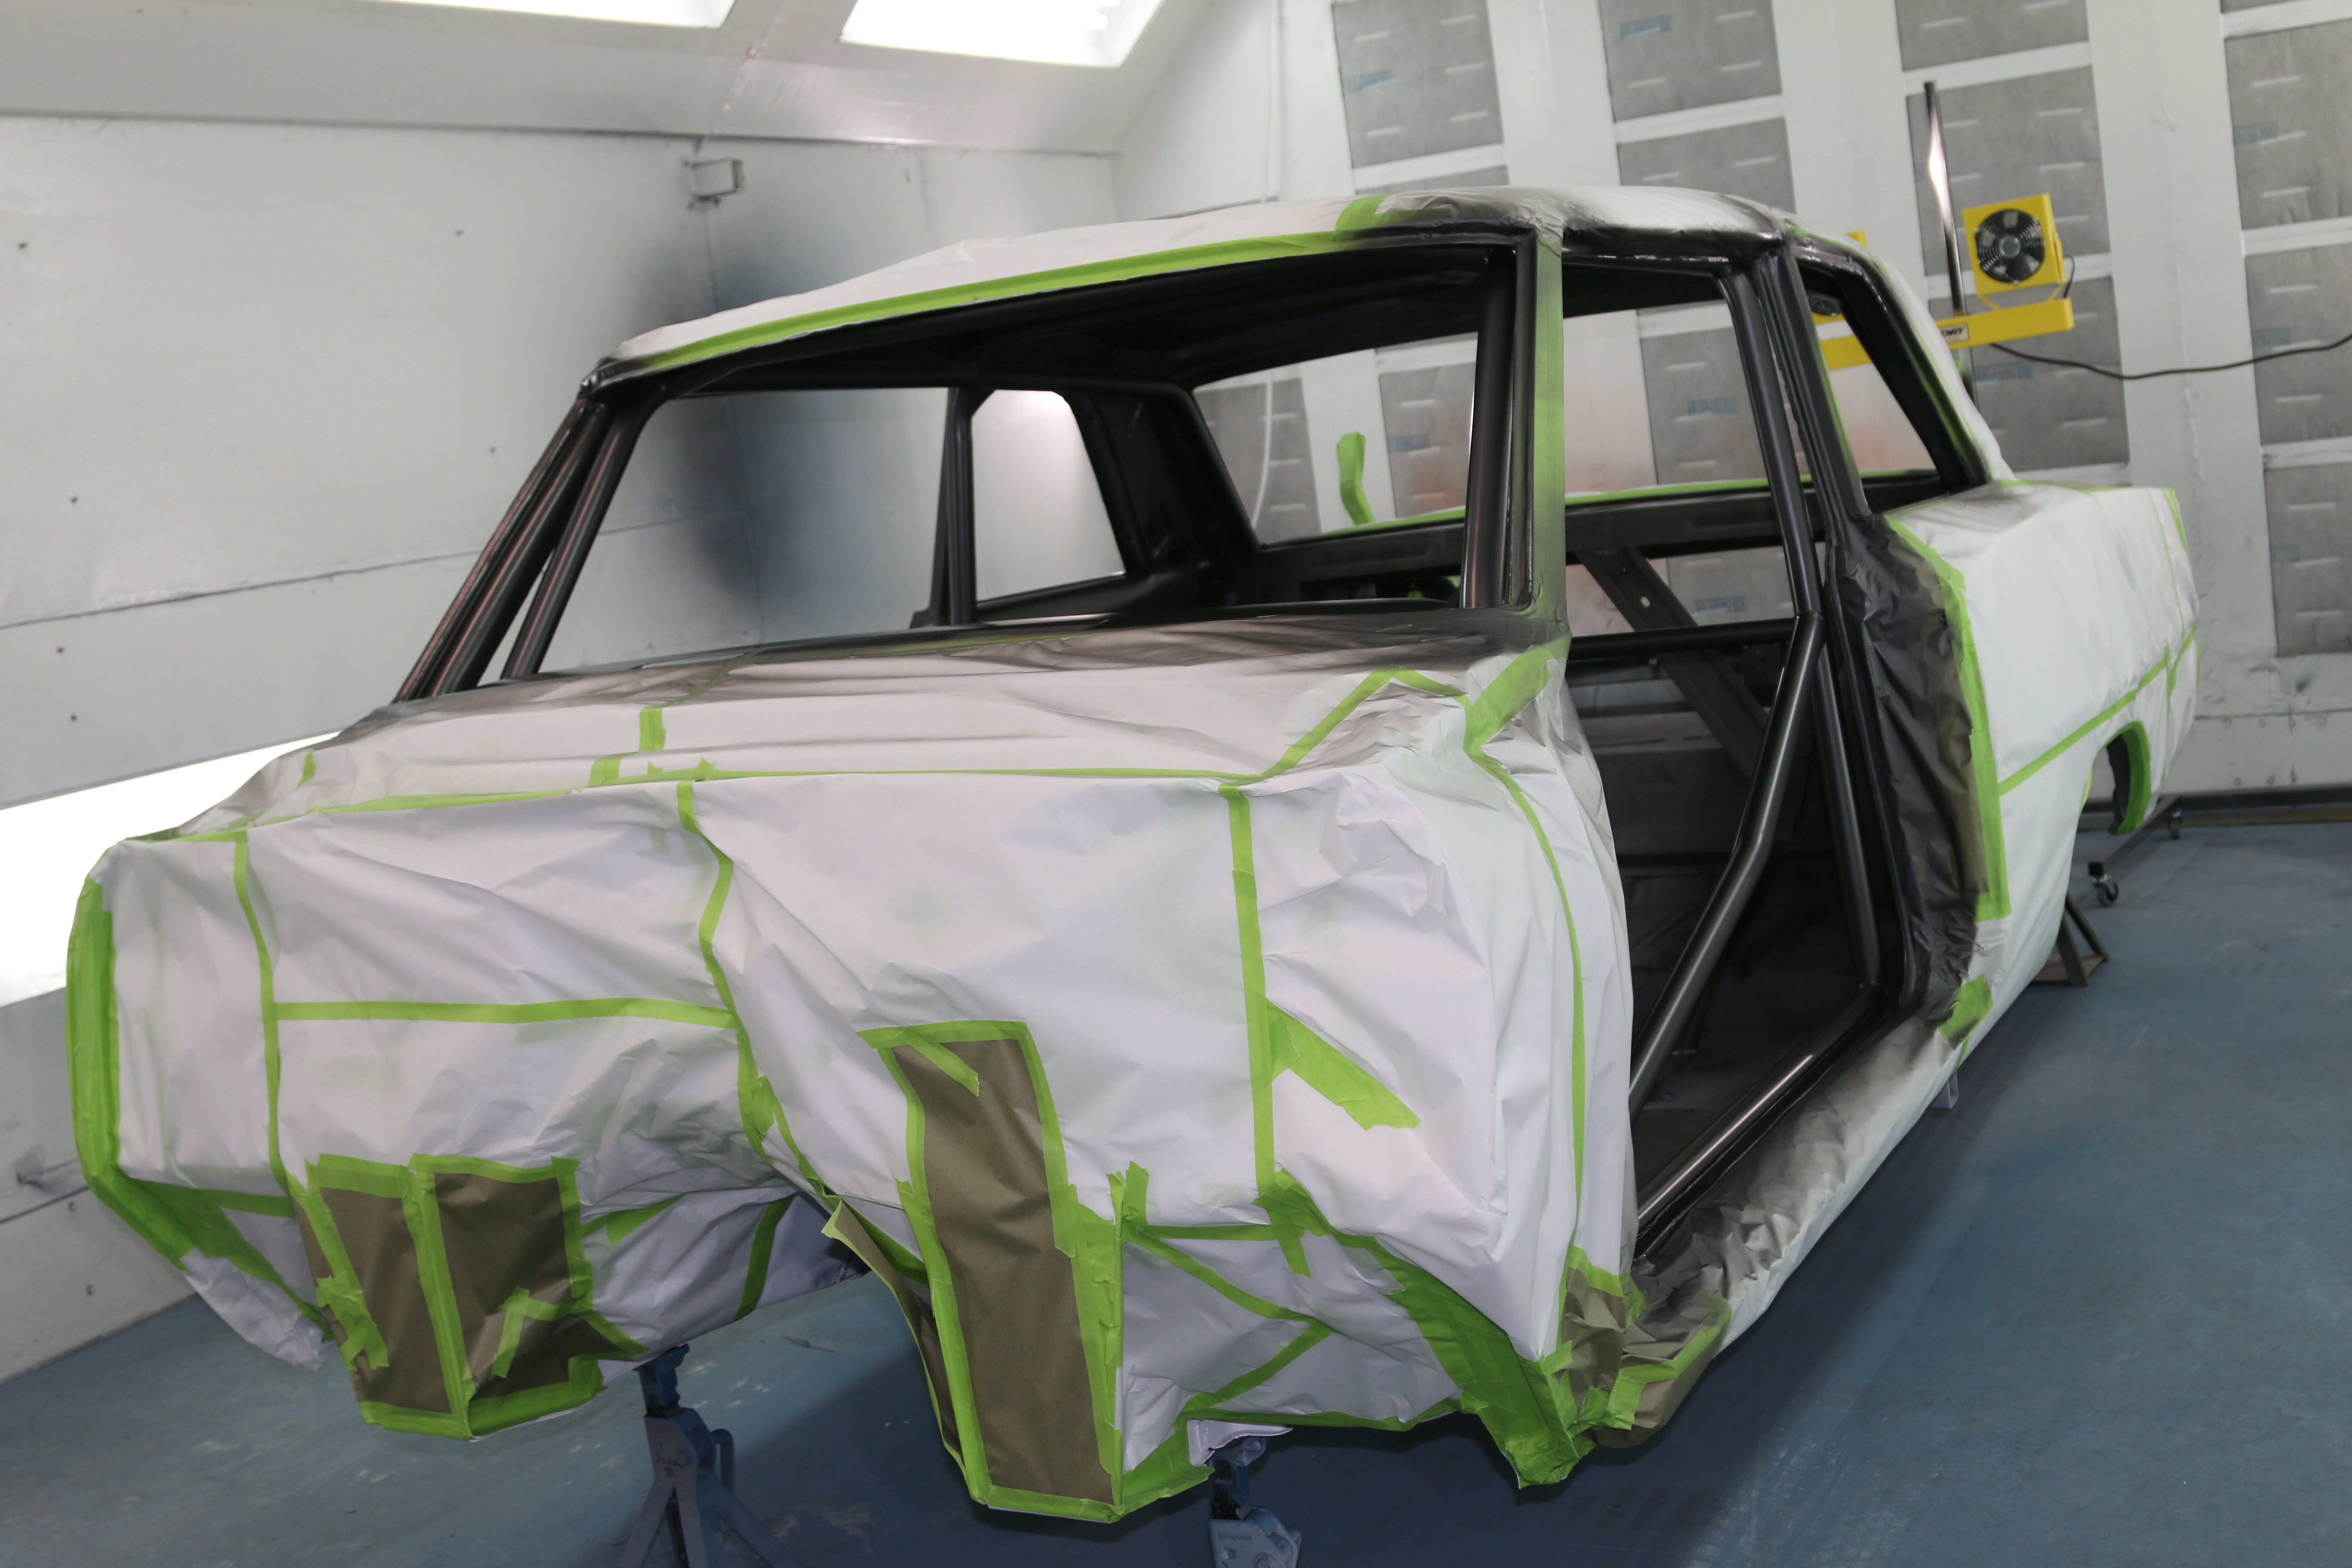
Pre-Paint Work at Motech Performance
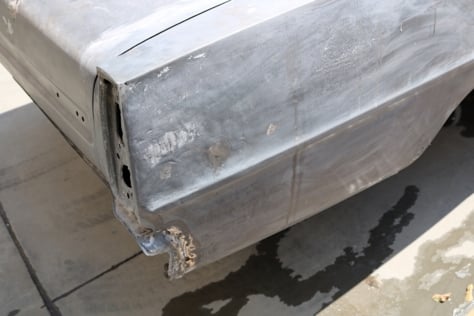
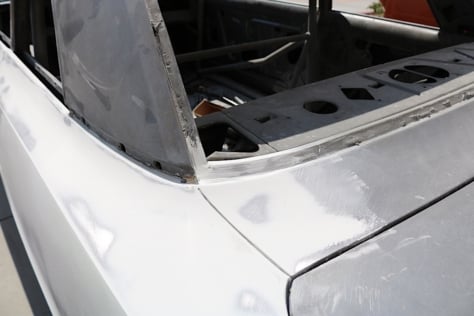
As we said earlier, Motech Performance is a one-stop shop when it comes to custom bodywork and paint. The team had an extensive list of fixes they needed to perform on MaxStreet before they started on the paintwork, which included welding A-Pillars and various cracks, doing some patch work, and resolving some rust areas. Motech used Axalta Coating System’s Spies Hecker Raderal Spray Polyester 3508 to help fill in the uneven areas.
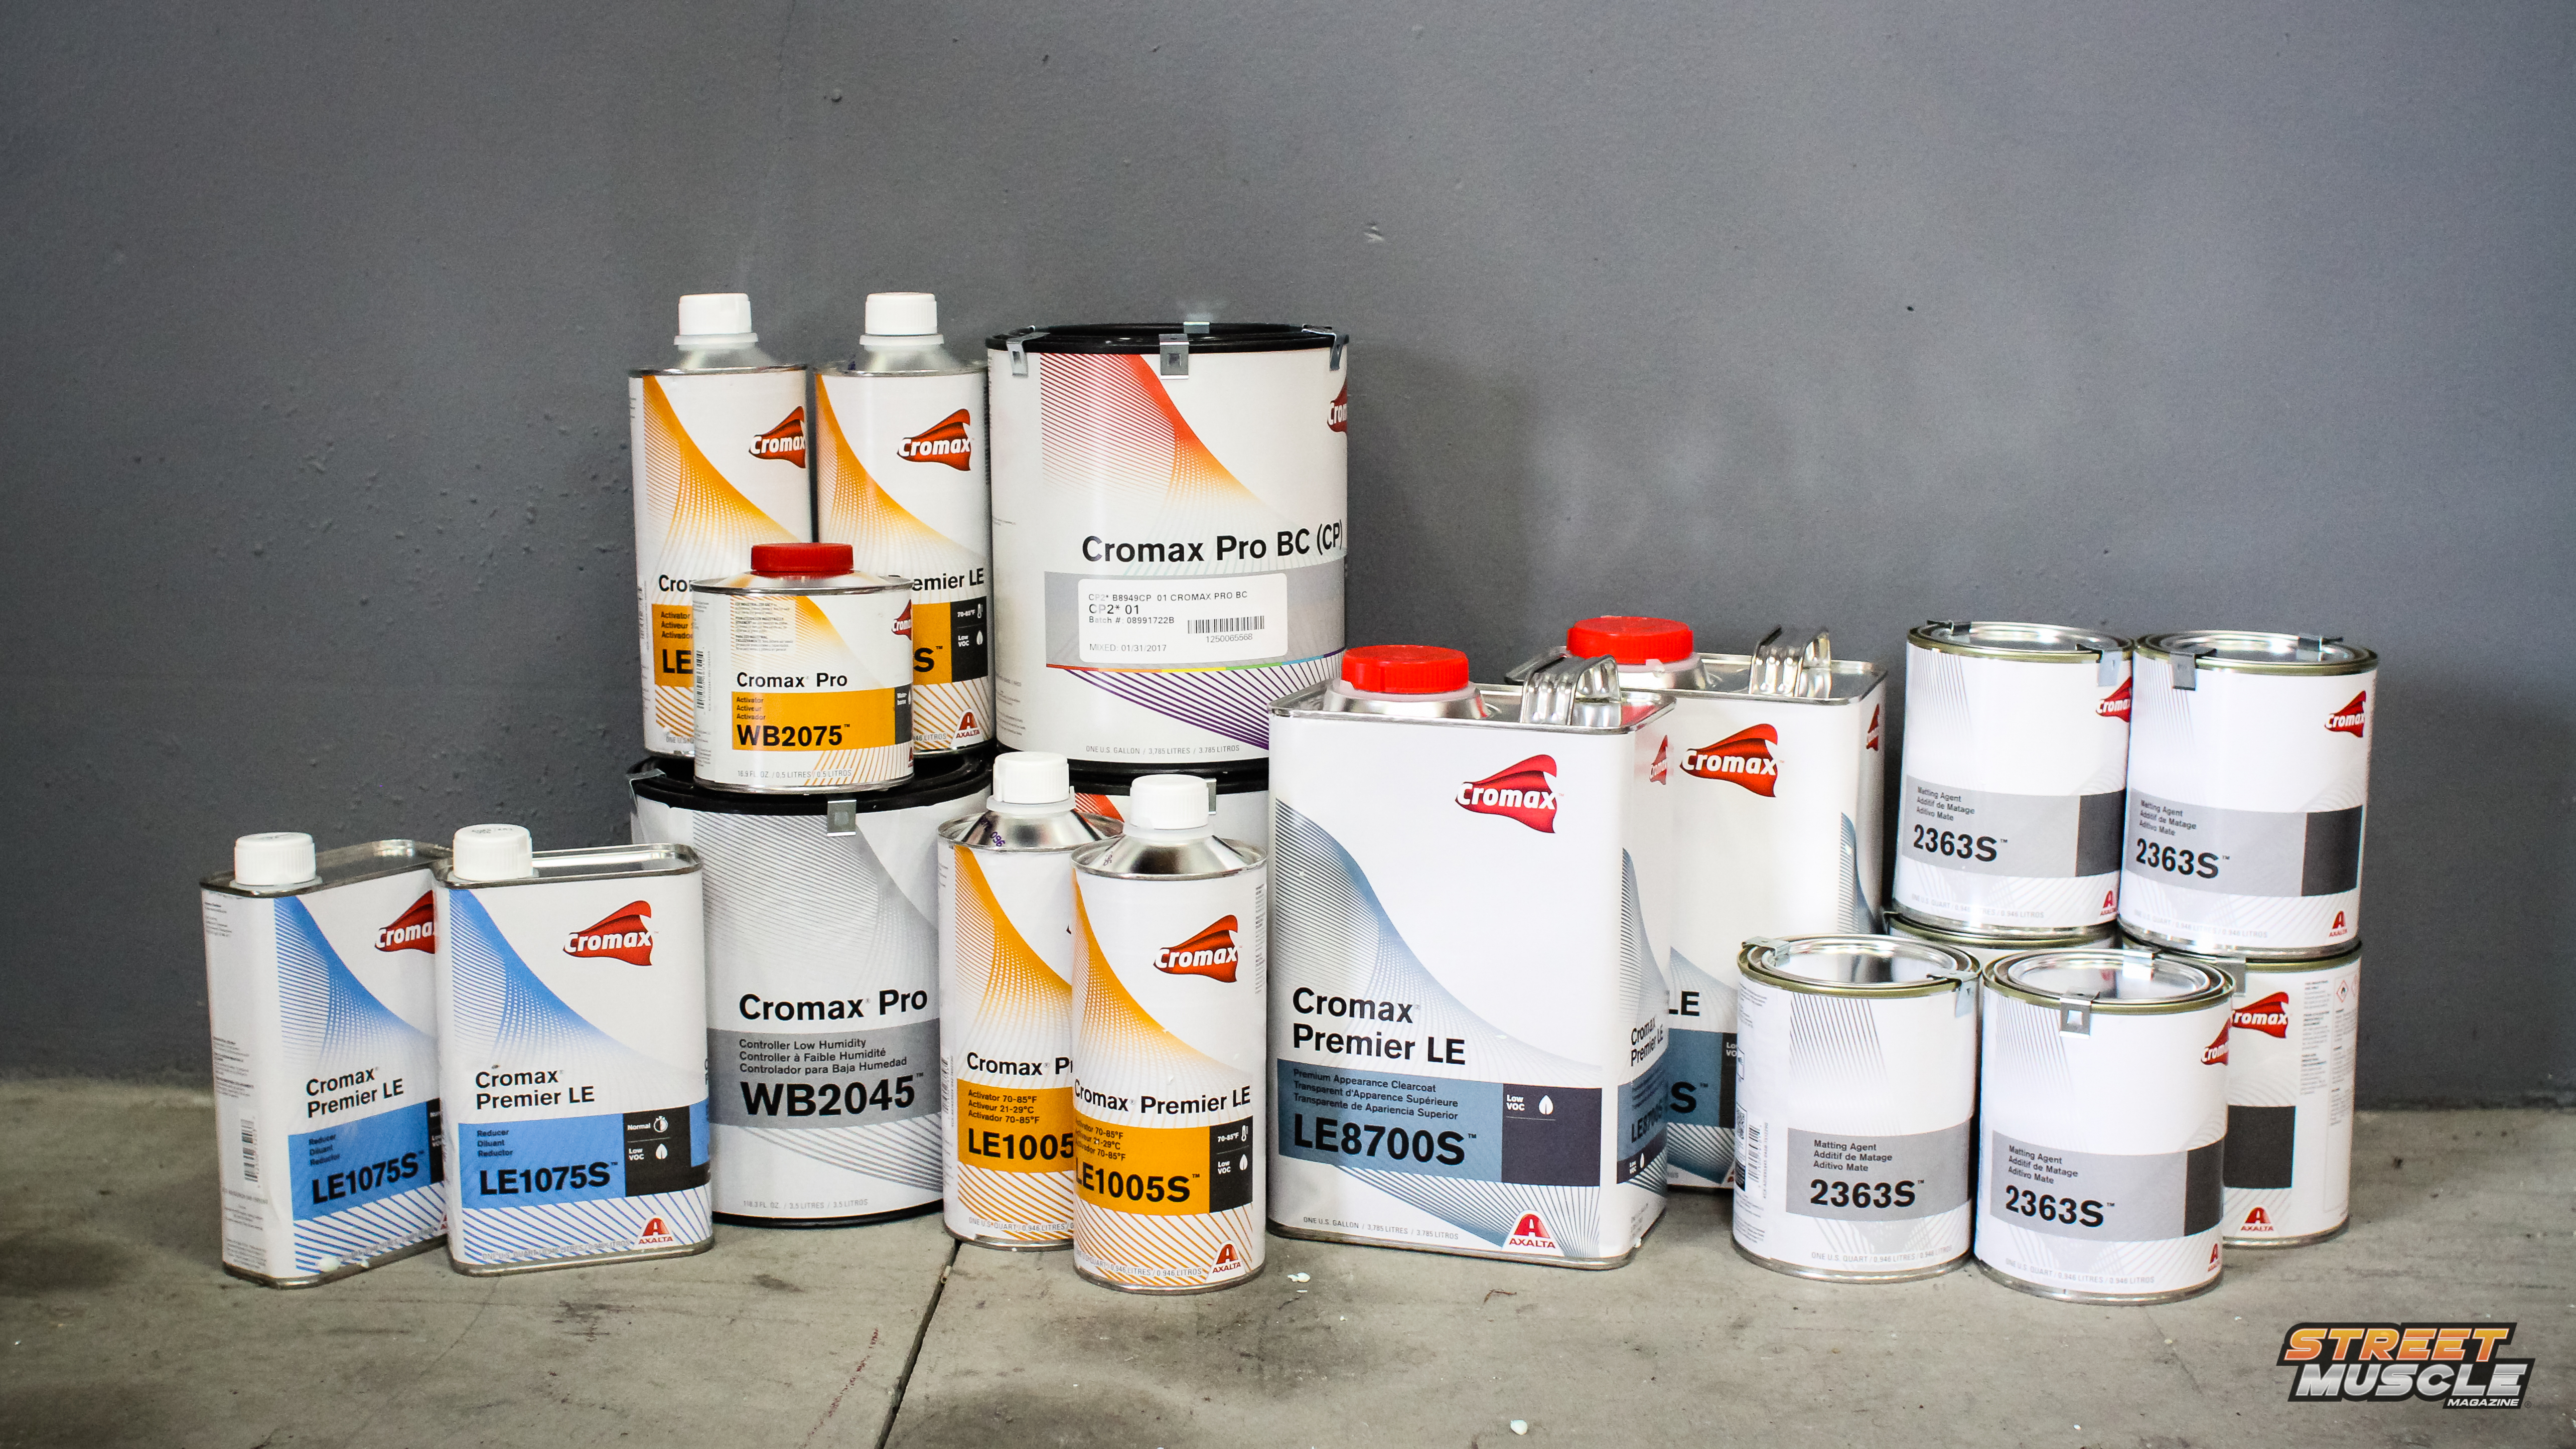
The Raderal Spray Polyester 3508 is a two-pack product based on unsaturated polyester resin from the Spies Heckler “2K-Polyester-system.” It is a very high build spray putty that dries quickly, has excellent sanding properties, and is particularly suited for large straight areas. It’s leveling properties and vertical stability will help with those long straight sides on the old Nova, which probably weren’t straight from the factory to begin with.
A few important tips to note about the polyester is that it not be applied over PVB acid etch primers or 1K primers and it should not be exposed to any moisture — no wet sanding here. For the best results, it is recommended to sand and degrease the surface thoroughly before applying five coats, each 20-mil dry-film thickness, though up to 40 mil is possible if you need to go thicker.
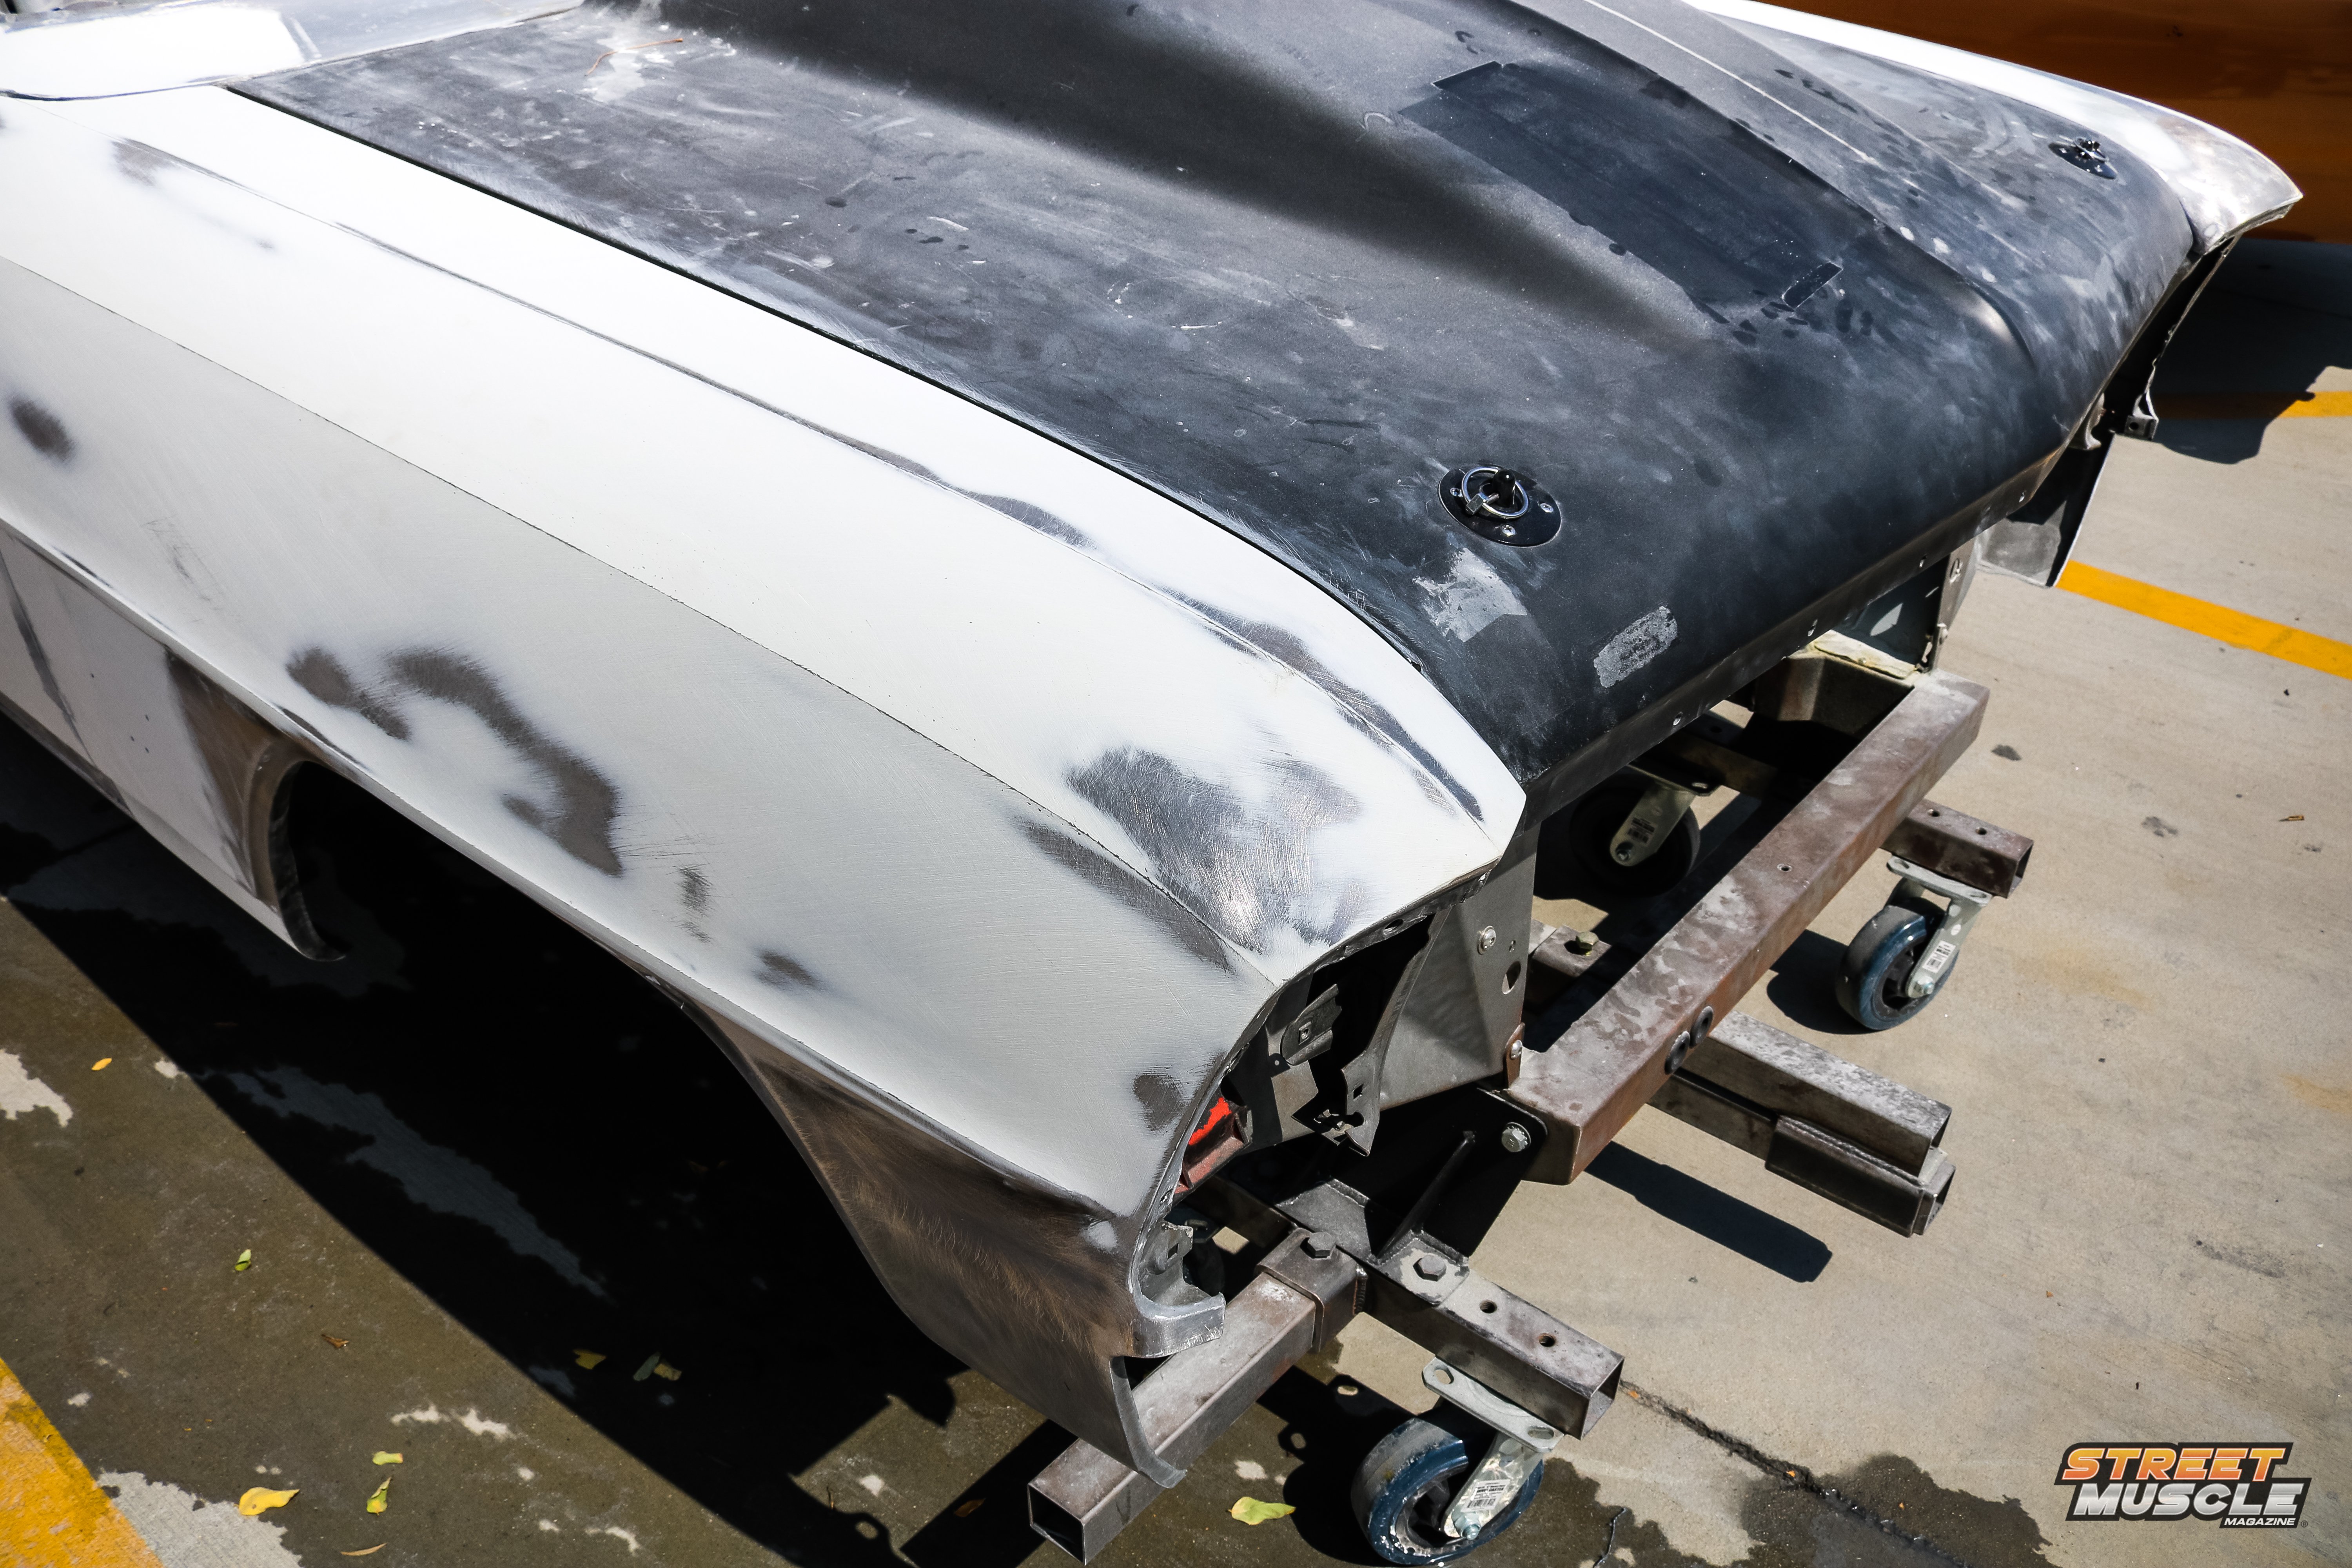
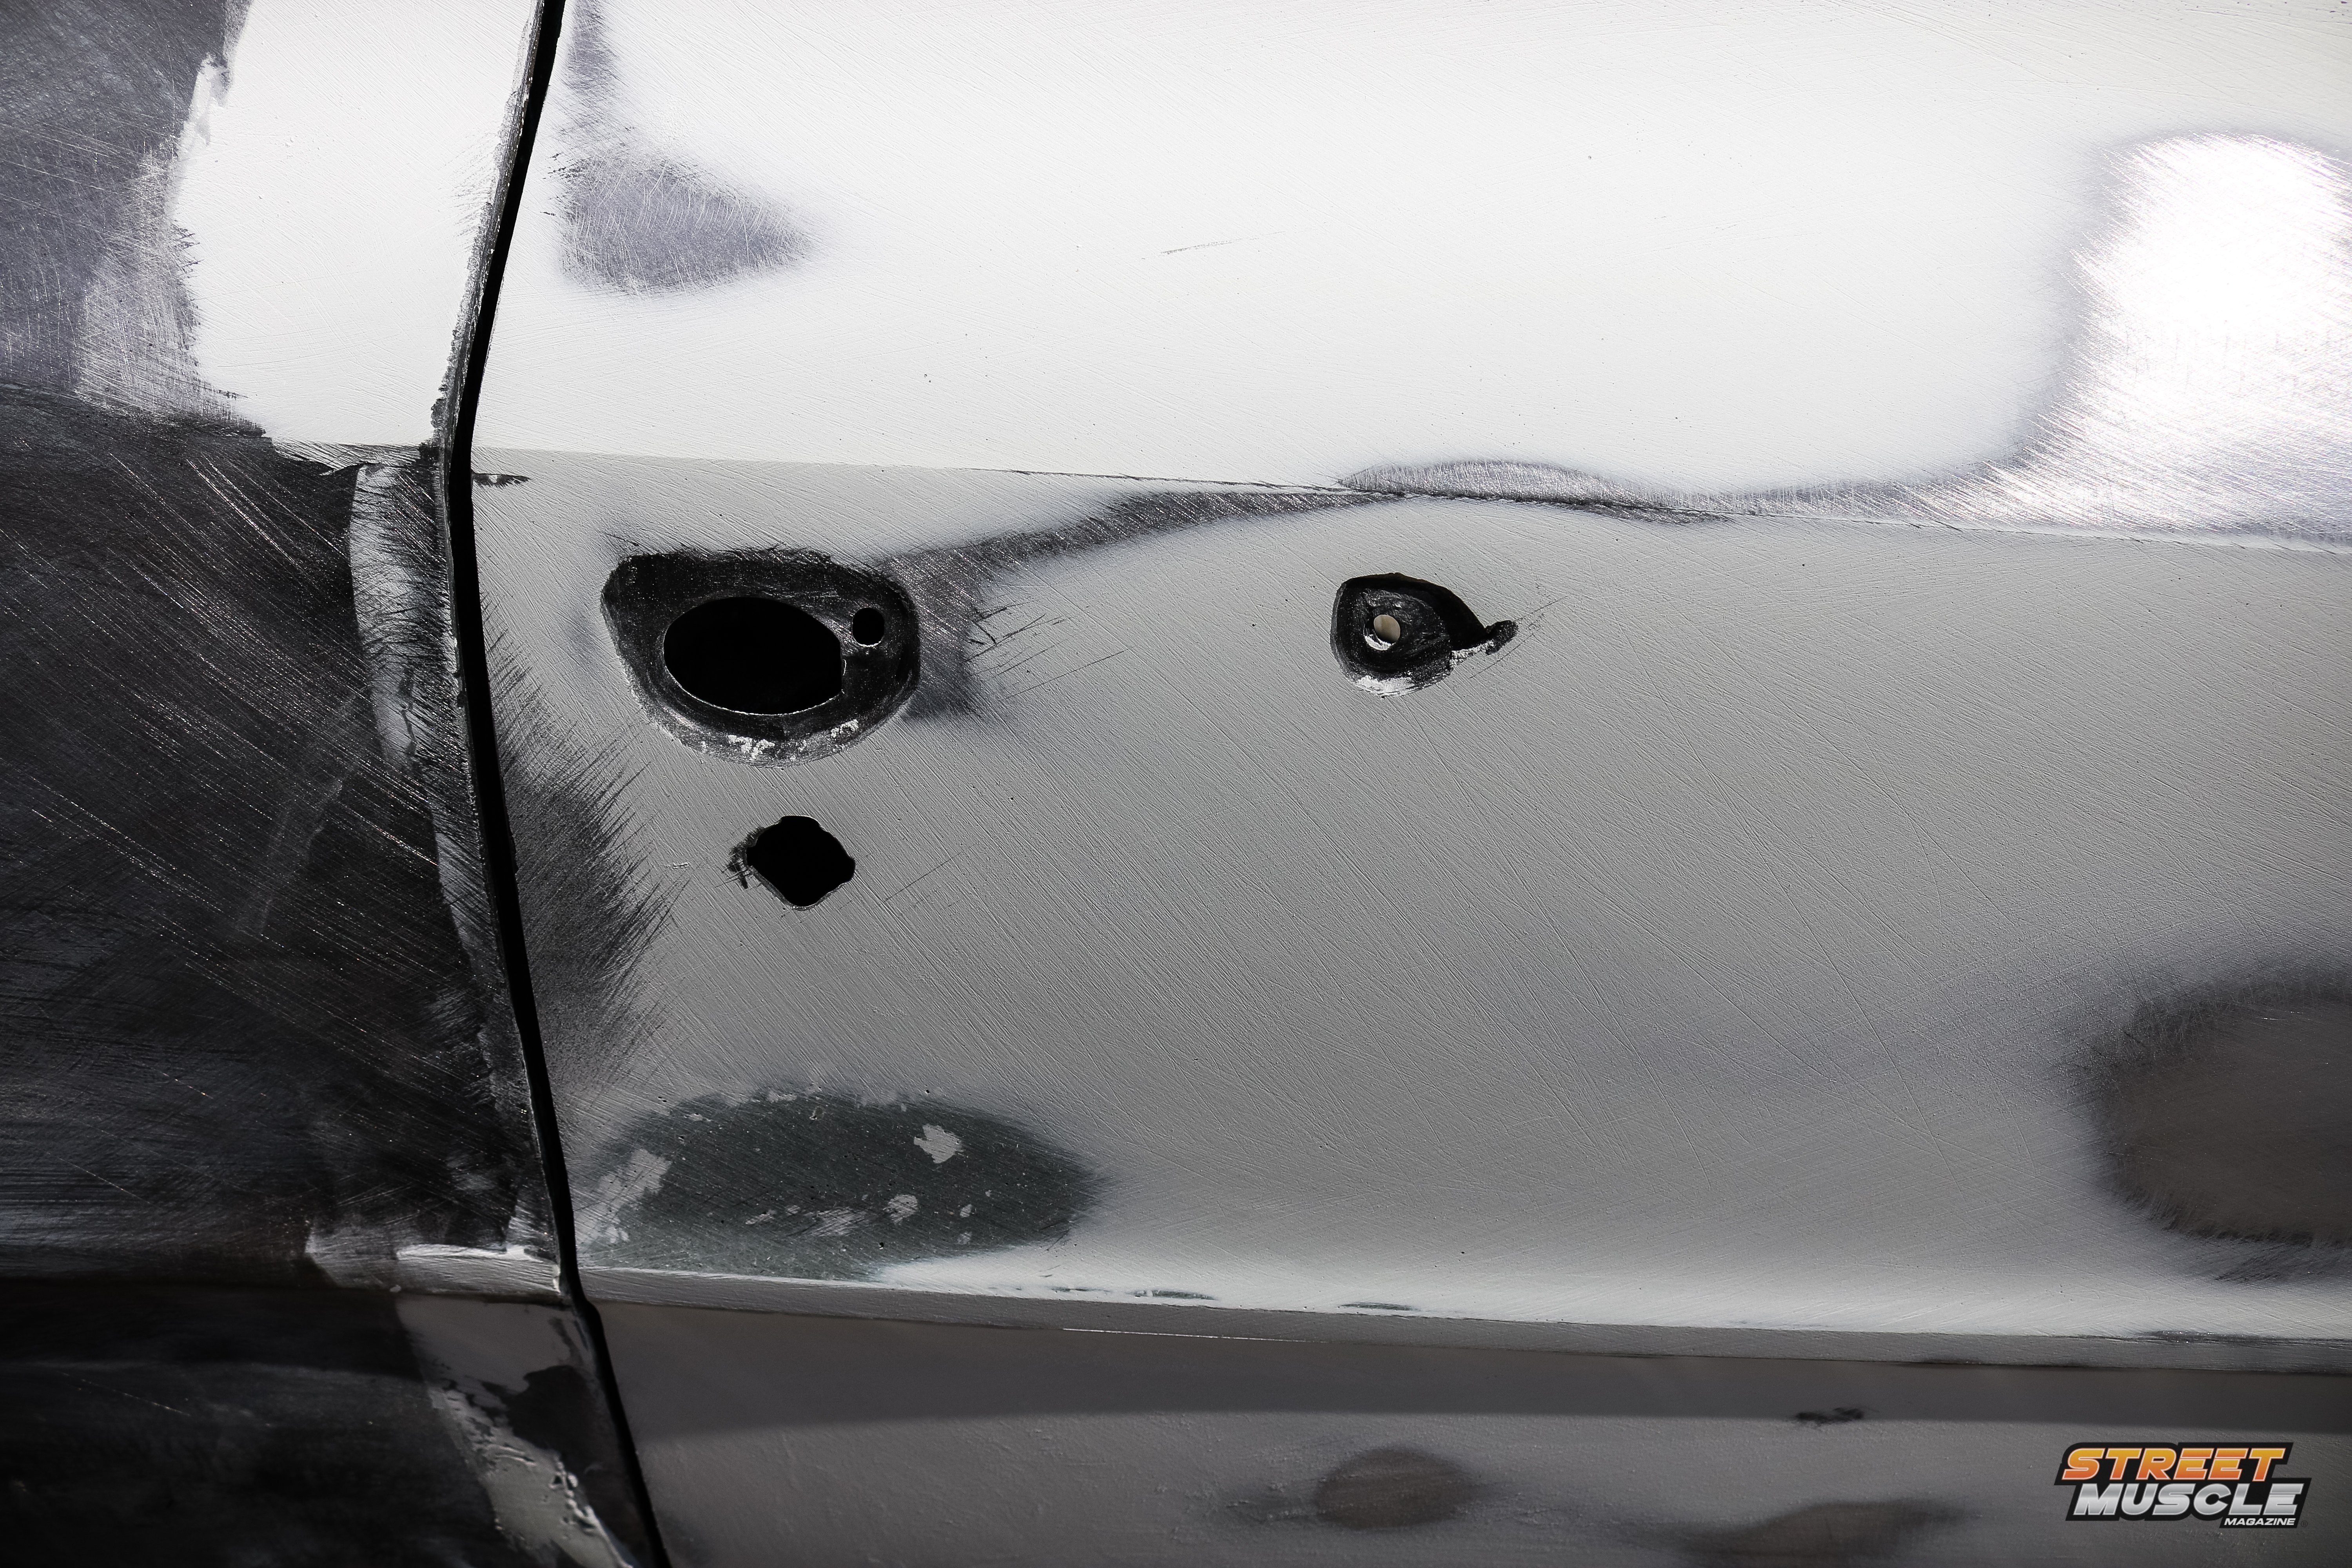
After the Polyester was applied, Motech used 40, 80, 150, 180, and 320 Grit sandpapers from Summit Racing with a longboard to smooth down any imperfections. These steps take time, but if you want to get it straight as an arrow, these are all necessary.
Other materials: Primer and Sealer
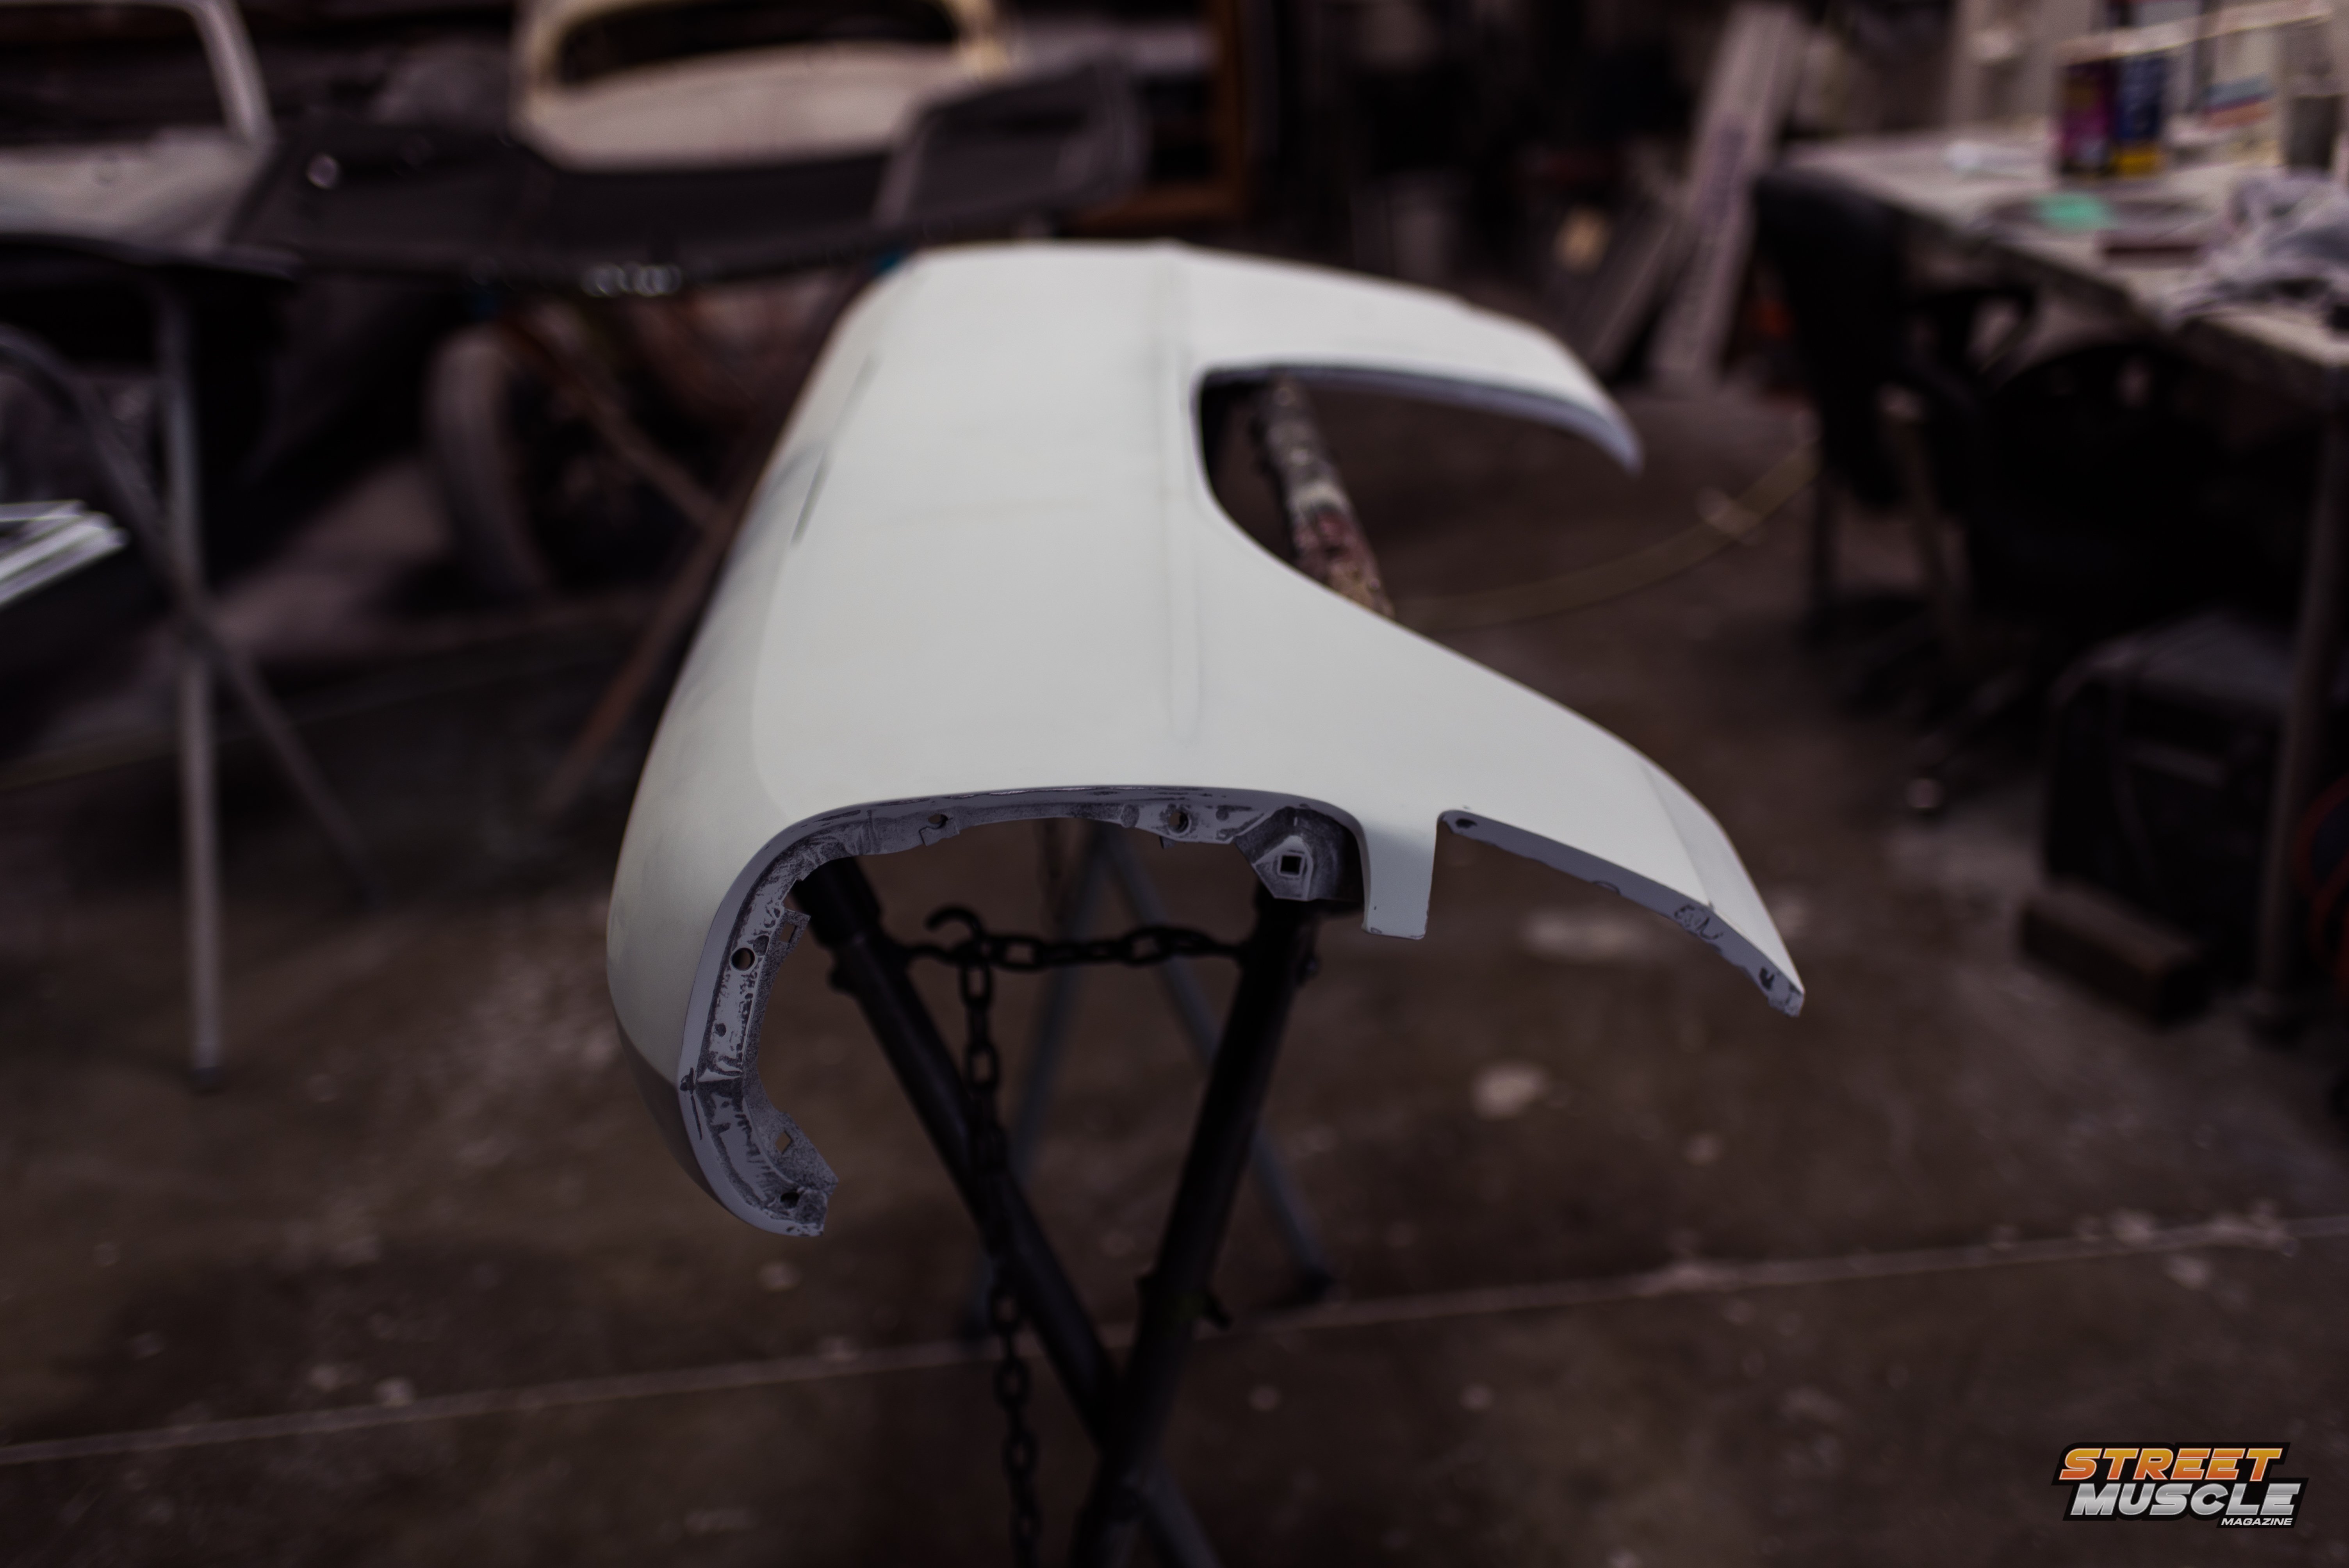
When it came to selecting primer, we stuck with recommendations from Axalta and selected the Cromax 22880S Low Voc DTM primer. This is an olive green, two-component primer. It is a non-sanding etch primer that provides quality results. With exceptional corrosion resistance and adhesion to bare steel (Direct-to-metal), galvanized, and aluminum, it will take care of all metal parts on the Nova.
An extra tip for success from Axalta recommends the primer is hand stirred or agitated on a mechanical shaker prior to mixing. You will also want to stir it thoroughly while adding the activator until the mixture is uniform and make sure the air temperature is above 80-degrees.
Motech applied one medium-wet coat with ½ mil dry-film thickness.
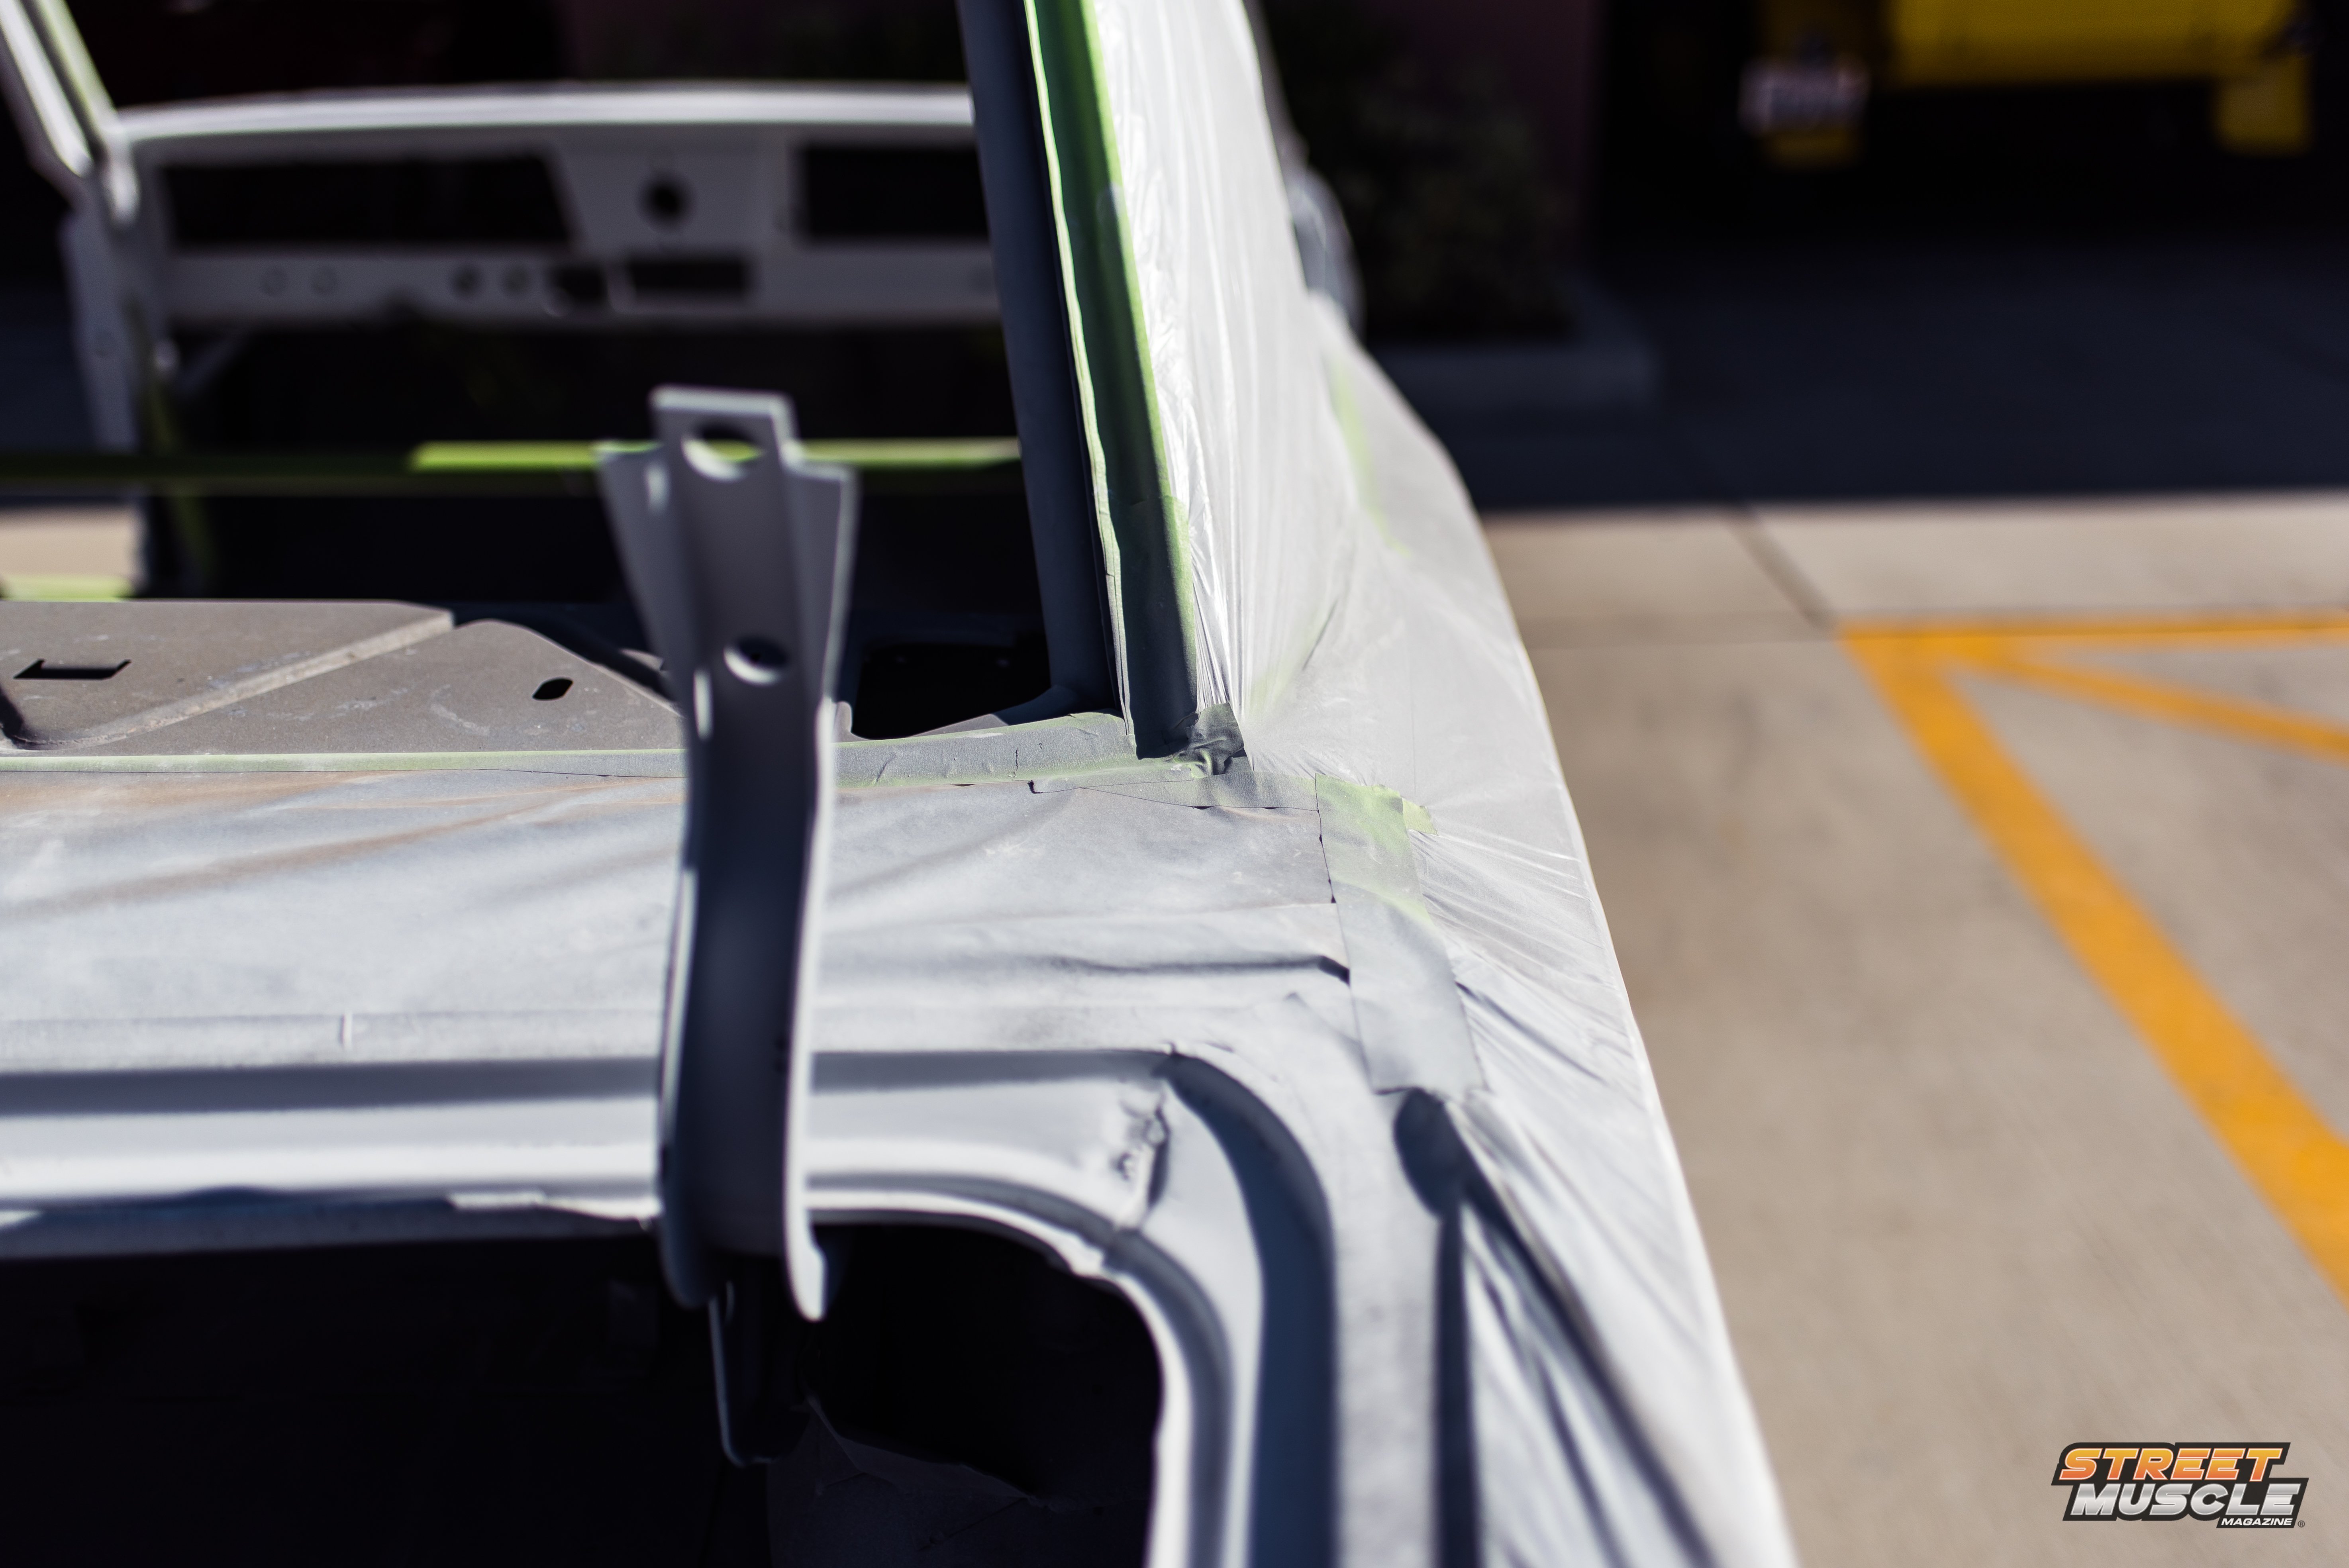
Atop the primer, to keep the top coat bright and prevent any bleed-through either way, Motech is applying Cromax LE3410S Low Voc White Urethane Sealer. The sealer is VOC compliant and is designed to provide excellent flow and leveling for spot and panel repairs. It delivers an exceptional topcoat adhesion with minimal overspray during application.
Special recommendations from Axalta here include maintaining thorough agitation by placing it on a mixing machine. Mix it using a mixing stick and a cup with straight sides for accurate measurements to ensure you achieve the stated product application and performance.


The sealer is best applied to a painted surface that has been thoroughly cleaned with mild detergent and water. For substrates other than unprimed plastic or fiberglass, Axalta recommends that the the surface is wiped with surface cleaner prior to application. You will want to finish sand with a DA sander with P400, P500, or P800 grit wet paper, then remove any sanding sludge with surface cleaner.
Axalta Paint to come –
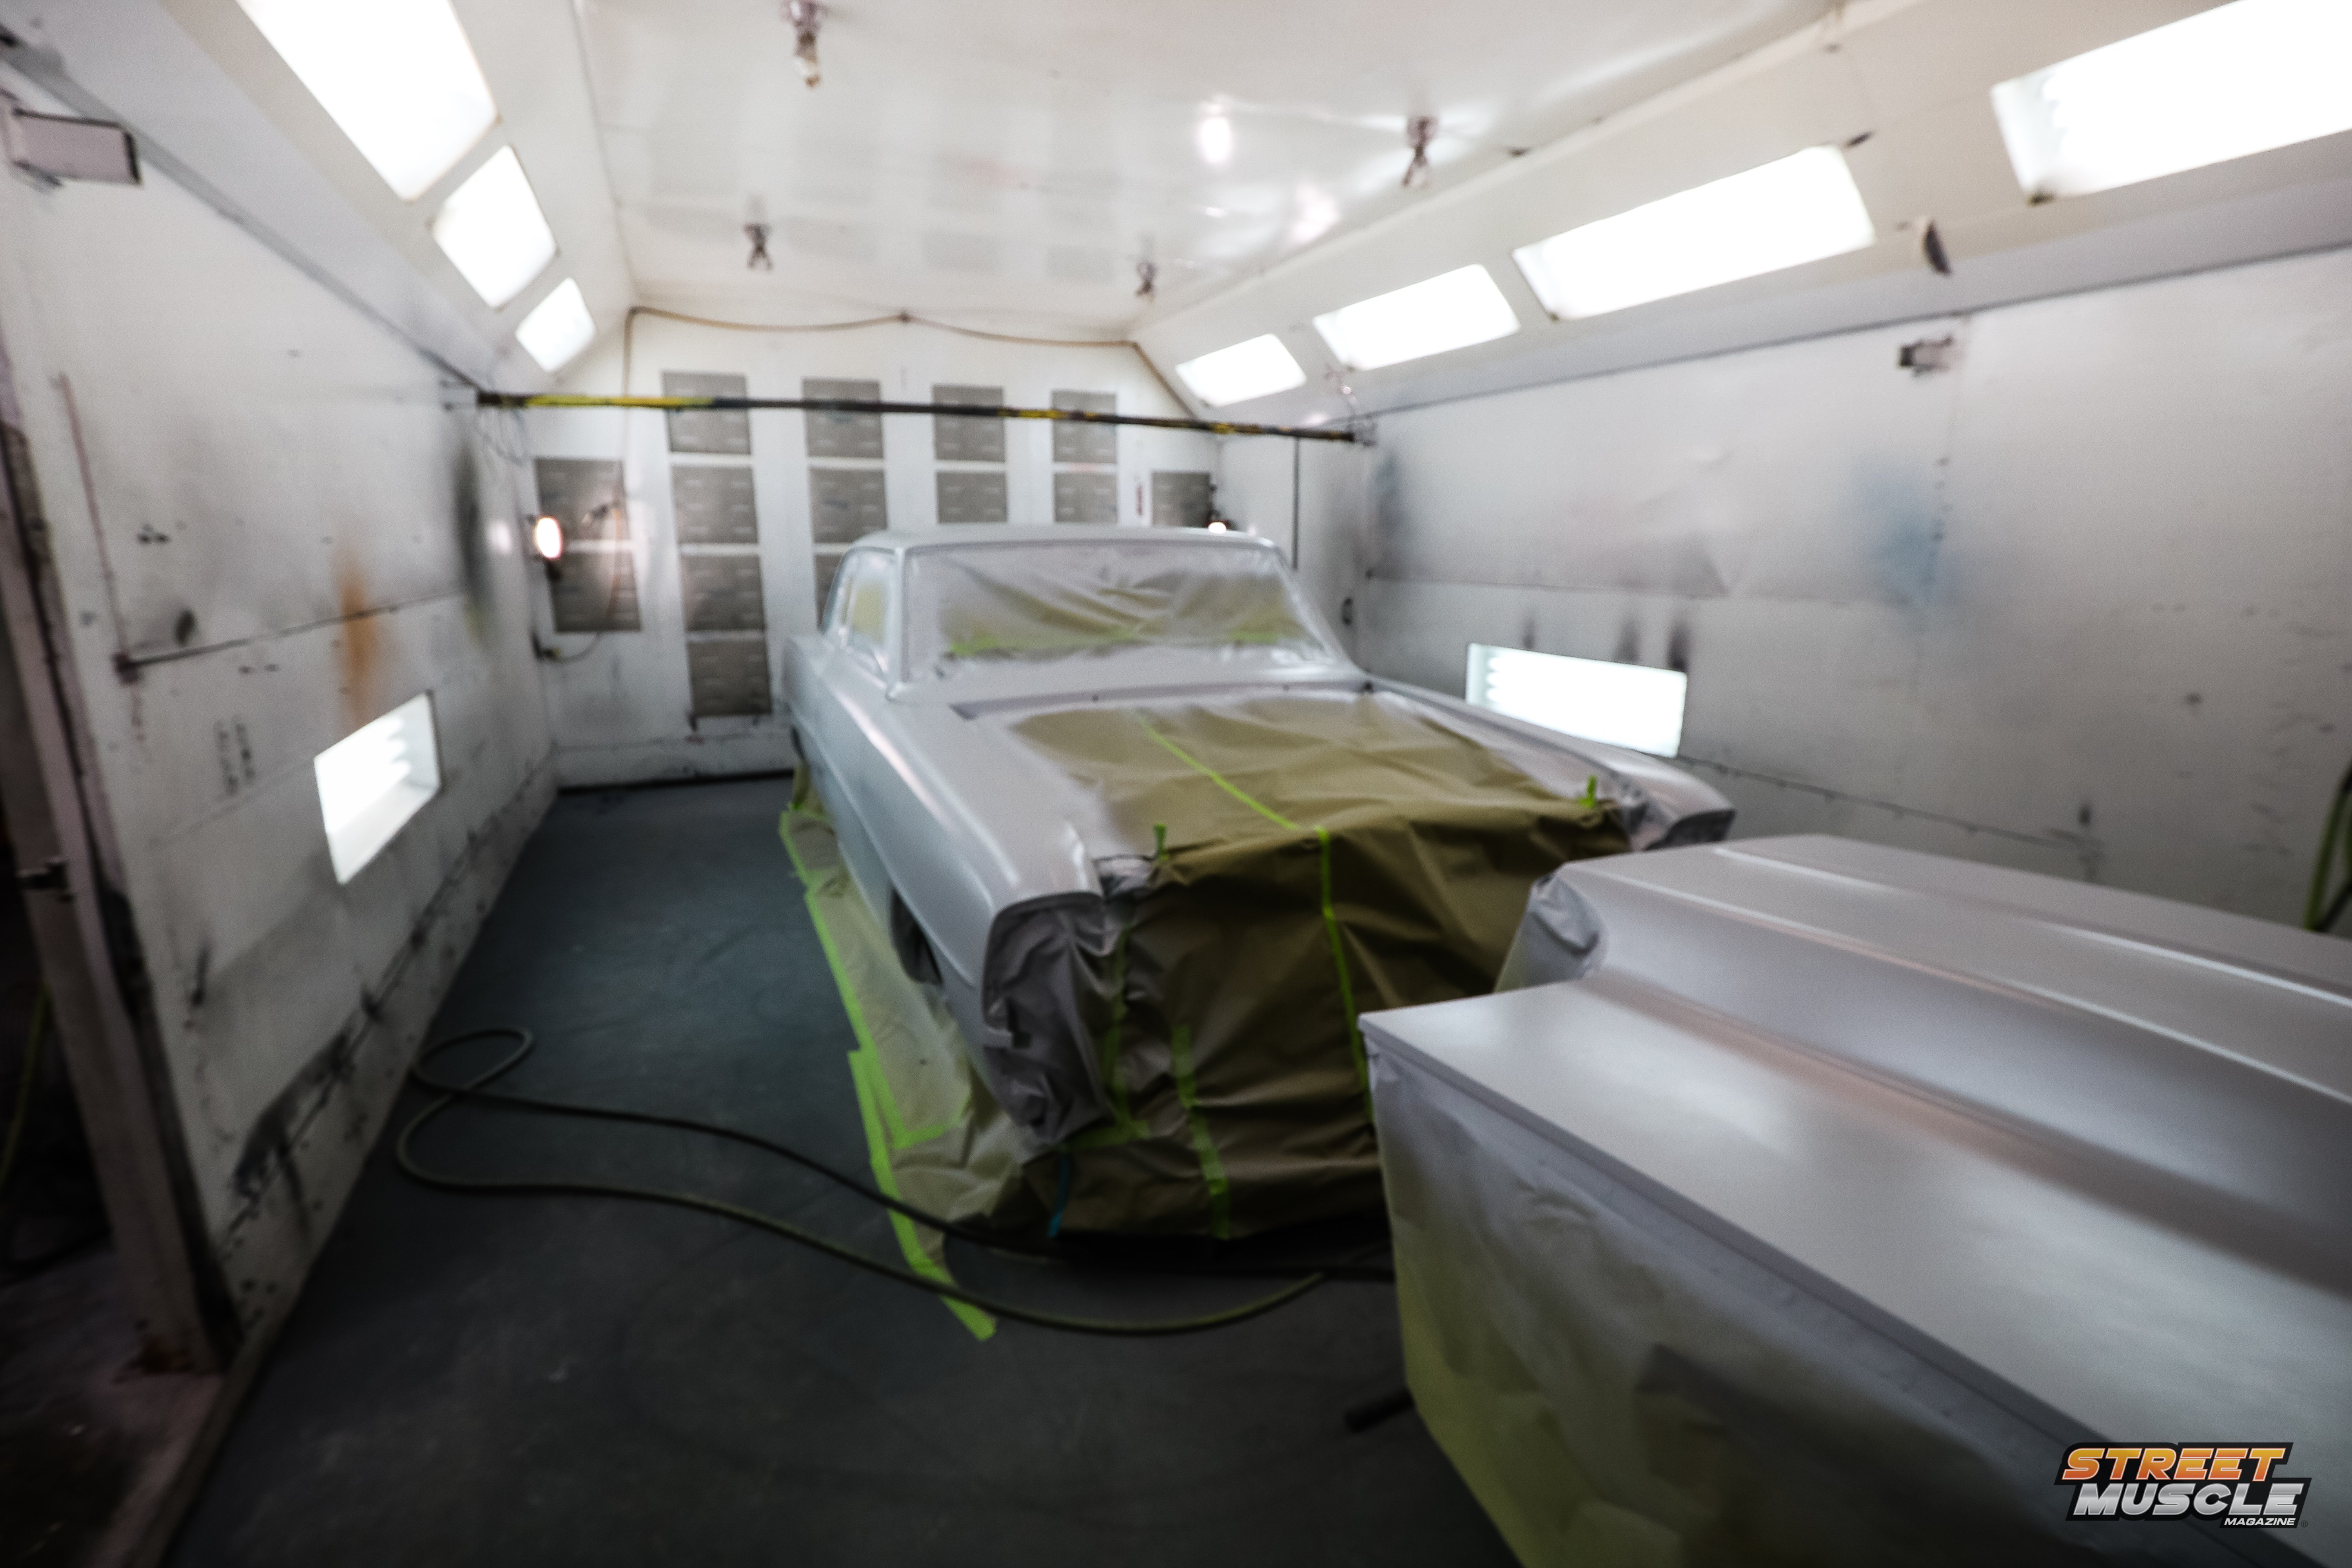
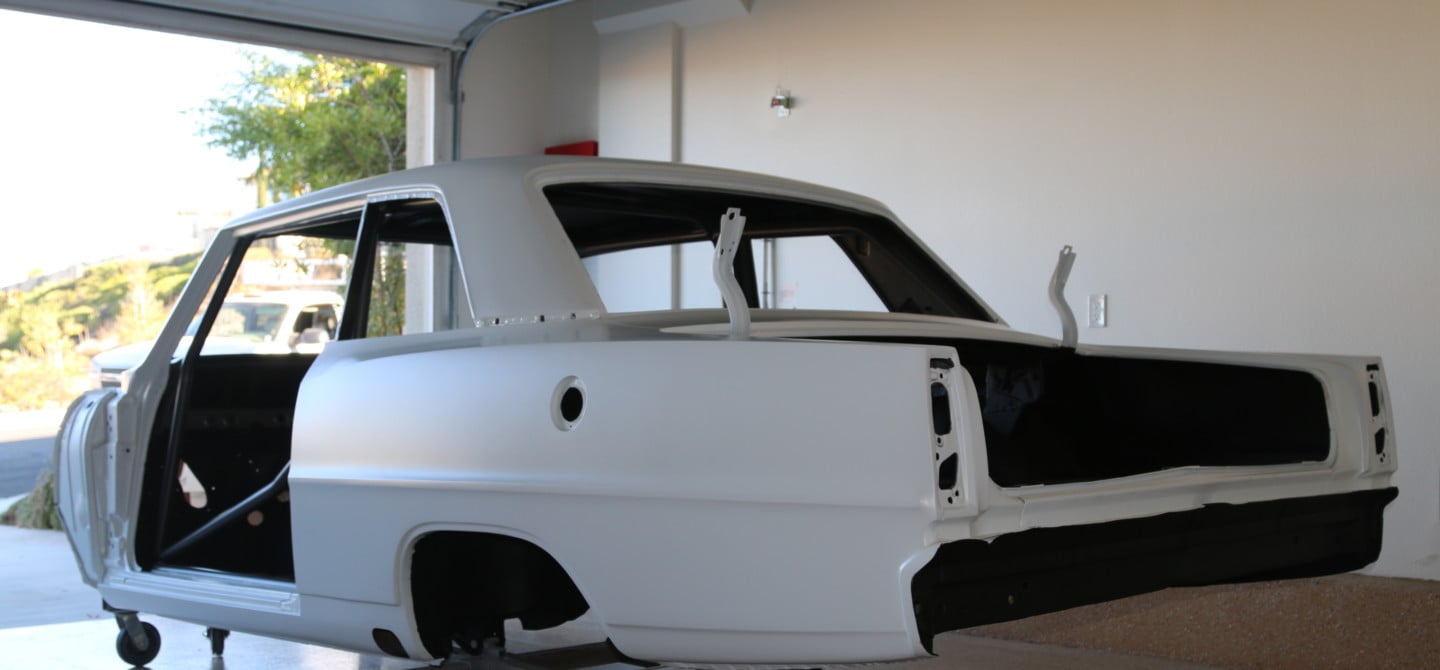
In case the white sealer didn’t give it away, we decided to paint MaxStreet in 2016 Corvette Arctic White on all of the exterior body panels, inside the trunk lid, under the hood, and inside the car on the dashboard, door sills, and door jambs.
To highlight the roll bar, and some other interior areas, we decided to use 2016 Corvette Shark Gray Metallic just to give it some nice contrast with the white exterior.
Currently Motech is in the final prep stages and has covered different sections of the car up to the sealer stage. They still have a little bit of work left to go, but we expect the car to take up residence in the paint booth to get the top coats very soon. Stay tuned!


July 2017-September 2017:
After MaxStreet hit the rollers for a couple of test and tune runs on our Dynojet 224xLC dynamometer, it was time to shift focus to repairing some of the bodywork on this build to get it ready for paint. Our plan was to drop off MaxStreet and Motech Performance in Murrieta, CA. The team at Motech has their own in-house paint shop and is equipped to handle everything from panel replacement to custom fabrication. But before we could do that, there were a couple of in-house requirement that had to be performed before we could drop the car off for paint.
MaxStreet Engine and Drivetrain Removal
Before we were able to drop off MaxStreet for paint, we removed the engine and drivetrain. From the team proceeded to trim the rings on the exhaust and fill in any sheetmetal holes that remained in the floorboard. We then filled in the remaining areas that needed to be addressed and MaxStreet was ready to head to Motech.
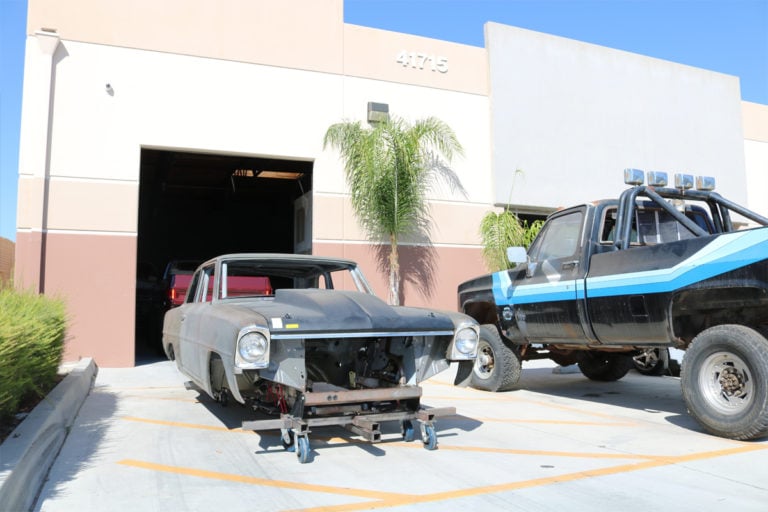
MaxStreet is off to Motech!
The big day was finally here. Our project MaxStreet was finally being picked up to be dropped off for paint. While many people may consider installing performance parts onto your next project vehicle the most important part of a project, sending the car off to paint was actually one of the more stressful and exciting parts to this build so far.
Finding the right color for your muscle car build can either make or break this vehicle. And if you are still unsure of which color combination you want to run with, once it’s sent off to paint it usually a done deal. Which is why many builders are opting to doing full vehicle wrap’s to change the color of their builds.
But we were confident that we found the right color combination to match what MaxStreet is all about so it was time to load the car on the trailer and delived it to Motech.


MaxStreet Arrives At Motech Performance
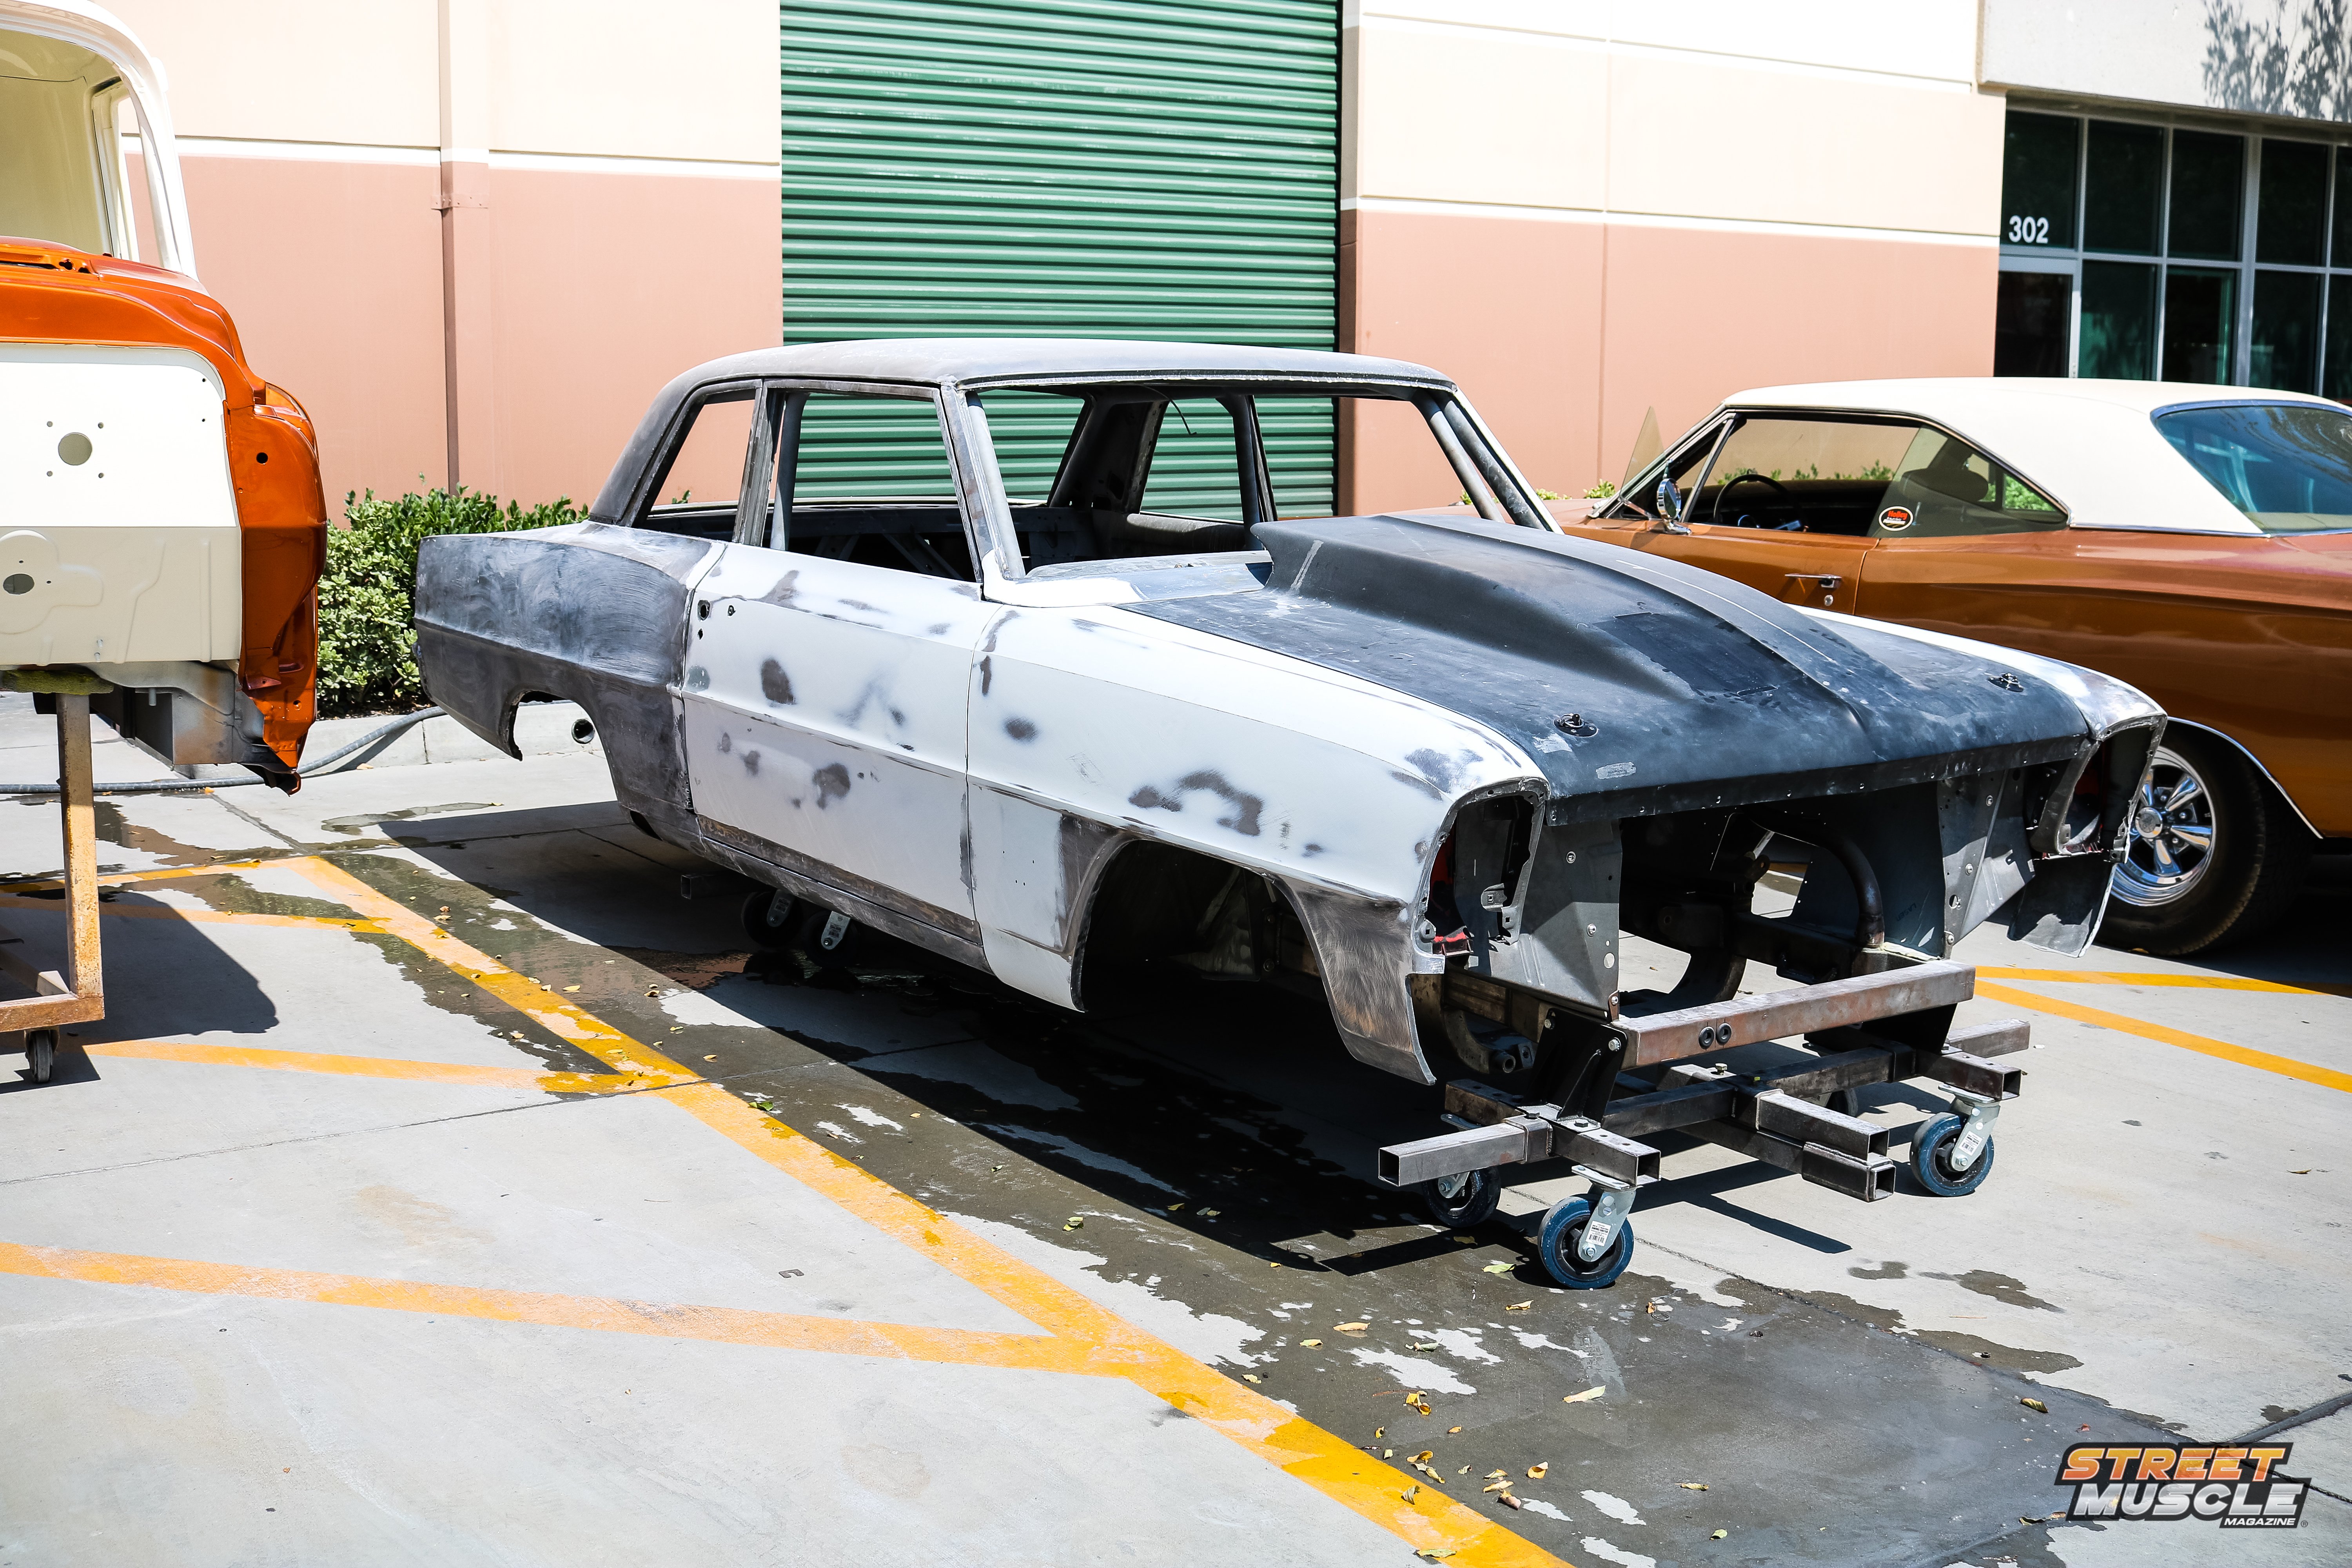
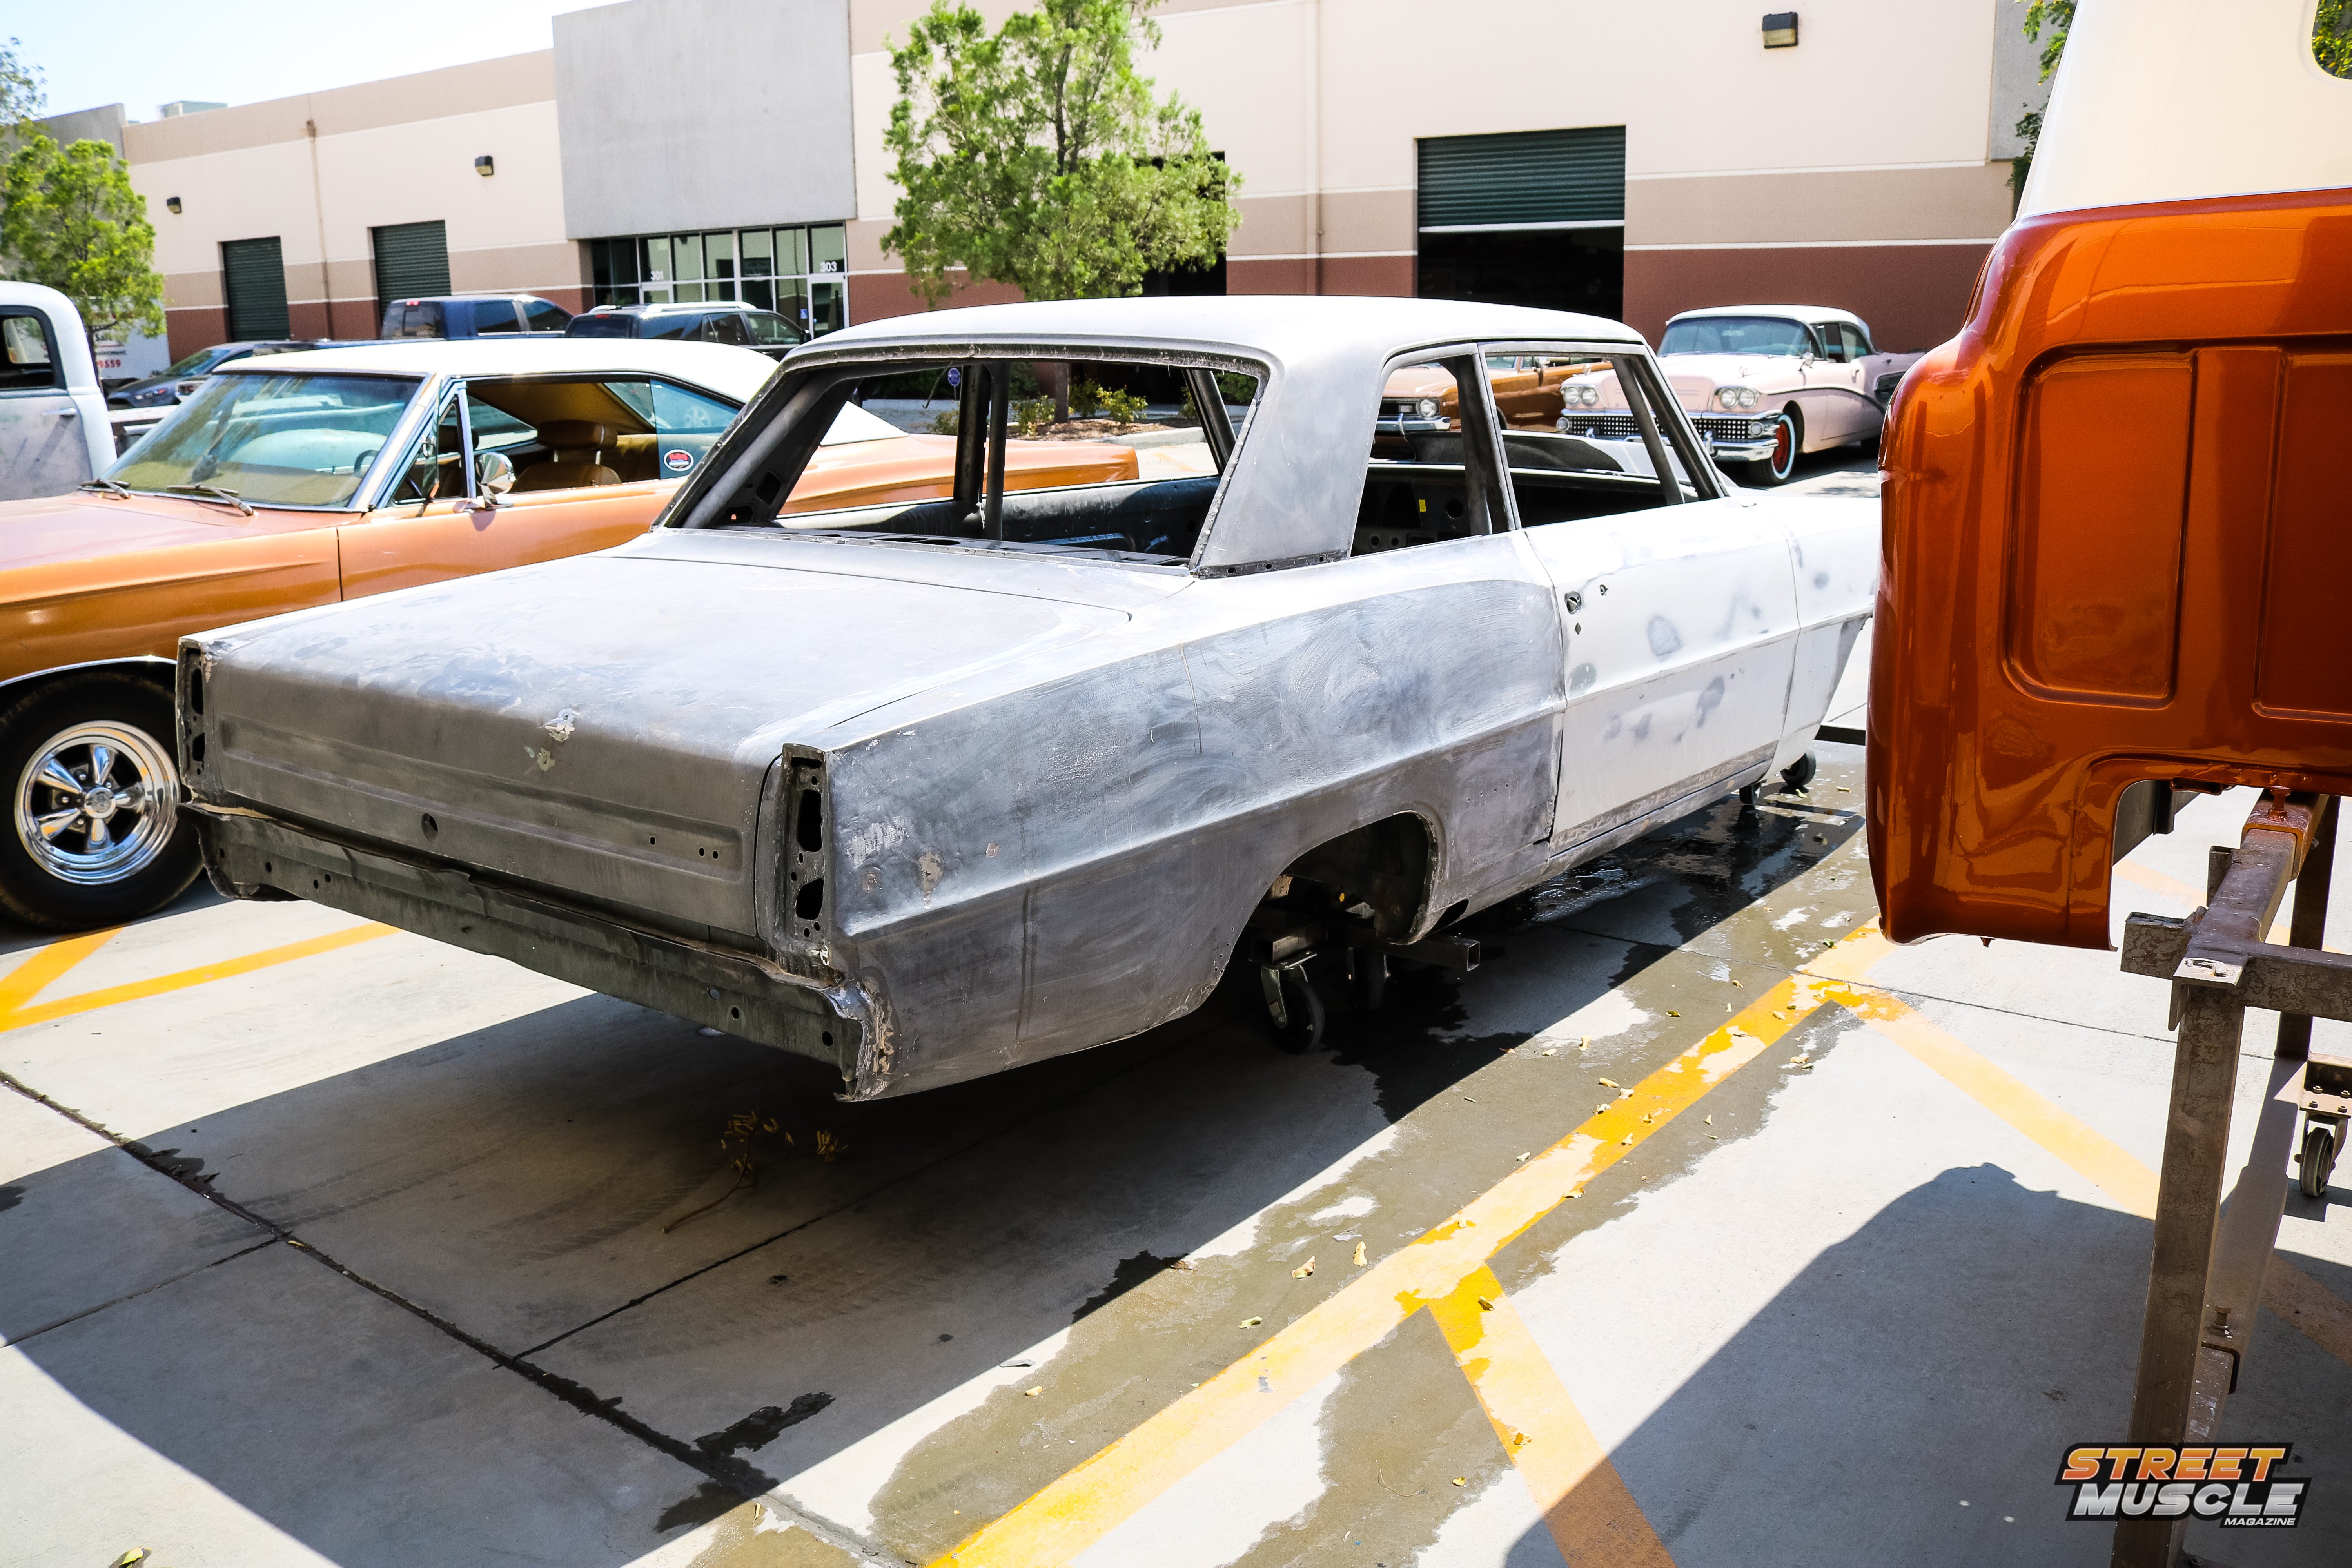
Once we dropped MaxStreet off at Motech, work began on getting this 1966 Chevy Nova II ready and prepped for paint. The team fully inspected the vehicle once it was delivered and came up with a game plan on how they were going to tackle this stage of the build.
Pre-Paint Work at Motech Performance
As we said earlier, Motech Performance is a one-stop shop when it comes to custom bodywork and paint. The team had an extensive list of fixes they needed to perform before they started on the builds paintwork to include:

- Welding A-Pillars
- Welding cracks on inner door “B” pillars
- Patching the damaged right door
- Gap right corner of trunk
- Patch rust in rear window corner
- Weld dent on Trunk Lid
- Weld dent on Left Corner
- Weld Dent on Left Door
- Weld rocker trim holes
- Weld inner Left door below door handle
- Replace lower right corner panel
- Weld up holes on Firewall
- Finish Welding cage at “A” Pillar bar to firewall
- Finish Welding Dash
- Final grinding
As the repairs were being made, the team at Power Automedia was able to stop by and snap the updates photos duing this stage of the build.


November 2016-June 2017: Hitting The Rollers For The First Time
If you’ve followed along with MaxStreet, you know that the saying “Rome wasn’t built in a day” applies. When you’re putting this kind of power to a compact Nova, you want to make sure everything is done right, and we have been taking our time with this build to make sure we do our best to make it worthy of its name.
We called out to our friend David Page from Fuel Air Spark Technology (FAST) to help out with the initial tune when we decided to put Max on the rollers. At that time, Joe Trujillo – now one of our techs – came down from Westech Performance to assist with the laptop duties. We weren’t quite ready to put the full tune on it just yet (back to that ‘Rome’ thing) so the initial run was to set up the FAST XFI 2.0 system.
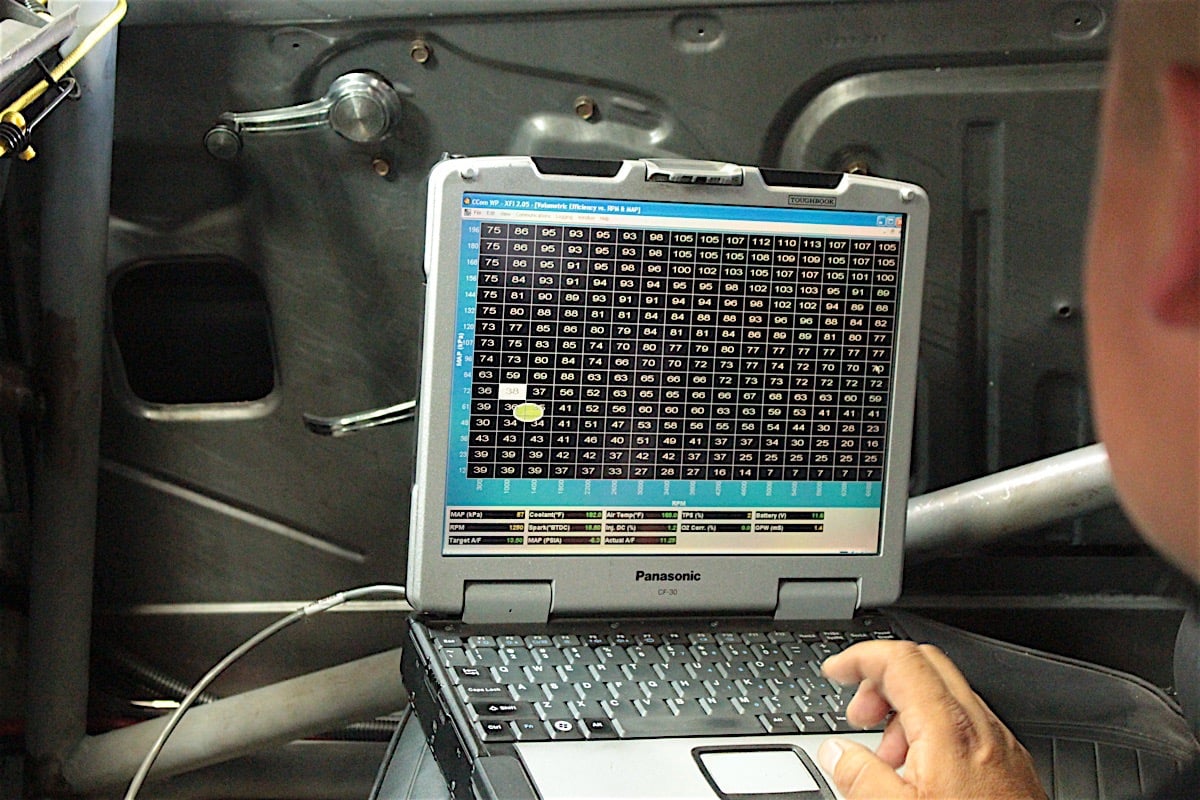
Unlike the self-tuning EZ-EFI system from FAST, the XFI 2.0 is a fully tunable system that requires user input, a laptop, and the skills to map out the fuel curve and program your EFI.
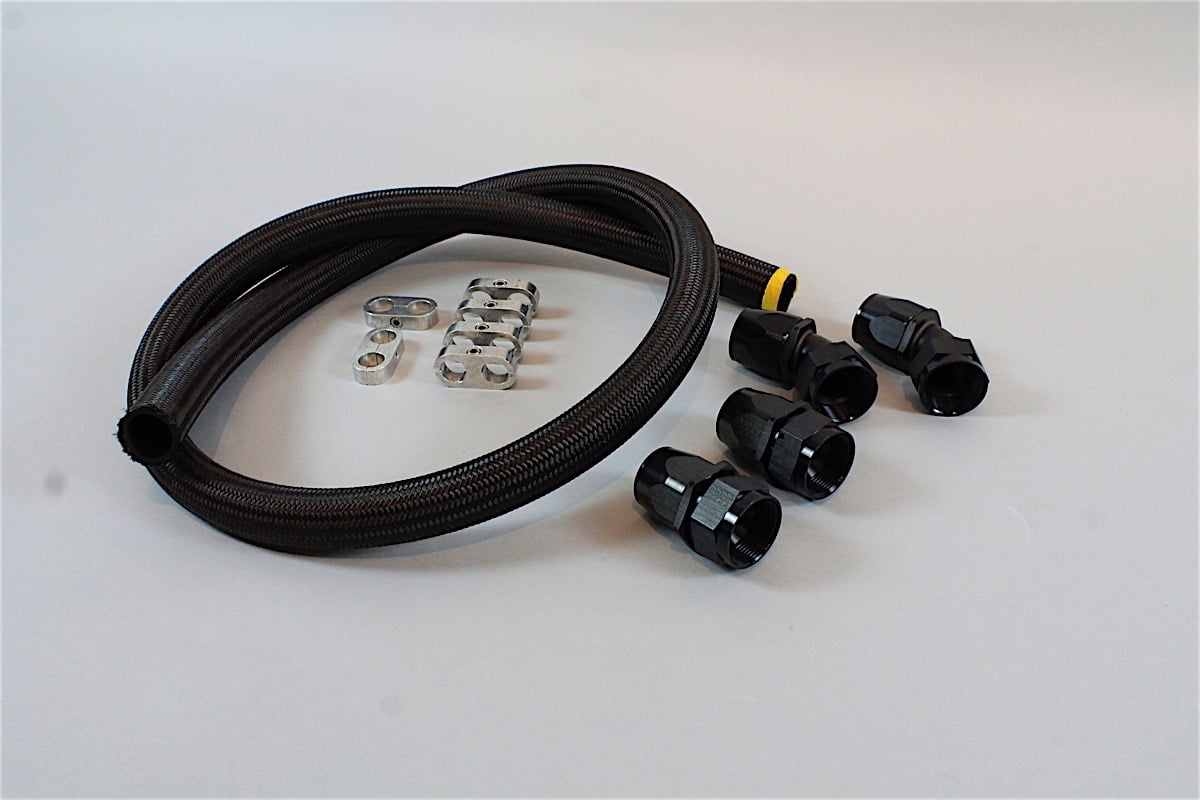
The first order of business was to double-check all of our systems and make sure we had everything in place. The car was rewired (loosely) with a Ron Francis wiring kit that later gets removed so that Max can go to body and paint, and we called on Holley to help us with Earl’s fittings and UltraPro series black polyester braided hoses to handle the duties of connecting our AFCO radiator to the Edelbrock/Musi big-block Chevrolet.
With all systems in place, MaxStreet was fired up for the first time and the laptops were lit up with graphs and charts as Joe and David plugged in to give the Nova a base tune for the first run.
As you can imagine with this type of build, a Snow Performance water meth kit was enlisted to help keep things a little cooler in those explosion chambers once the F-2 ProCharger starts putting serious power to the induction system.
For a first run after our initial tune, an impressive 900.0 horsepower and stump-pulling 799.1 lb-ft of torque was achieved by MaxStreet.
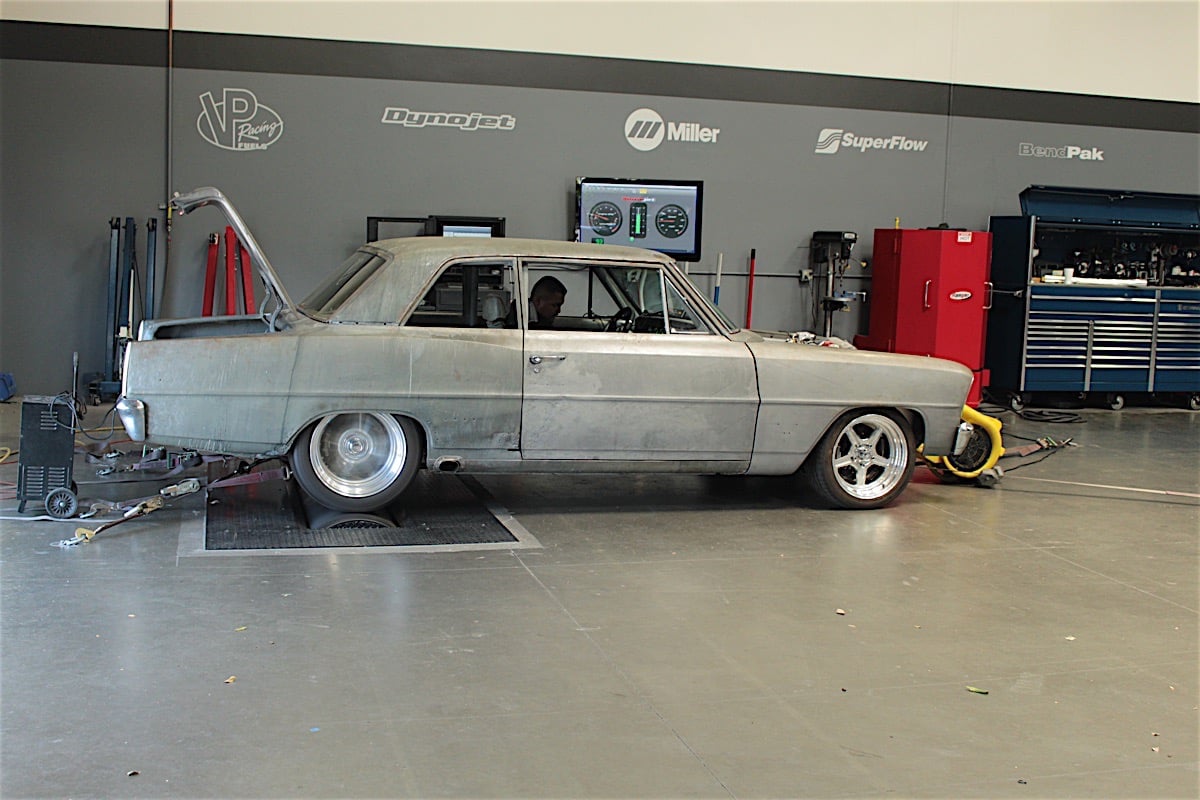
After a couple of test and tune runs on our Dynojet 224xLC dynamometer we were ready to push the pedal just a little more and see what MaxStreet could do.
As they say, you have to learn to walk before you can run, and our ’66 Nova walked across the rollers putting down some big numbers. The combination was good for an initial run of 900.0 horsepower and 799.1 lb-ft of torque; with a little more tuning and some finesse, we estimate we’ll be seeing another hundred or so more to the rear wheels – the “Max” part of MaxStreet.
For now, however, MaxStreet is going on another sabbatical while the body and paint gets done, as well as the new TMI interior that will complete the “Street” part of MaxStreet. Until then, you can check out the dyno run and learn a little more about the FAST XFI 2.0 self learning EFI system HERE.
June 2016: Stopping Before We Get Started
 We’re just a few days away from getting MaxStreet fired up for the first time with the new blower, and we’ve got a bit of tuning that will need to be done by our friends at FAST. We’re not sure if we’re quite ready to take Max around the block, but if all goes well with the first fire-up, it’s going to be very tempting to take this old Nova out into the parking lot and see how it does. Of course, there are a few details that needed to be ironed our first, and one of those minor details meant that it was high time we put some fluid in the Wilwood master cylinder.
Because this car is every bit the custom build, that meant custom brake lines, too. There was no way we were going to put a stock brake line on this car, so we reached out to Classic Performance Parts to supply us with all the hardware we needed to get some fluid pumping through Max’s veins. This meant planning out the brake lines and securing them to the body, and clamping it all down tight. There are lots of choices, but stainless steel brake lines and braided hoses was the way to go for MaxStreet and CPP helped us get one step closer to providing the whoa for all that go.
April 2016 – The Missing Link
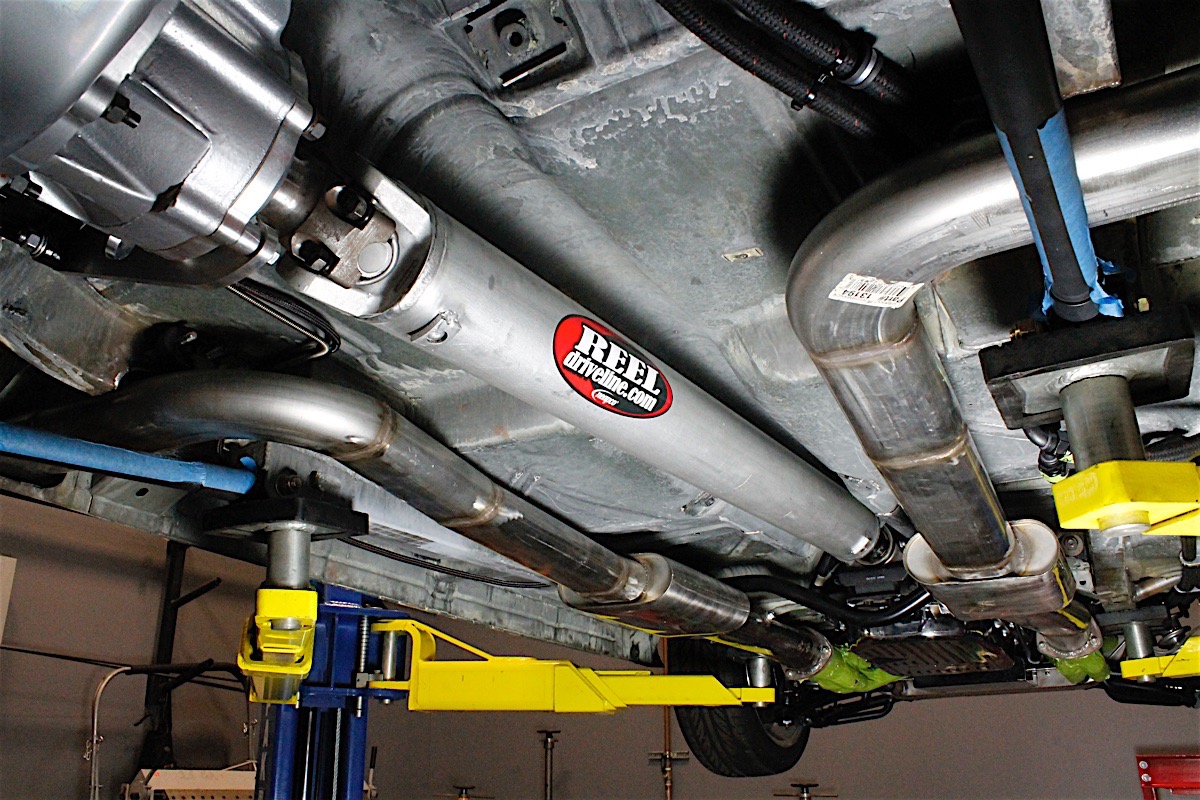 One link that was missing from this build is a way to get all that power from the engine and transmission to the Moser rearend. For that task, we needed a good, strong and lightweight driveshaft to be custom-built.
Though many might think that this calls for the Superman of driveshafts, with U-joints made of titanium, the experts at J. E. Reel Driveline assured us that the 1350 style joints would work just fine – even with our 1,100+ horsepower.
We carefully took all the necessary measurements, and picked the proper flange styles as shown on the downloaded spec sheet from J. E. Reel, and ordered our new link from the TCI Automotive six-speed to the Moser rearend with a Ford nine-inch differential. While there are a few more details necessary to get this beast rolling, we’re about ready to fire it up and with this missing link… we’ll be able to take it for a short test drive, too. READ THE FULL ARTICLE HERE.
February 2016 – Adding Electrical Power
 One of the most overlooked parts of a custom build is sometimes the wiring. Keeping in mind that this is a custom build and not a restoration, it’s easy to just rip out all the old wiring and start all over.
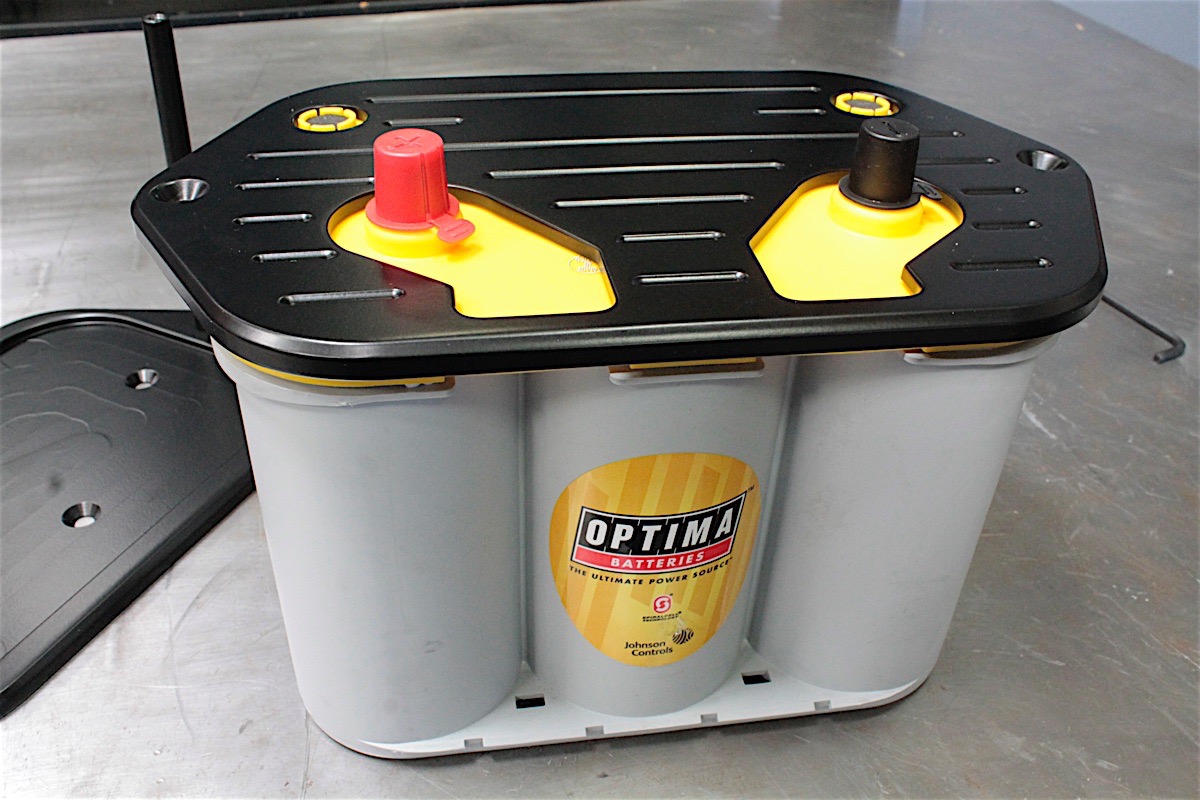
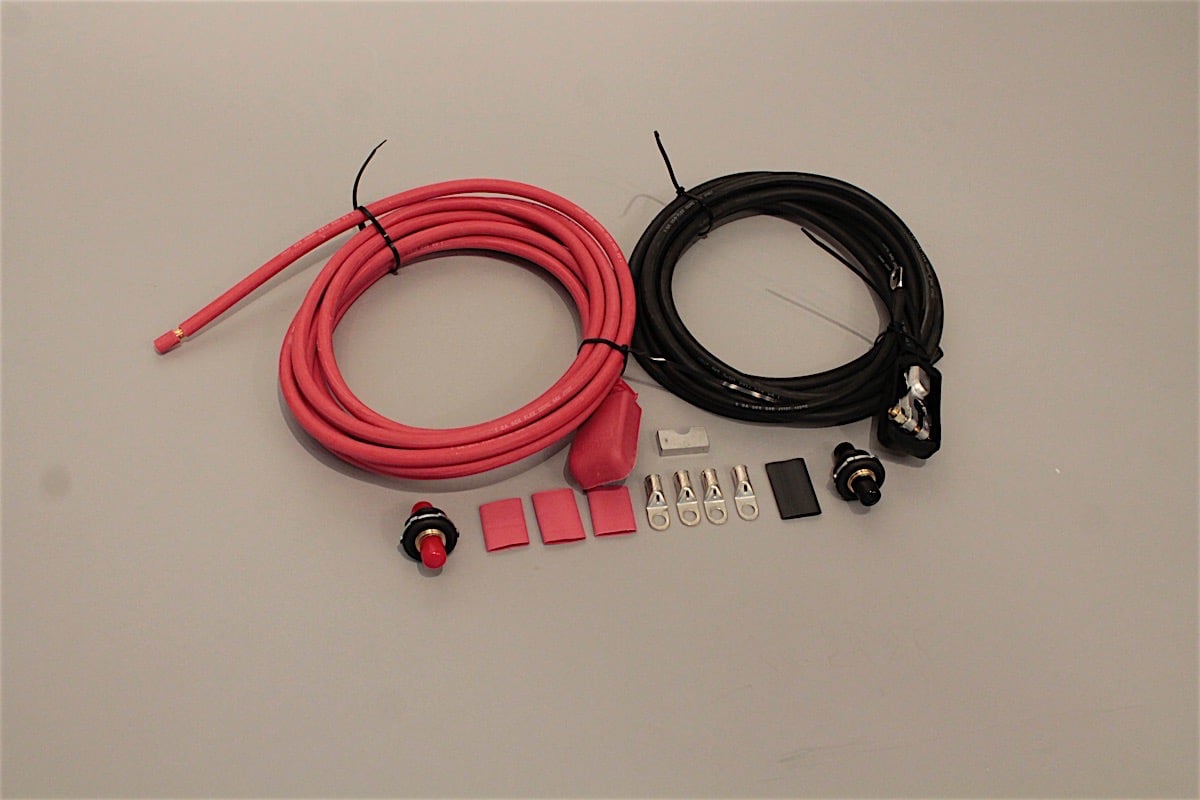
After all, we’ve added so many new components that our electrical requirements have more than quadrupled. We started with the Optima yellow-top battery mounted in the trunk with a Classic Industries hold-down kit, and plumbed the two-gauge Ron Francis battery wiring kit to the front end of the car.
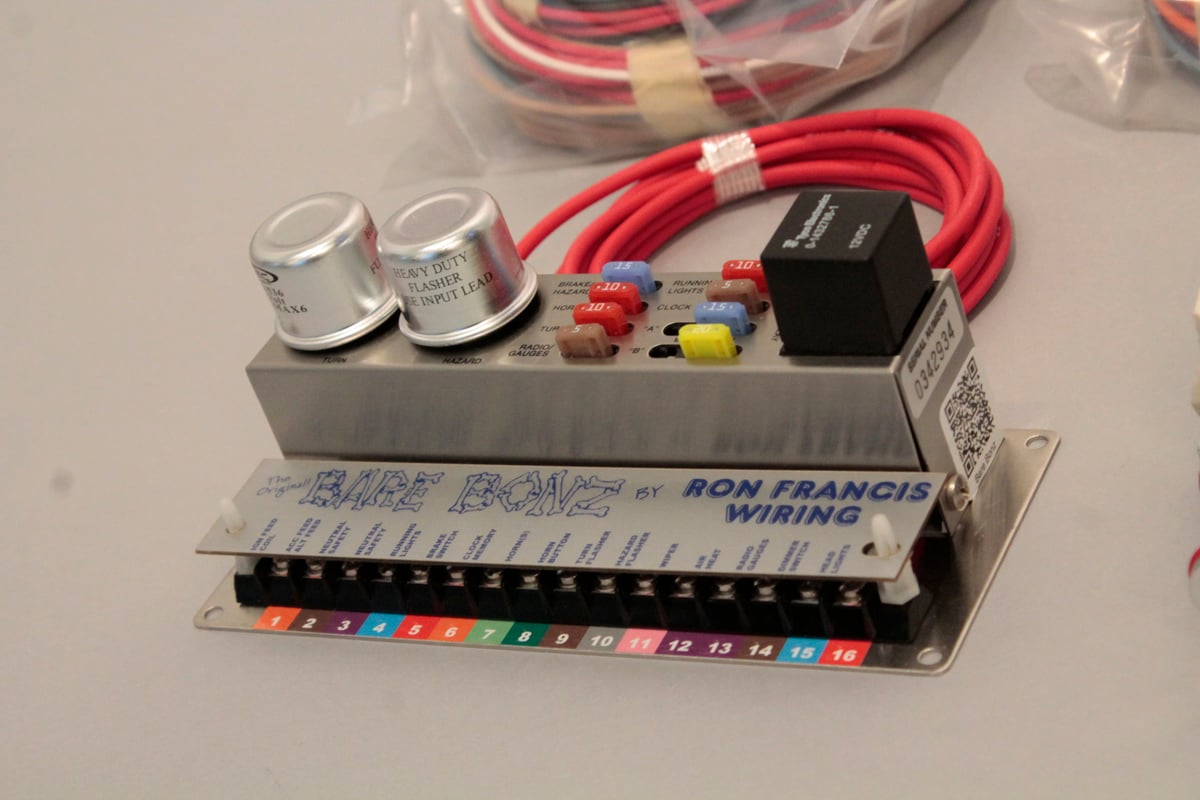
Being that we’ve added so many new circuits for a bare bones street machine, the new Black Box from Ron Francis was a no brainer. With ten switchable circuits to control our electrical functions, we simple used Bare Bonz fuse panel kit and added the Black Box to it. Circuits can be doubled up for higher amperage, but we found that the basic layout of the Black Box is all that we’ll need to switch on all the electronics with a simple trigger wire from the main harness.

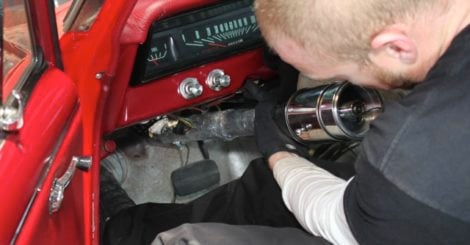
January 2016 – Braking It All Down
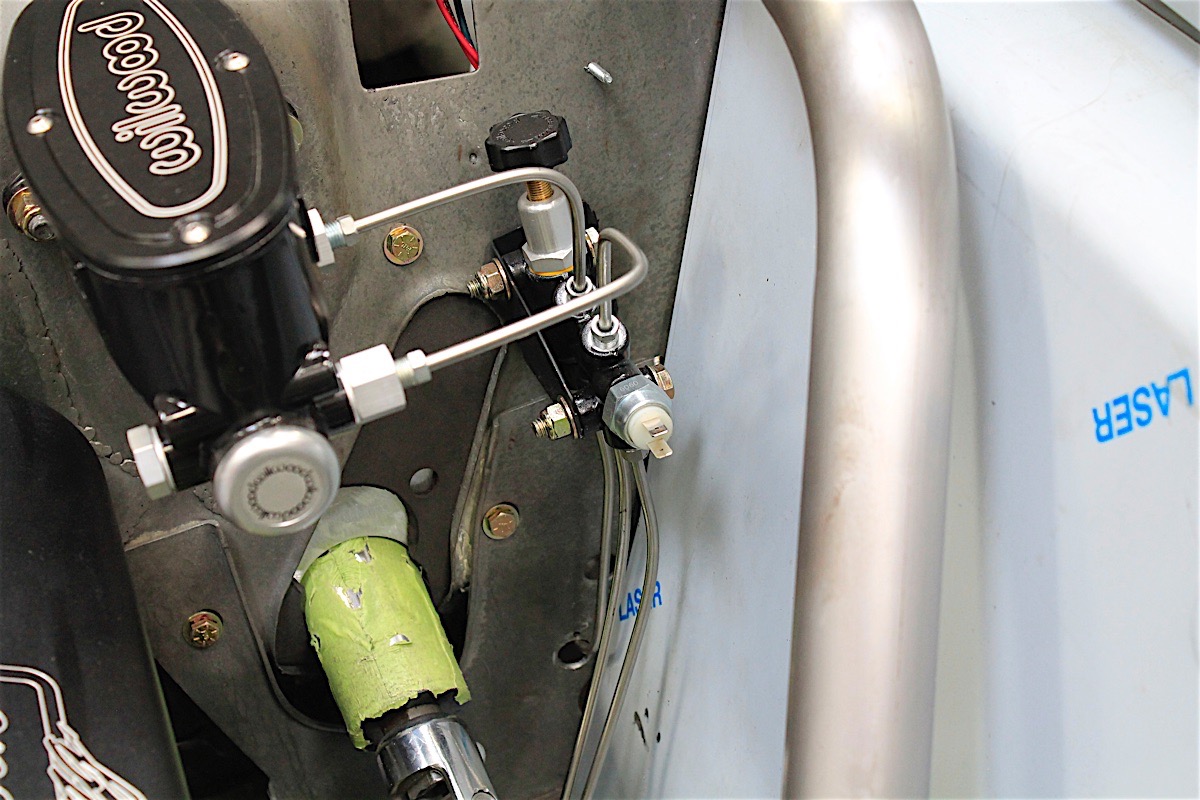 When you have this kind of power, getting the beast to stop requires some serious hardware, too. With the Wilwood brakes we installed, it only made sense to install a Wilwood master cylinder. Our engine bay is already cramped with horsepower, and the compact Wilwood master cylinder looks right at home with all the rest of the hardware underhood.
We plumbed the Classic Performance Products (CPP) brake lines to the calipers and custom-bent the new stainless steel lines. We found that CPP had all the hardware and components we needed to connect the lines, with all of the required clamps to hold everything in place.
December 2015 – Cooling The Engine
 We had already installed our AFCO radiator, but with the custom fabrication we have been doing to this early Nova, we needed to get everything in place so we could make sure we could get the cooling fans and shroud installed.
With a phone call to AFCO and some measurements, we were back in business to get the fans installed. We did have to do a little bit of modifying, but that’s expected when you’ve stuffed a big-block into a small car – and then bolted up a huge ProCharger to the front of it.
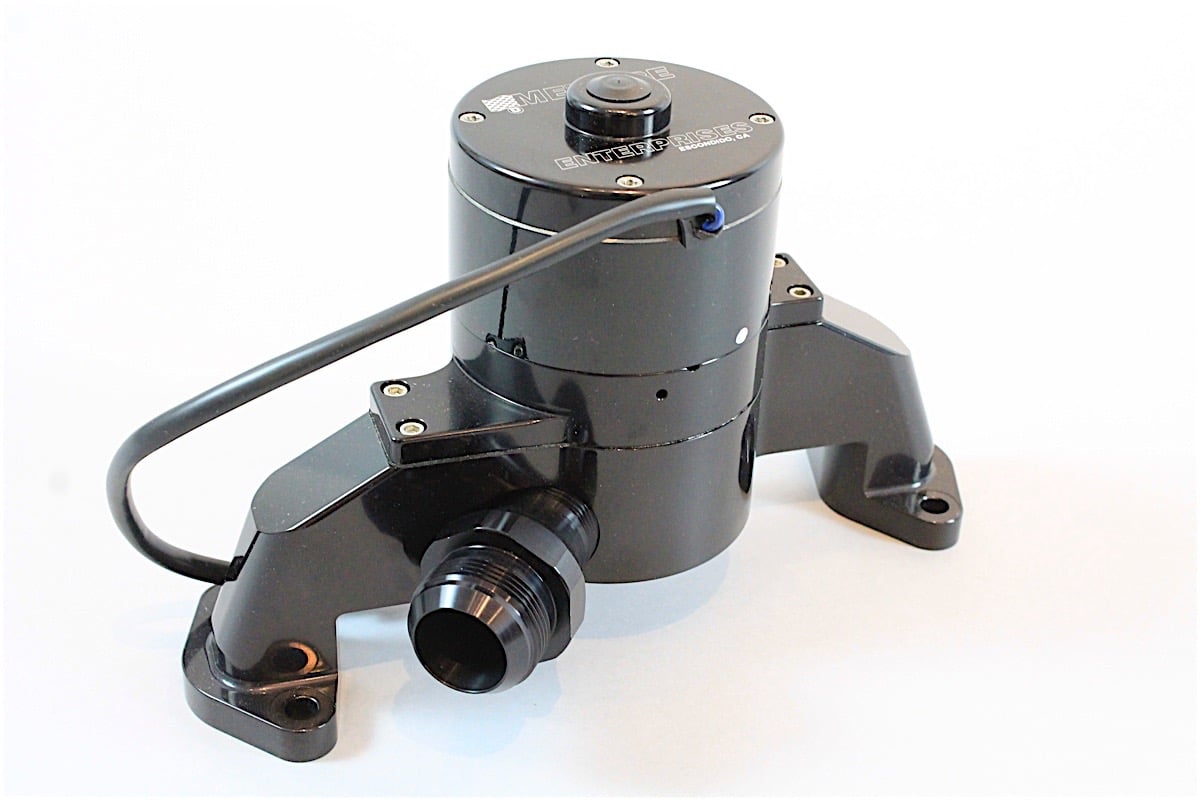
Pumping all that coolant to the radiator is going to be done with a Meziere electric water pump and plumbed with Earl’s fitting and UltraPro hose from Holley. We used AN fittings throughout, and that includes the water pump and radiator fittings for a tight seal without hose clamps cluttering up the look.
September 2015 – Dusting Off The Cobwebs, Feeding The Juices
One thing that inevitably happens when you stop working on a project car for any given period of time is that you lose track of where you left off. Project MaxStreet is one of those projects that you don’t take lightly and you don’t take for granted. When we brought it back into the shop to put it into gear, we realized that while we have come a long way, we still have a way to go before we can fire up this bad boy.

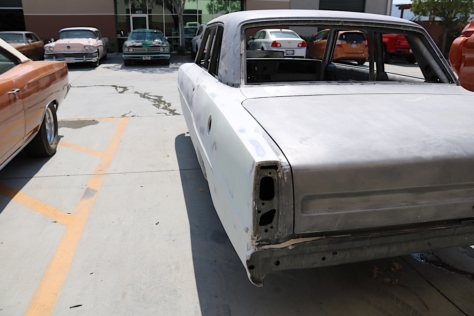
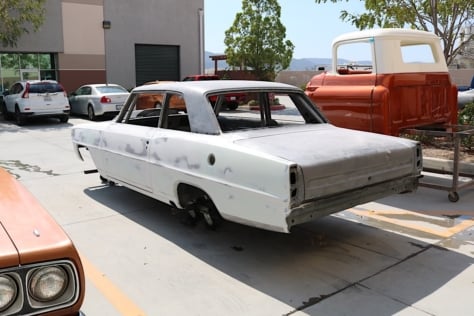
MaxStreet showing the side of her that most others will be seeing.
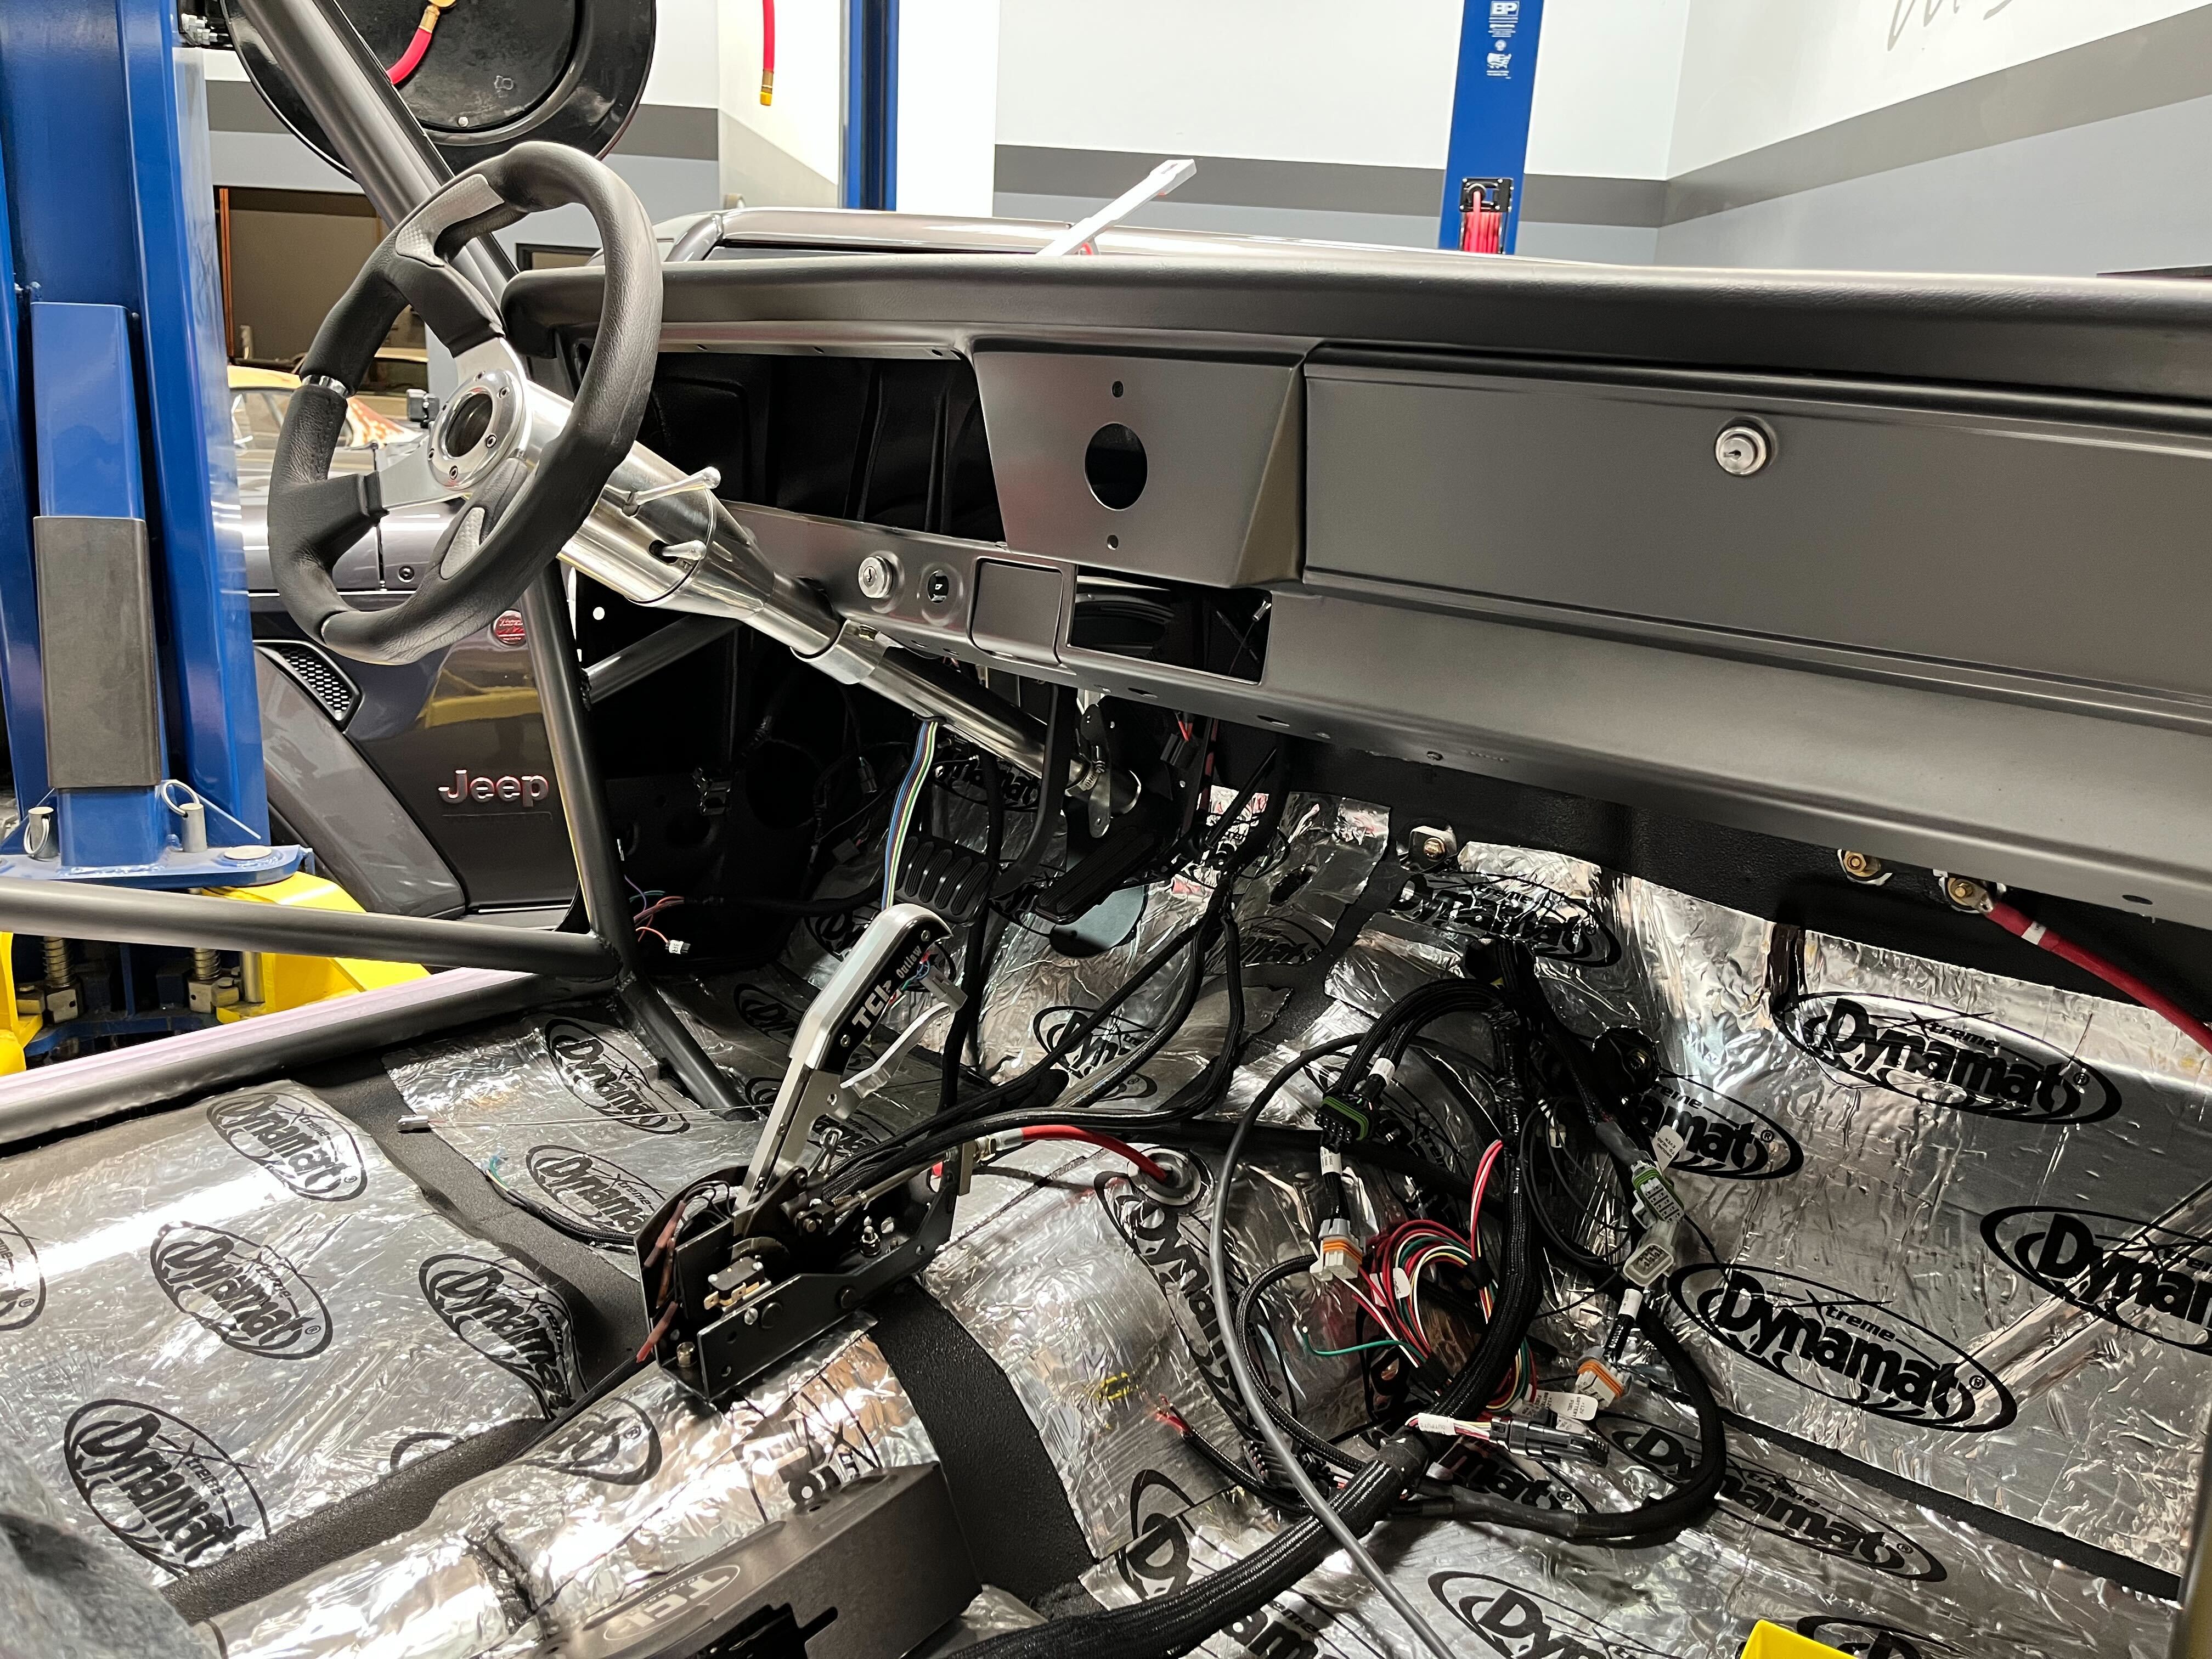
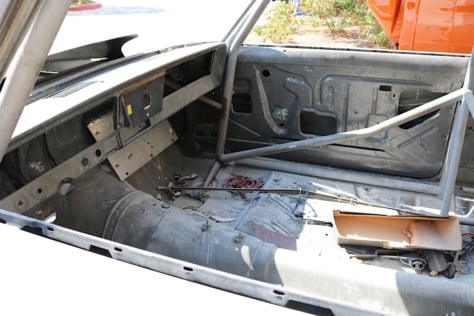
A couple of the tasks at hand this time around is to feed MaxStreet some necessary juices, that includes the battery and the fuel, brake, and cooling lines and hoses. Relocating the Optima yellow top battery to the trunk, we began our Ron Francis Wiring project with the Bare Bones panel and the award winning Black Box relay panel to help power all of our accessories and engine functions.
It all might look like a lot of spaghetti now, but Max is in capable hands as the wires get run from front to rear, and routed over and under brackets and braces to connect the battery to the rest of the Nova’s vitals. We worked closely with Ron Francis Wiring to determine the best solution for wiring this beast fresh, and with the number of components that require their own separate power and ground, the Black Box was the clear choice for this project.
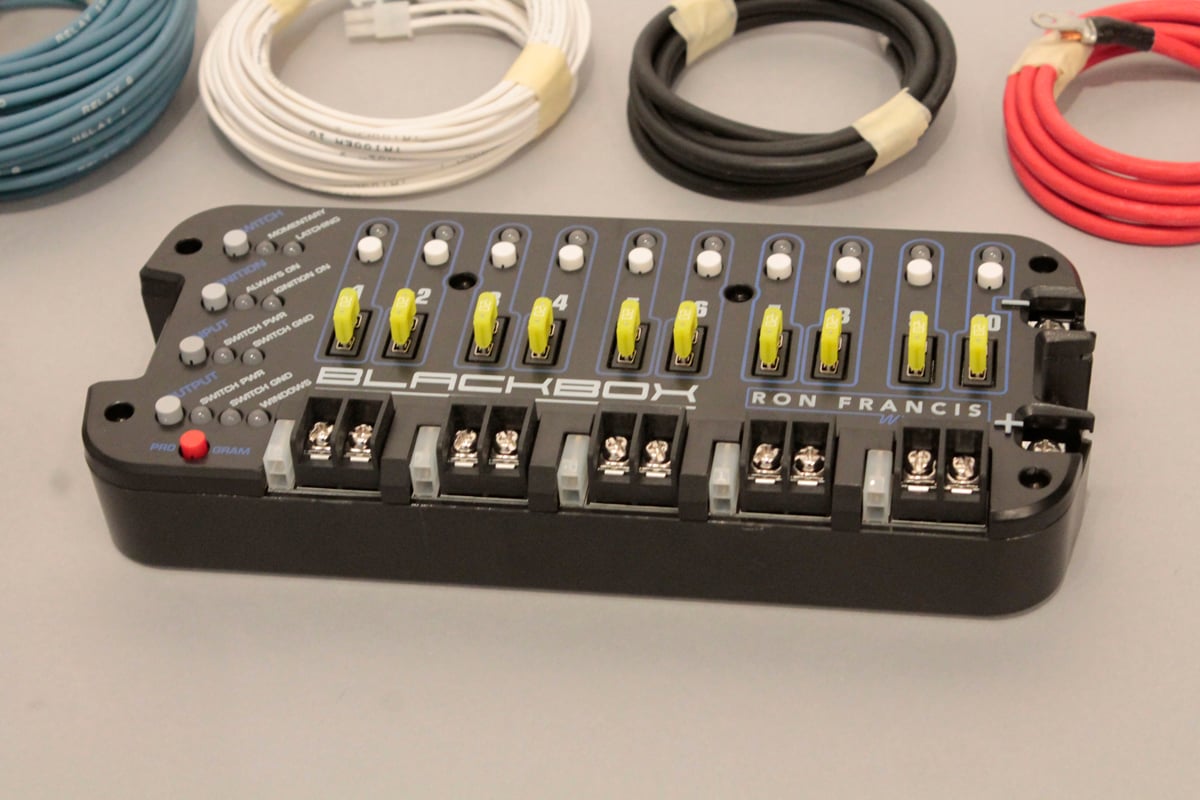

MaxStreet isn't getting rewired, this car was already stripped and it's all going in fresh, including the award-winning Black Box from Ron Francis Wiring.
We also reached out to Holley for an array of fittings for the power steering, fuel, and cooling hoses from Earl’s, and it was time we decided on a new electric water pump from Meziere. With a 555 big block providing big power we didn’t want to take it to chance with conventional hoses and fittings and Earl’s had the solution for us.
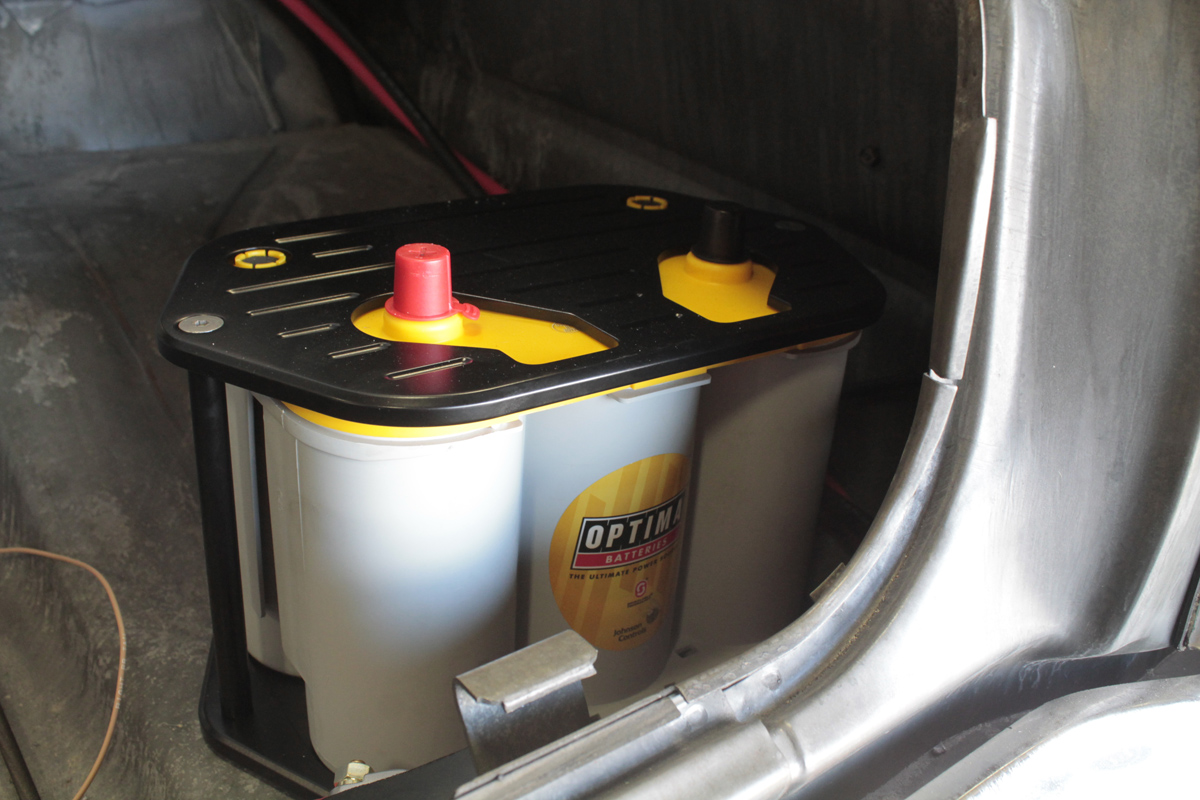
Nestled in the trunk, the Optima battery will provide plenty of juice to the electrical system.
Bringing things down to a halt from its first initial runs is going to require serious attention to the brakes, and that’s where Classic Performance Products (CPP) stepped in with stainless steel brake lines, line clamps, and braided brake hoses at all four corners. One call to CPP and we were able to put a quick order together with everything we needed to get the brakes plumbed.
These vital components are the lifeblood of a musclecar and we wanted to make sure that we have all our eggs in one basket, and that MaxStreet gets the attention it deserves. It may look like it’s far from hitting pavement, but the potential is there and with each cobweb that we brush off it’s another step closer to putting MaxStreet on the ground again and crossing the parking lot under its own power.
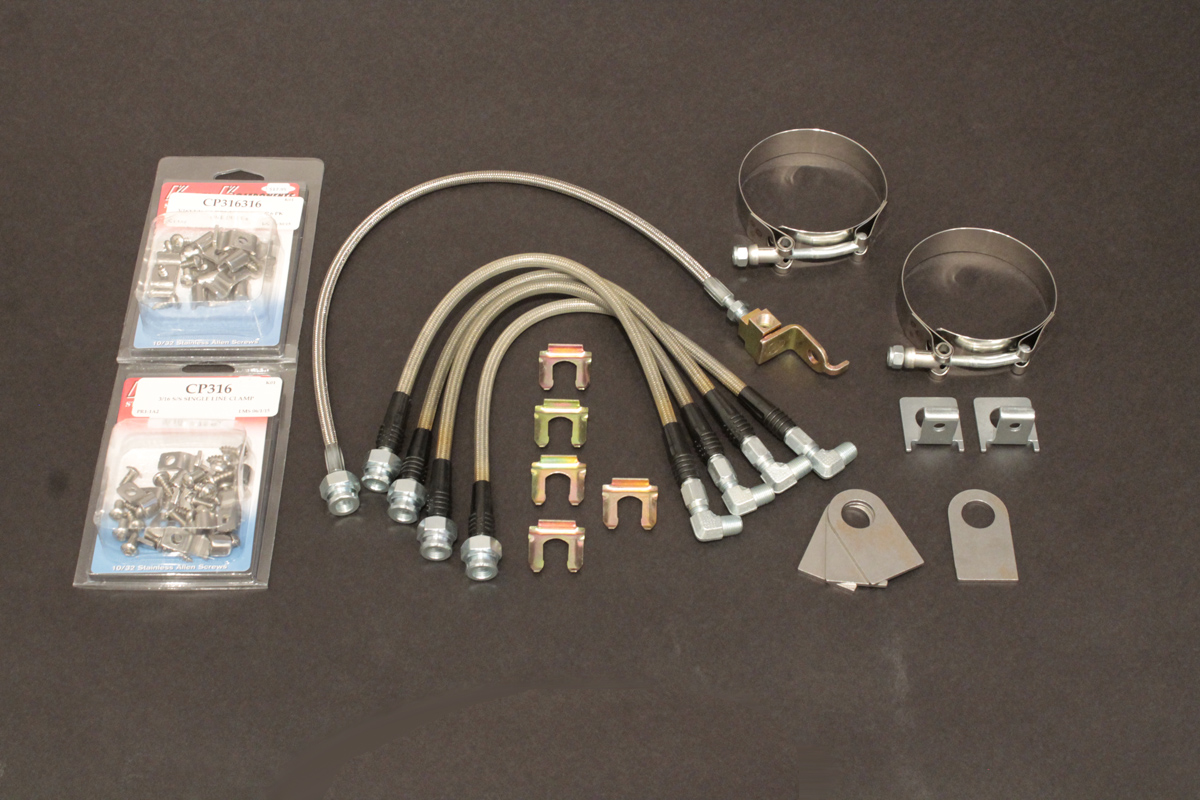
Brake lines and hardware from CPP to connect the Wilwood brakes to the master cylinder.
MaxStreet already has the heart of a lion with the power of a behemoth, and most of us are drooling every time we hit the shop and see the supercharged 555 cubic inch BBC. It’s enough to make anyone drool.
It’s a street car with drag car attitude and lots of motivation thanks to Edelbrock and Musi. So tell us, how many of you want to see this Nova light the fires and lay some rubber? We do, and that’s why MaxStreet is hitting the shop with a few more expectations and goals in mind. Stay tuned for more updates coming soon.
April 16, 2015 – Buy the Ticket, Take the Ride

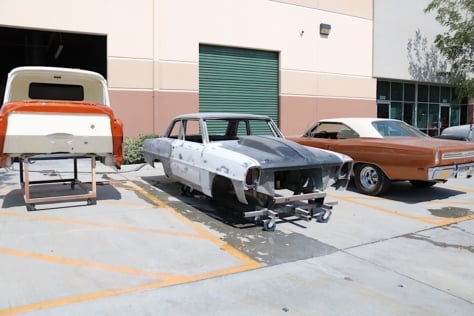
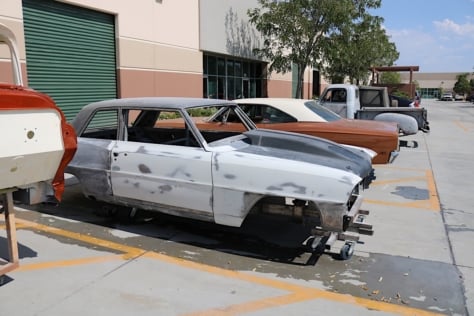
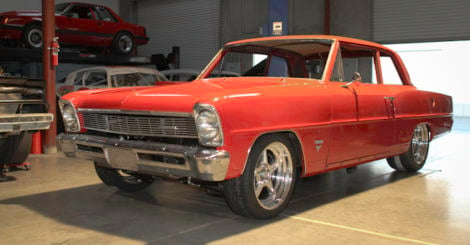
We pulled our Nova II project car out of the dark corner that it had been hiding in. It was a sad looking hulk but good things were coming shortly.
Gonzo journalist Hunter S. Thompson once said “Buy the ticket, take the ride,” in a discussion about slumps. We found ourselves in a slump with the MaxStreet project car. The beefed up Nova II had sat in a dusty corner of our shop for over two years, collecting dust and aging. Instead of moaning over lost time and what could have been, we followed Thompson’s advice. The ticket had already been purchased, now it was time to take the ride.
The MaxStreet Nova project was slightly off track. Once destined to be a maximum presence on the street, the Nova’s plan was confused by too many additions, too soon. After all, was it a street car or was it a track car? How many street cars had 10-point roll cages in them? How many track cars had low compression engines? The car was confused and we needed to get a better plan before our aging beast became a vintage classic without ever having turned a tire.


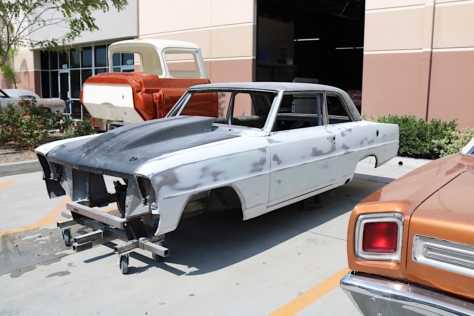
We cleaned off the accumulated dust and took inventory of what we had. Rest assured, MaxStreet will see MaxAction very soon.
Rolling the chassis into daylight and taking inventory of what we had was the first step into bringing our Nova II back to life. Our “think tank” put their collective heads together and designed a plan and timeline to get our Chevy street car on the road with maximum street presence. No more sitting in the corner, oxidizing and collecting dust. Our slump was over and now it was time to move forward.
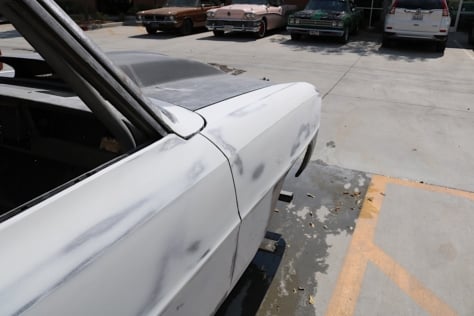
While the chassis was enjoying the bright sunny southern California afternoon, we thoroughly cleaned the mothballs of inactivity off of every piece of sheet metal. Every corner, crack, and crevice was wiped down and the proud bowtie swagger slowly came back to the beast. It would not be long before the Musi/Edelbrock heart would start beating with power again. The circulatory system of FAST, Aeroquip and Rick’s Tanks would soon be pulsing with life-giving fuel.

Now that we are back on track, get used to seeing the MaxStreet Nova from this angle, especially when we hit the streets.
February 17, 2012 – Fueling MaxStreet, The Infinite Loop
Using parts from FAST, Aeroquip and Rick’s Stainless Tanks, we created the infinite loop on MaxStreet’s fuel system. We had all of our components in place, and the next step was to run the fuel line from the tank, to the engine compartment, and then back to the tank for the fuel return line.
With a 555ci Edelbrock/Musi big-block (rebuilt by Pacific Performance with low-compression JE pistons) and an F2 ProCharger bringing us into the 1000 horsepower range, fuel delivery is more important than anything else. If the fuel isn’t delivered with the right pressure and the proper GPH, the engine suffers, so of course we only used quality parts and fittings. READ THE FULL ARTICLE HERE.
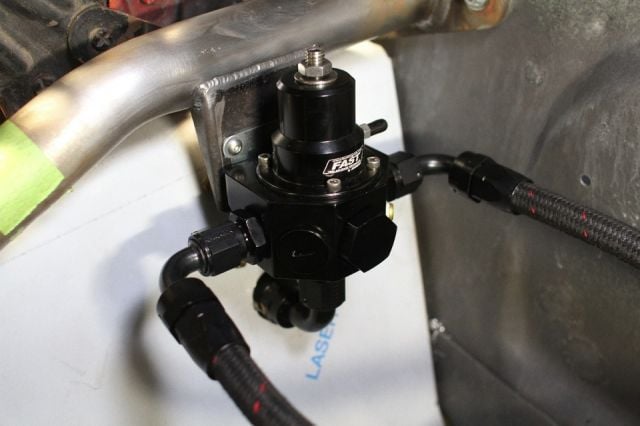


With the fuel delivery we're expecting for this project, the idea behind the fuel system is to keep the fuel moving. That means a suitable return system is necessary to keep the fuel flowing, and to keep it cool, and keeping fuel lines away from heat sources - like the headers and the engine block - by running them through the apron panel and out of the engine compartment.
February 7, 2012 – Roll Cage Install
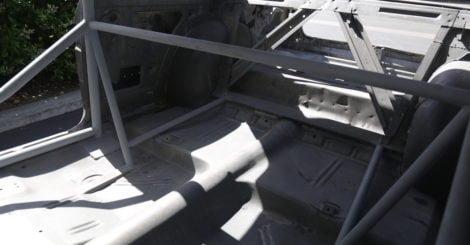
With all the horsepower that MaxStreet is capable of, another area of concern, besides having the right fuel delivery, powertrain strength, and road course worthy handling, is to protect the occupants. The Chassisworks 10-point roll cage kit provided all the tubing necessary to get the occupants protected and does double-duty stiffening up the body. READ THE FULL ARTICLE HERE.
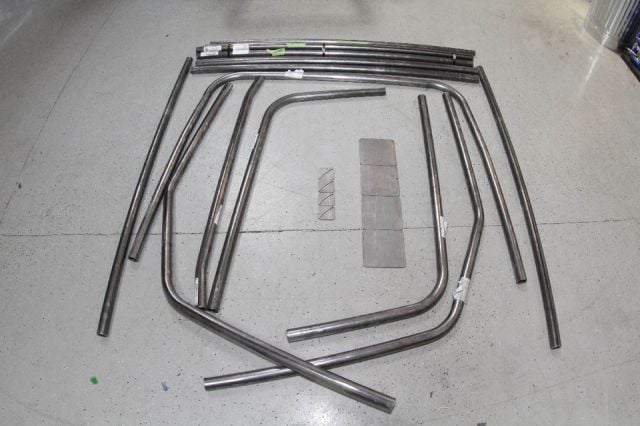

Firming up MaxStreet to protect car and occupants is important when you have the kind of power that the 555 is putting out.
August 25, 2011 – Edelbrock/Musi 555ci Low Compression Rebuild
The Edelbrock/Musi rebuild took place because we had this engine in another project, and we wanted to be sure that everything was up to snuff. It only had 521 horses at the rear wheels in that project, but we had much higher goals and wanted to see 800+ crank horsepower out of this big-block without the ProCharger. READ THE FULL ARTICLE HERE.

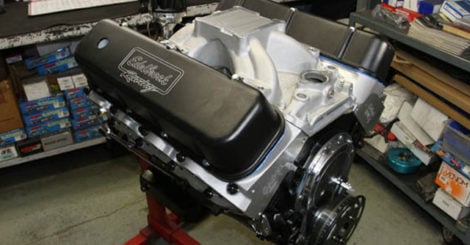
Pacific Performance performed the rebuild of our low compression engine, this Edelbrock/Musi engine is getting lots of boost and needs to be able to handle it..
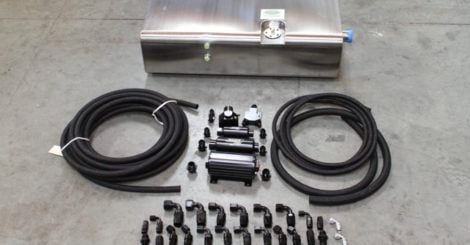
June 8, 2011 – Fuel System Install Part 2
A closer look at the fuel tank and components gives you a better idea of the quality that goes into them. When you’ve got this kind of power, fuel delivery has to be able to keep up with the demand, and MaxStreet will be moving lots of fuel when the go-stick is mashed. READ THE FULL ARTICLE HERE.


FAST hoses and fittings, and Rick's Tanks fuel tank are the components we rely on to deliver the fuel to big-block.
May 18, 2011 – Fuel System Install Part 1
Handling the fuel system needs, a stainless steel fuel tank from Rick’s Tanks was placed up under the trunk floor, and plumbed with fittings, hoses and a high volume fuel pump from FAST. The tank is hand-fabricated and hand-welded, and designed to bolt into the stock location, making for a perfect fit. READ THE FULL ARTICLE HERE.

April 10, 2011 – Edelbrock RPM XT Cylinder Heads
When you’re pushing enough air through your intake to produce over 1,000 horsepower, you need to make sure that the cylinder heads can flow that much air, too. The Edelbrock RPM XT cylinder heads utilize CNC-porting to make the most of the runners and bowl area for increased air flow, which was tested by Edelbrock for up to .800 valve lift. READ THE FULL ARTICLE HERE.


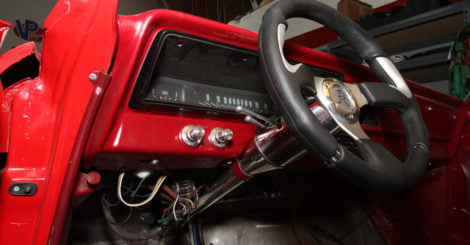
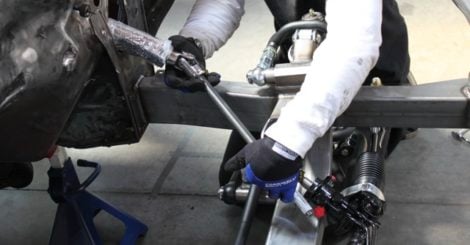
March 15, 2011 – Flaming River Steering System Install
One company that has been providing the right components to custom builds like this is Flaming River. Their steering column was a perfect fit and included all wiring and brackets necessary to install it in our 1966 Nova II, making it look like it should have been there from the start. READ THE FULL ARTICLE HERE.
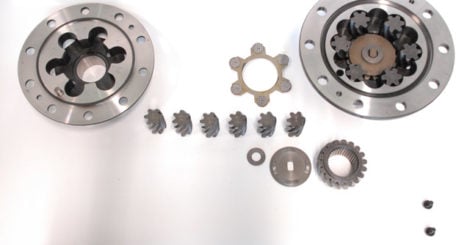
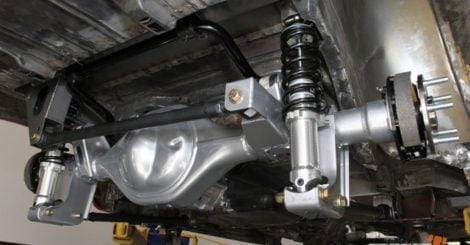
February 15, 2011 – Moser Wave Trac Differential
When you have the kind of power that MaxStreet is building, you need to make sure that all of your drivetrain components can handle it. The weakest link is the first to go, and you don’t want to be out on the road, let alone the track, and find out that you have a weak link. We turned to Moser Engineering for their Wavetrac differential to make sure we don’t have any of those weak links. READ THE FULL ARTICLE HERE.
February 14, 2011 – Suspension Upgrades
With the suspension systems in place and our wheels and tires fitted and tucked up under the sheet metal, the steering system was another area to tackle. Engine mounts were added, apron sheet metal was installed, and a Flaming River steering column was connected to the rack-and-pinion steering to get MaxStreet headed in the proper direction. READ THE FULL ARTICLE HERE.
November 23, 2010 – ProCharger F-2 Install
There are superchargers, and then there’s ProCharger. We needed a supercharger that was going to be capable of delivering more boost than we needed and handling more horsepower than our big-block is capable of. Why? So we wouldn’t run out of power when we needed it most. READ THE FULL ARTICLE HERE.
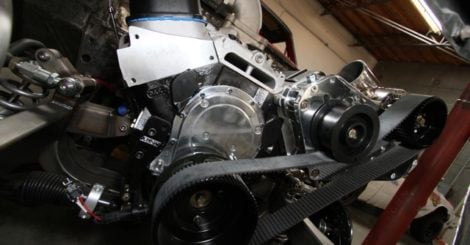
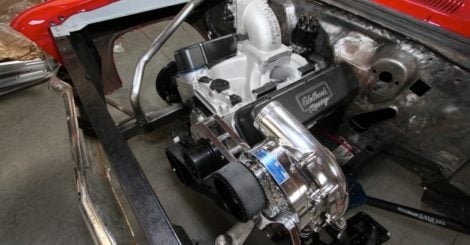
If you saw the lead photo, then you know that this Edelbrock/Musi BBC is getting a little help pushing air through it. The ProCharger F-2 Supercharger is capable of over 1,600 horsepower, which gives us the room we need with over 1,000 crank horsepower.
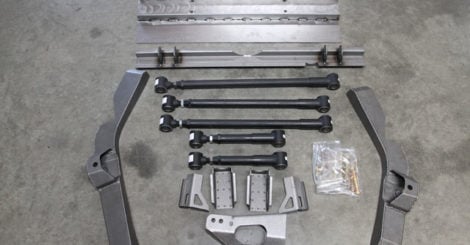
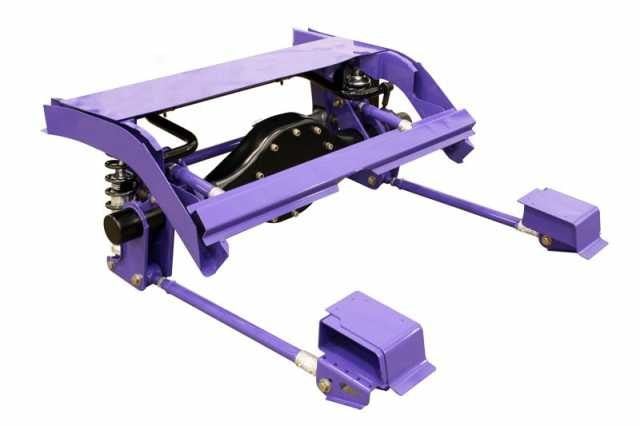
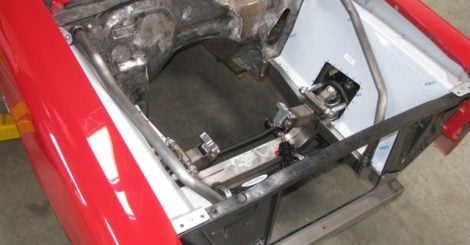
November 17, 2010 – Detroit Speed Engineering Four-Link Install
The rear suspension got a major overhaul as well, and we replaced the leaf spring with a Detroit Speed Engineering’s QUADRALink four-link suspension system. This setup assures us that we’ll get the power to the pavement because the rear tires will be planted firmly. It meant that some sheet metal had to be removed to make way for the suspension, but the result is worth the effort. READ THE FULL ARTICLE HERE.
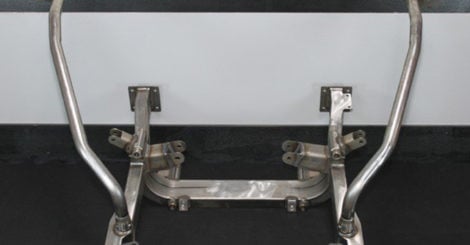
August 24, 2010 – Chassisworks g-Machine
One way to make a classic car handle better is to ditch the antiquated suspension and bolt up something that gives you the freedom to make adjustments to caster, camber, spring rates, steering and better suspension geometry. We installed a Chassisworks g-Machine Subframe system to achieve just that. READ THE FULL ARTICLE HERE.
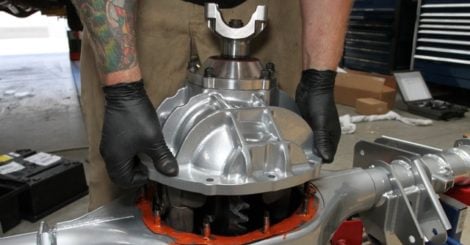
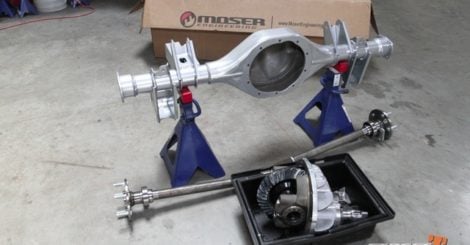
July 1, 2010 – Moser Rearend
With big power, a great trans, and wide tires, we needed something to transfer all that horsepower to the rear wheels. Moser Engineering’s nine-inch was chosen to get the job done, and it was bolted up to a Detroit Speed QUADRALink suspension with coil-overs. READ THE FULL ARTICLE HERE.
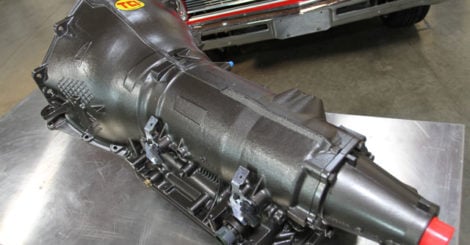
July 1, 2010 – TCI Six-Speed Install
Installing the huge TCI 6X, 6-speed transmission also meant some fabrication was needed. But this is the transmission that we needed behind our big-block, and it was worth the extra work needed. With lots of horsepower and the desire for MaxStreet to be a great all-around car, we needed a transmission that can handle the kind of power we were going to throw at it, and also still be reliable. READ THE FULL ARTICLE HERE.
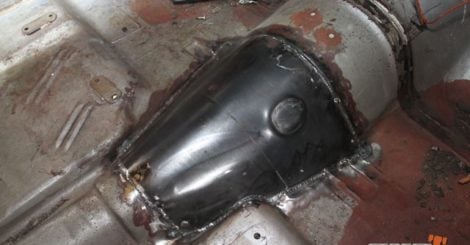
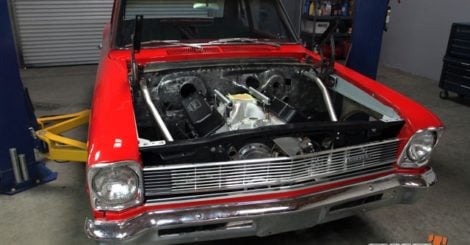
June 14, 2010 – Big-Block Install
The 555ci Edelbrock/Musi BBC required a little bit of trimming and fabrication, we needed room and the firewall was the place to take it from. We weren’t concerned about windshield wipers, you know the song, ‘It Never Rains in California’. READ THE FULL ARTICLE HERE.

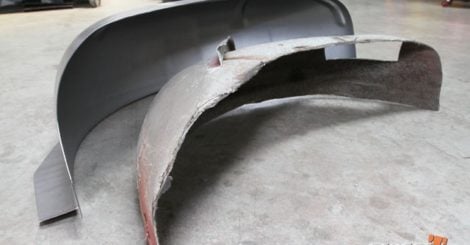
June 14, 2010 – Mini Tubs and Wheel Fitment
To get the ultra wide wheels under the quarter panels meant mini tubs needed to be installed. The 17 x 11-inch Billet Specialties Street Lite wheels pack a lot of rubber, and we had to also trim the rear seat frame for everything to fit.

November 23, 2018 – New Paint Courtesy Of Axalta Coating
It finally came time for Maxstreet to change clothes. While the exterior of the car was coated in Cromax Pro Corvette Arctic White, the roll cage and other interior elements have been shot with Cromax Pro Fusion Gray for a bit of contrast.
To find out more about the paint and body work, READ THE FULL ARTICLE HERE.


